Designing a Star on Garment Designer
Cochenille has many crafters using the Garment Designer program, so I thought I’d share a quick look at my craft project. Since we have a webinar later this month about Working with the Extras Menu, I thought I could show it being used in action! I will include the Garment Designer Pattern file as well as a half-scaled .pdf at the end of this post.
Now many of you may have noticed Garment Designer does not have stars included in the Style Sets, but if you’ve seen a few of our other posts, you know that we can modify these styles quite a bit simply by moving points around. My Fourth of July craft challenge to myself was to modify a style in Garment Designer into a star.
In order to draft a star I first needed to find any style with 10 points and all straight segments. Having curved segments would work as well, but it would not be ideal since I would also have to adjust the bezier curve handles. For this endeavor, I looked towards our collars, under the extras menu. The Collar Stand: Mandarin 1 collar to be exact.
You can find this by going to your Extras Menu, then selecting Joined at Back under the collar title (which will always be greyed out because it is just a title):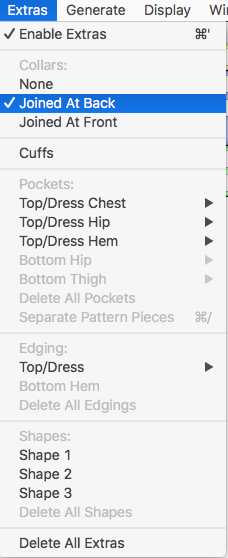
In the time-lapsed video for this project I had hidden my other pieces so I only had my ‘extras’ showing. You can choose which pieces are shown, and how they are displayed (joined, adjacent, independent) by going to Display > Pieces: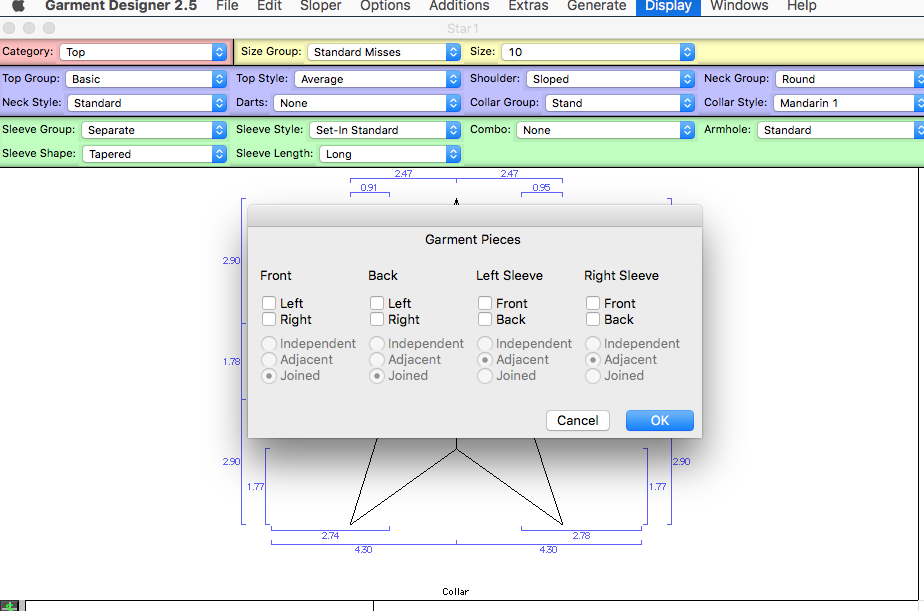
Allow me give you a general overview of what I did. There were a few times I got my math wrong so I would have to go back and fix points, you’ll notice me go ‘backwards’ pretty often and recheck measurements, then cross-check again.First I just moved the points into the general shape of a star. Then after calculating what my dimensions should be, I turned on the dimensions on my pattern to assist me (Display > Show Dimensions). I also used my info bar to measure between points or to measure segment.
If you are not familiar with selecting and measuring segments, read Chapter 3 in the Manual.
No, really, go read it. Learning how to select and measure segments and points is a must when working in Garment Designer.
Windows Users can find their Manual on their Desktop or by going to their C: Drive > Garment Designer folder. Mac users can find the Garment Designer folder located in Applications.
Info Bar Tip: Just because there is not a segment between two points does not mean you cannot measure the height or width between those two points. Select the two points you want to measure (you may have to suppress symmetry temporarily if it is turned on) then look at your info bar in the lower left corner of your screen for the information: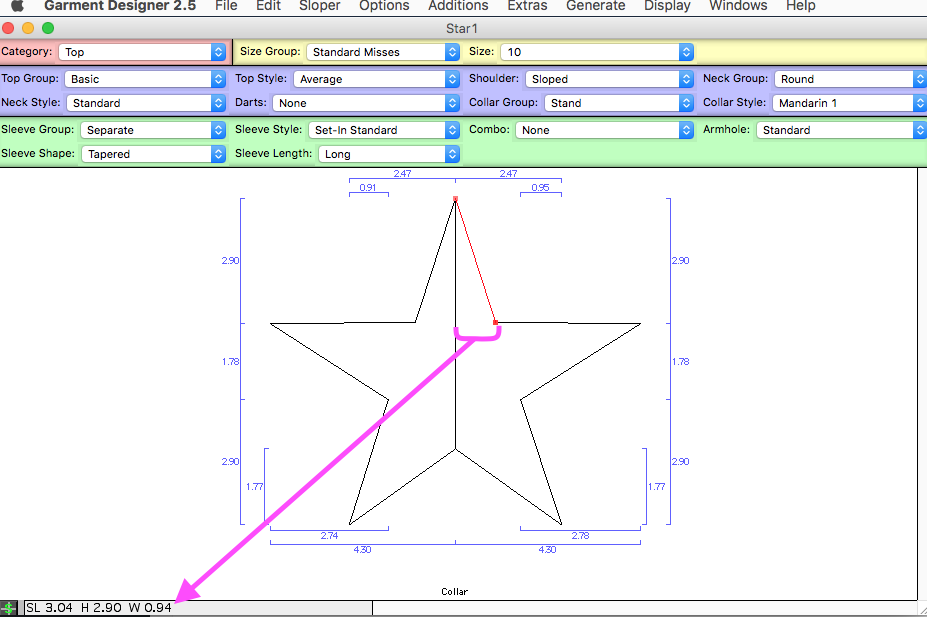
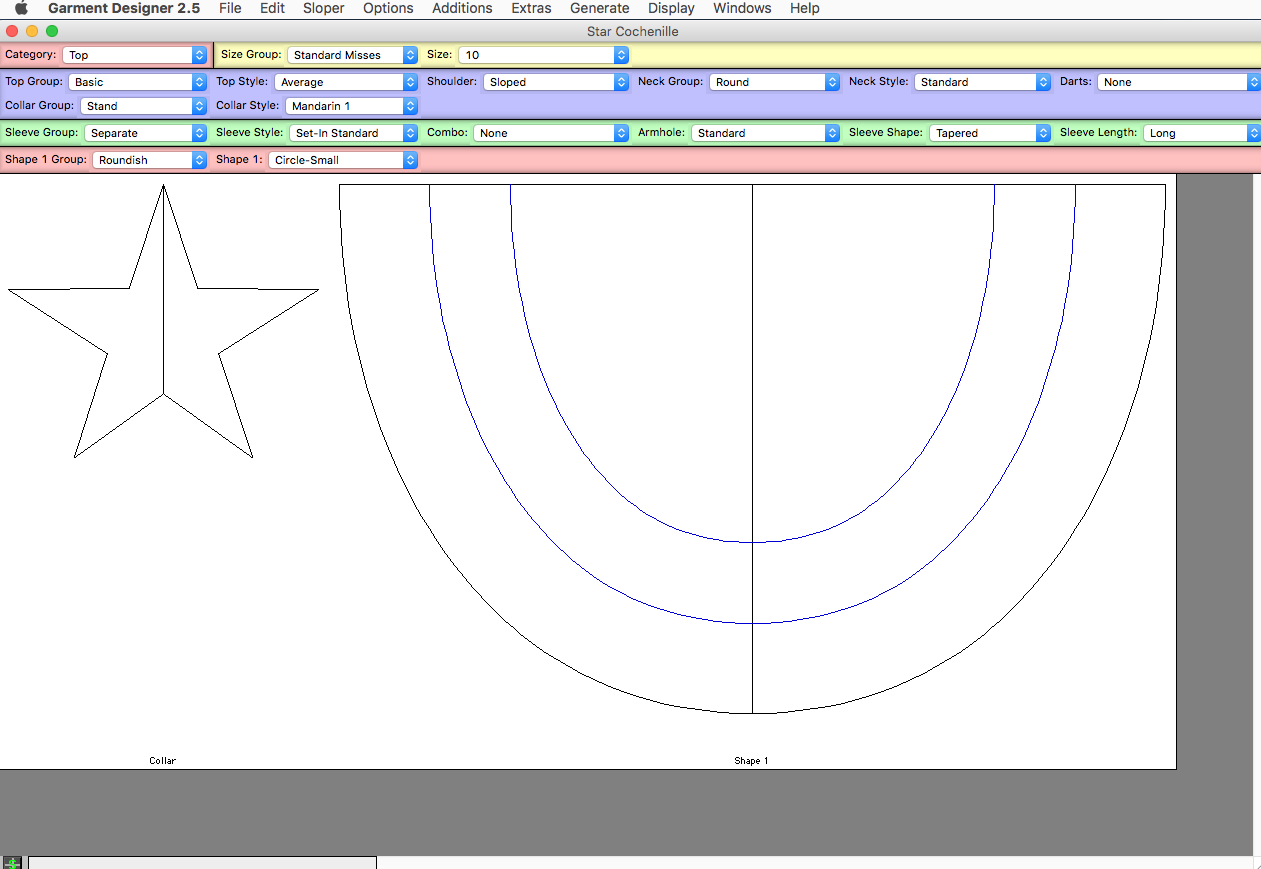
I planned on using this star template to make patriotic bunting out of glitter foam or felt pieces next time I run to the craft store. I will use the entire semi-circle to cut out the red. Then layer the white and blue pieces on top.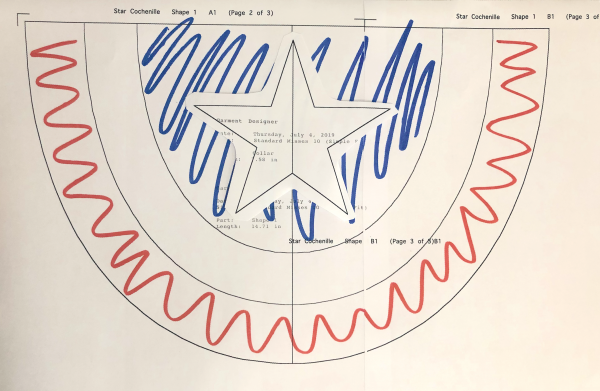
After completing the star I visited my Extras Menu again to pick a shape. I chose a ‘Round Shape’ and then moved the uppermost point level with the two points at the sides to make a semicircle.
To mark the other semicircles within my shape I used the facing option. I selected the circular outer segments then went to Additions > Add Facing.
I’ve included the file below if you’d like to take a peek, but try not to change any of the styles. You can also scale the display to print out a larger size or smaller sizes.
Cochenille Star Pattern and Printout
Enjoy your day and happy crafting!