At some point, while knitting a pattern by hand or machine, many knitters pause and ask themself, “why am I making someone else’s pattern? You let your thoughts wander.. will it fit, will it flatter my figure and is this pattern clear and error free?
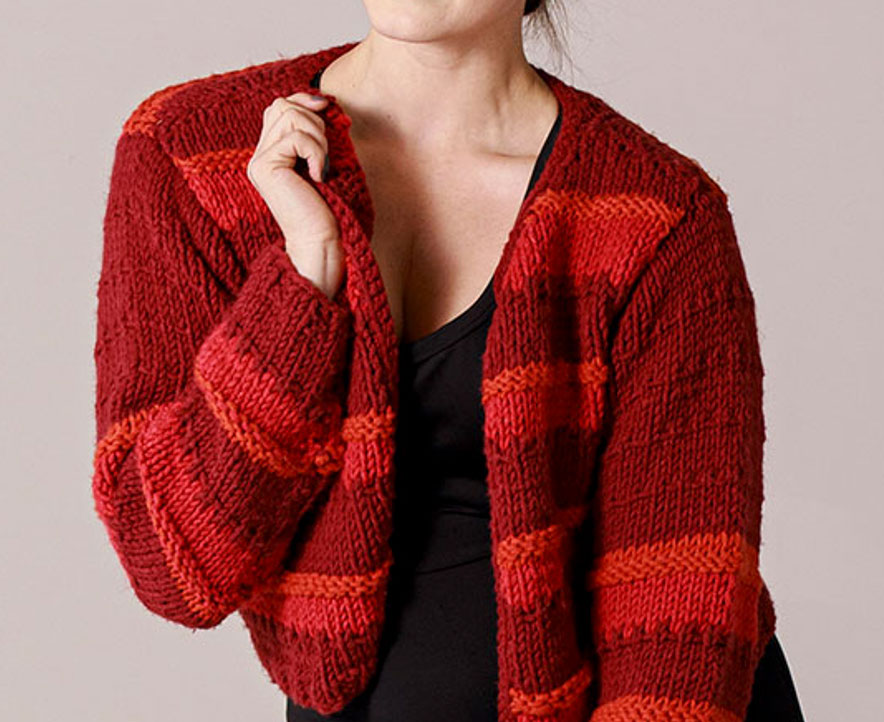
If you continue to allow your mind to meander, you might ask yourself: Could I design my own knitwear? I could decide the shape, use my own measurements, and even choose my own yarn and stitch pattern, etc. Wouldn’t that be great!
If the doubt creeps in… push it away. Designing your own knitwear doesn’t need to be intimidating. The process is relatively straight forward, and as long as you start simple, you will begin a chain of successes that lead you to that ultimate dream sweater.
You can create your pattern manually, designing on paper, and attaching numbers to a shape, or you can use patternmaking software like Garment Designer patternmaking software to build the pattern around the body (measurements) you choose, including the ability to use your own personal measurements.
Let’s look at the general process of design. The initial steps are the same whether you are designing manually or by computer.
Start Small: Choose a Simple Silhouette
Although your instinct might be to make that dream garment, fully tailored and utilizing a complicated stitch pattern, it would be wise to put that thought on hold and start with something simple. The goal of your first project should be to happily complete it, without frustration. You can build up to that amazing garment, one sweater at a time. So, for a first garment, consider designing a simple drop shoulder or a square armhole style. Even an angled full-fashioned armhole is basic enough for a first time as it is a simple variation of the square armhole. In general, the math for shaping is simpler with these styles. Let your yarn and stitch pattern create the joy… and enjoy the process of finding that perfect combination of yarn and stitch.
Although there is no rule on which comes first, the shape or the stitch pattern, the best approach when new to designing is to start with the shape. Determine the silhouette: fitted or relaxed, drop shoulder or square-armhole, cropped or long.
Create a Sketch
Put your ideas on paper. Sketch the garment on a piece of paper, pattern piece by pattern piece. Consider the garment length, how full or slim you want the garment, and the general style features.
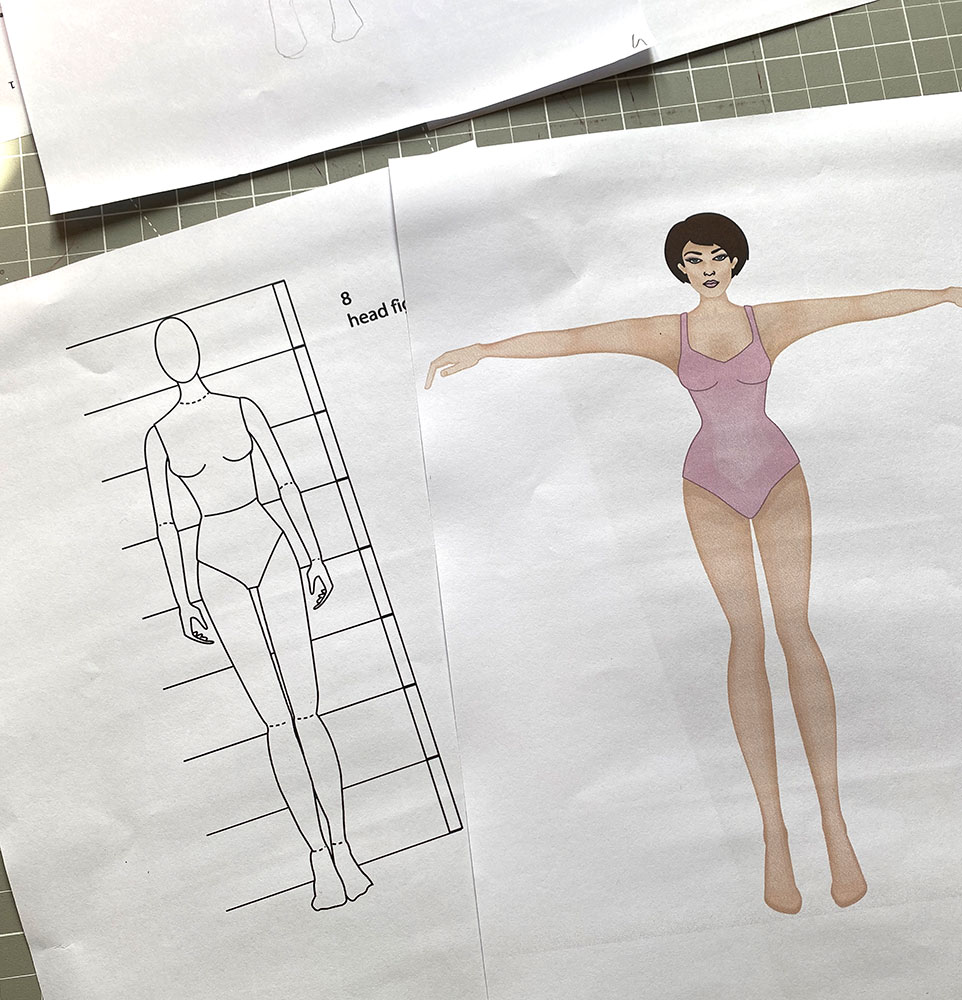
If you are worried about your drawing skills, then you can use what is called a fashion croquis. Place a sheet of plain paper over this, and looking through to see the body, draw the garment. (you can google fashion croquis and find these online).
I then add what I call ‘measurement ticks’, which define various sections of the pattern that require measurements.
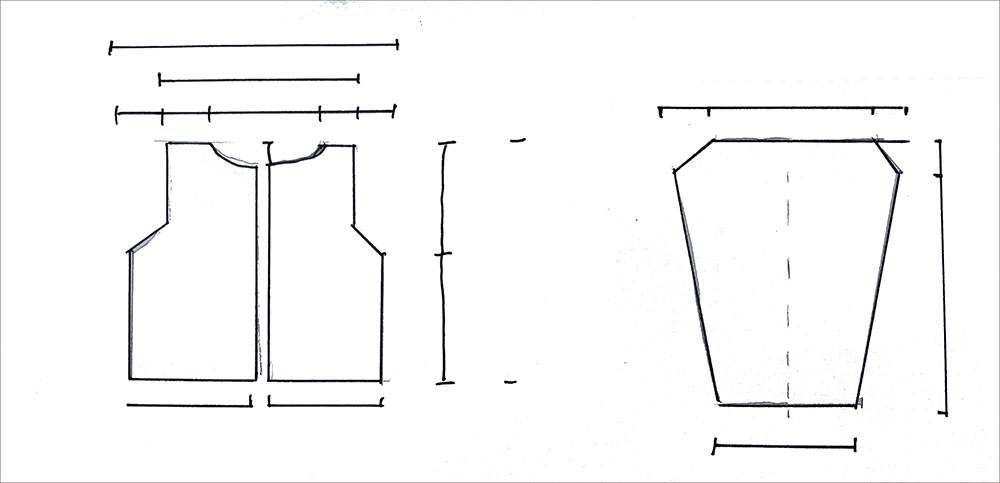
I like to start with my garment width and garment length. This gives me the ‘working rectangle’ or overall shape. Then, consider garment length, neck and armhole depth vertical measurements and width at underarm/hem as well as shoulder and neckline width horizontal measurements. I suggest standing in front of a mirror to determine lengths and depths as well as pulling out some of your clothing to use as reference (knits or knit-like) to help you understand the level of fit you want.
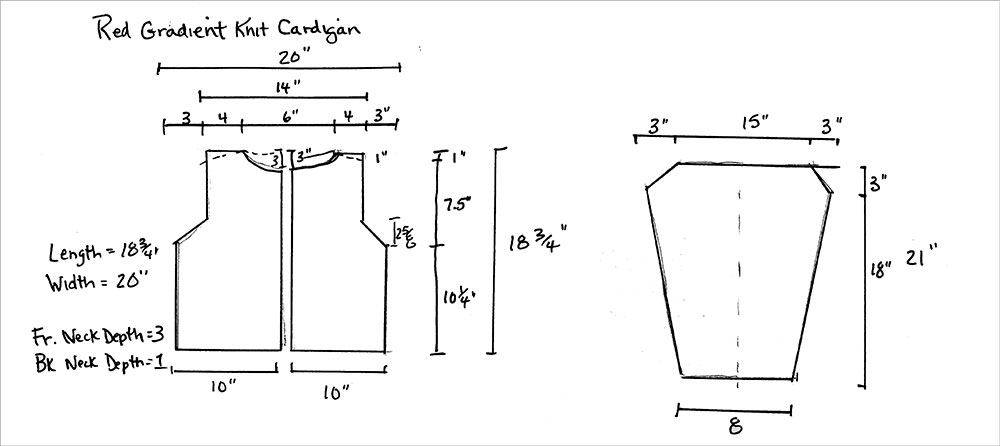
Now attach some measurements to the sketch. Using your body measurements as a guide determine first how long and how wide (at the underarm or hem) you want the garment. If you opted for looser fit style, then you will be adding more ease to the garment. If you are aiming for a tailored look, then you will minimize the ease. If you are unsure about how much ease is right, consult clothing in your closet. It is there for the knowledge you can gain. Pull out a sweater or top with a similar hand and drape to what you envision and take some measurements. I refer to these garments as Reference Garments. They will ensure wiser decisions and remove guess work.
Think of your Knitting as Fabric
Before you start swatching yarn, think of your knit as fabric. Your intended sweater silhouette will drive decisions. If you want something fluid and flowing with an oversized silhouette, you will want to create fabric that is a little open and drapes. If you are choosing to make a more fitted garment, then you will want to create a knit fabric that is a bit more solid with more body. The combination of fiber, yarn, and stitch pattern as well as your needle size and/or tension on a knitting machine is what creates the fabric and thus the look of your garment on the body, so have a general plan before you start other steps.
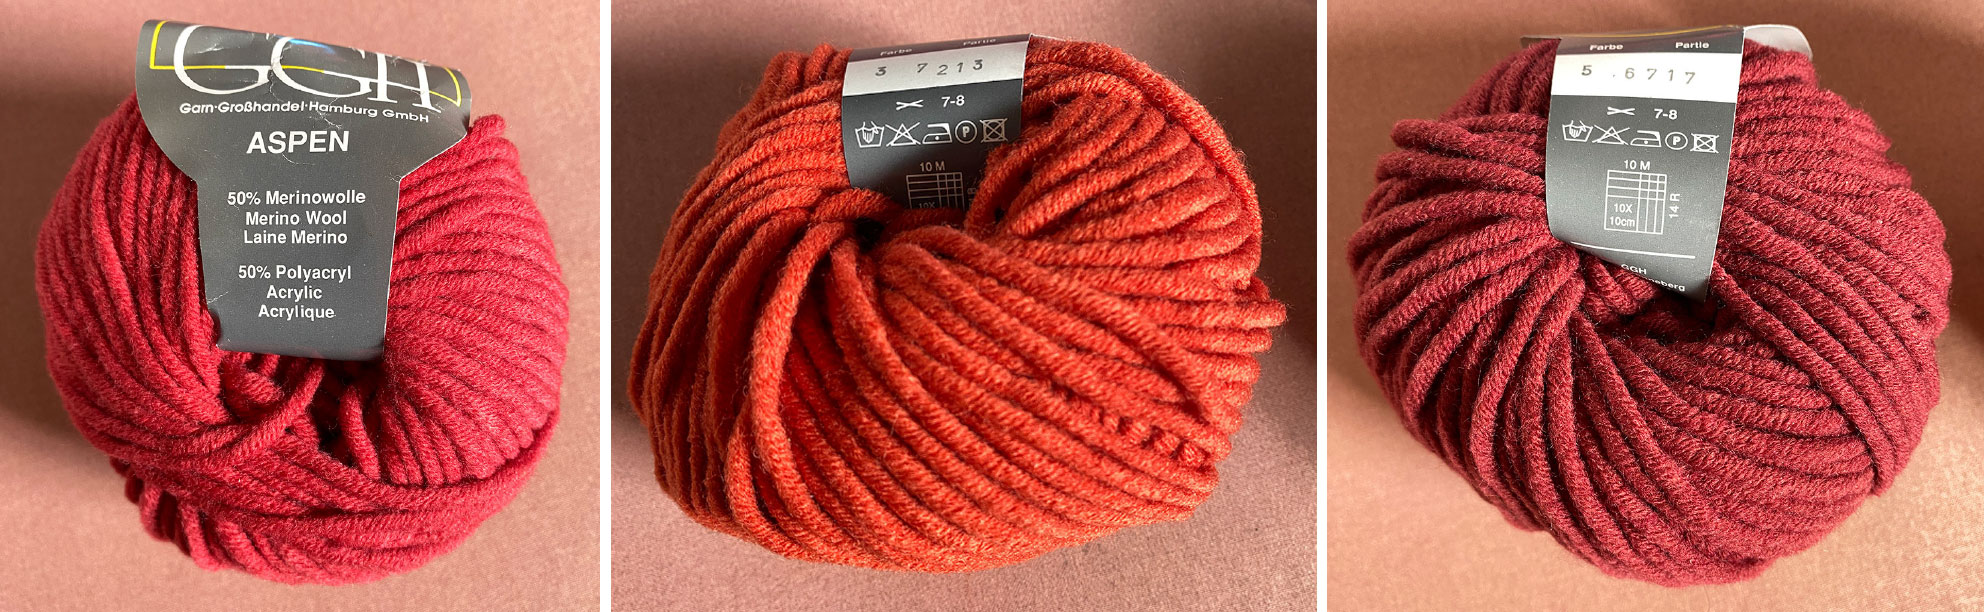
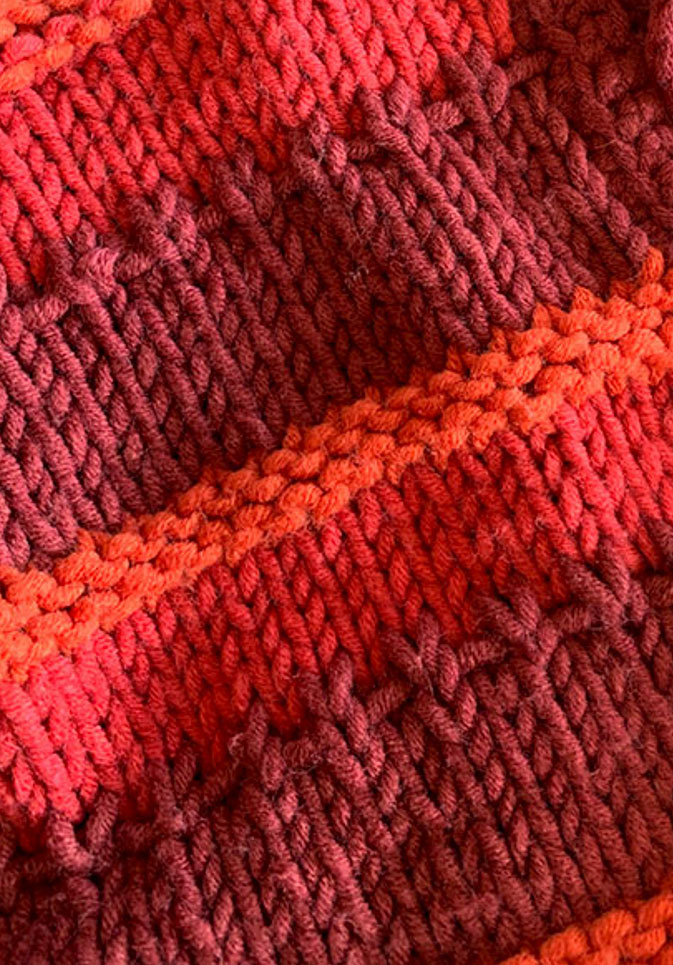
I chose to use a yarn called Aspen by GGH. I selected three colors to work with, and I kept the stitch pattern relatively simple, using only knit and purl combinations.
The Importance of Gauge
Gauge is the foundation every other decision sits on top of. It tells you how many stitches and rows equal an inch in your yarn, on your needles, in your hands, or on the machine — and every measurement in your design depends on that number being right.
Getting an accurate gauge is the step knitters most want to skip, and the one that causes the most heartbreak later. Swatch first. Measure honestly. Wash and block your swatch the way you’ll treat the finished garment, because fiber often changes dimensions after washing. Your whole design — every stitch count, every shaping decision — is built on your gauge numbers, so it’s worth getting right before you cast on the real thing.
Make sure you swatch with the same yarn, needle size or machine tension that you plan to use in the project. It is worth some experimentation to get the drape and hand of your knit right. This can mean knitting different samples, varying the yarn, needle size/tension, and even the stitch pattern. Your goal is to find the right combination of yarn, stitch pattern and needle size/tension to create the fabric that best suits your silhouette.
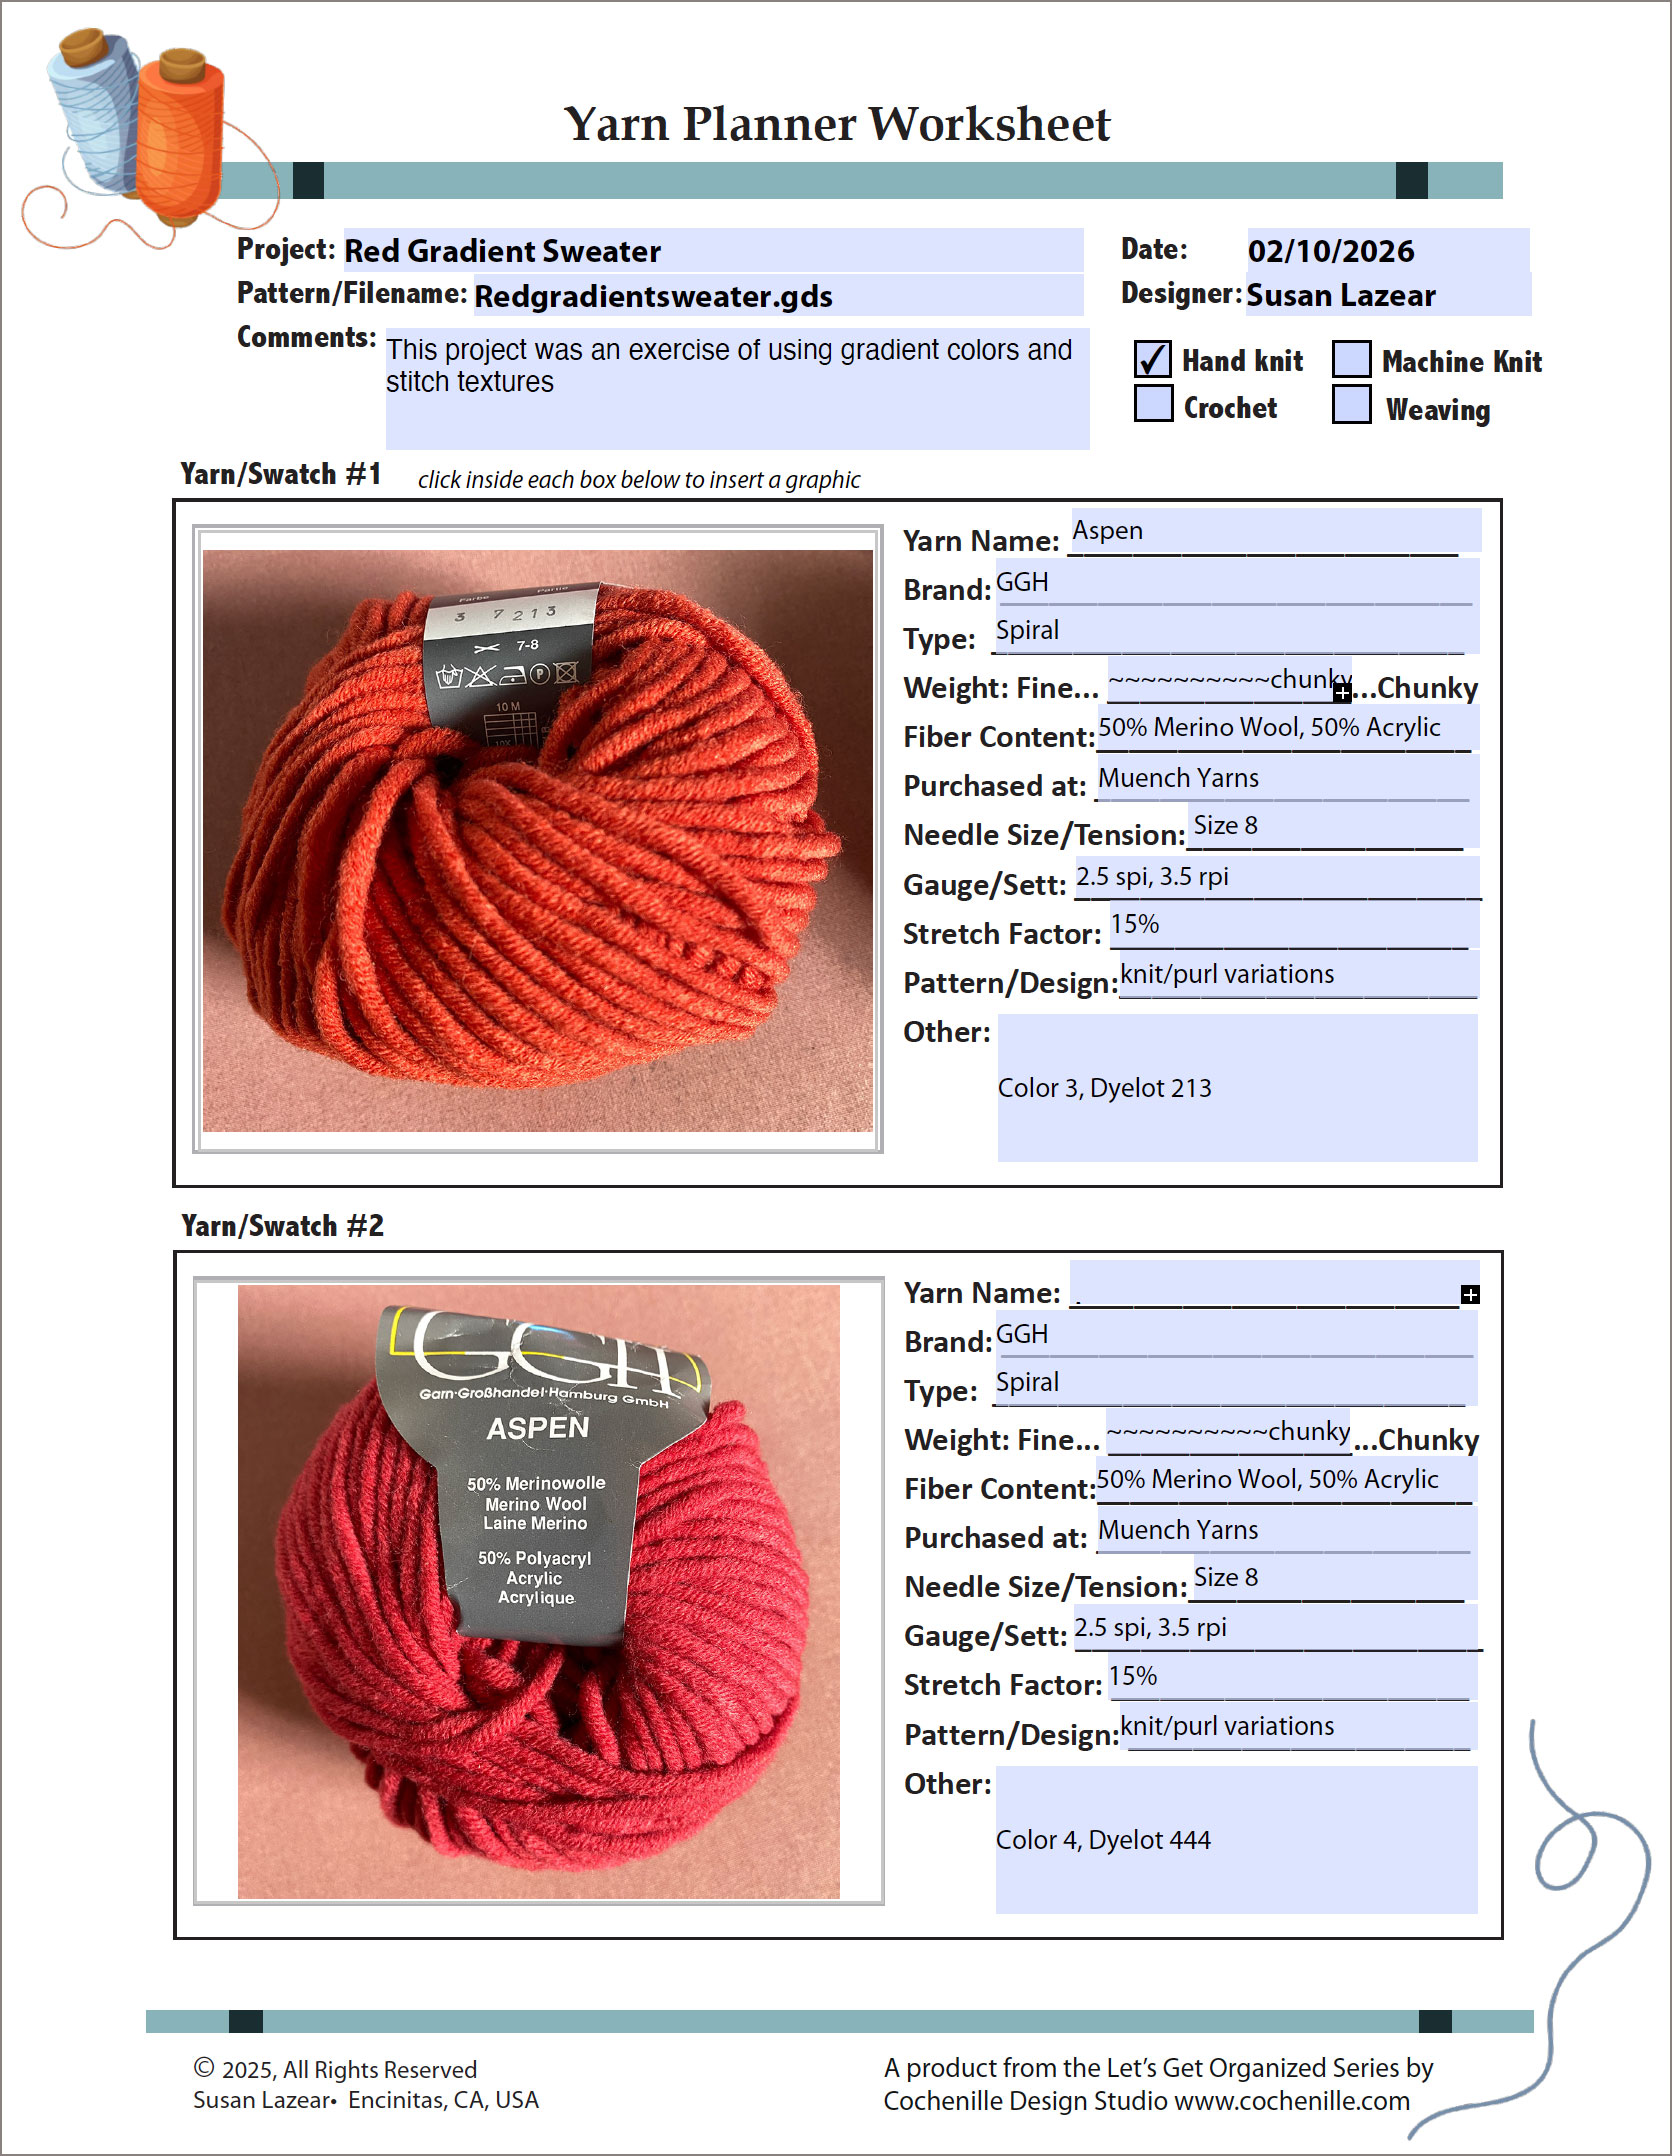
Create the largest swatch you have patience for, realizing that the bigger the swatch, the more accurate your gauge.The gauge I achieved using my yarn and stitch pattern was 2.5 stitches to the inch and 3.5 rows to the inch. I keep track of my swatches using our Yarn Planner worksheets.
We have now reached the point of combining the garment measurements with your gauge, and this is where the design process changes between manual design and using a software charting program. With the former, you will need a calculator and some basic math skills. You can add stitch and row counts to the schematic with some pretty simple math.
Manual Design: Add Stitch and Row Information to the Sketch
Once you have an accurate gauge, you can add to your drawing, computing stitches and rows around the garment.
Multiply the garment width by the stitches per inch to determine the cast-on. Multiply the row gauge to the side seam length to determine how many rows you knit before you need to shape for the armhole. If you chose a simple drop shoulder or square armhole style, charting the shaping in the armhole will be relatively simple.
The shoulder seam can be straight, or you can angle it with some pretty simple math. First determine how many stitches wide both the neckline and the shoulder seam width are. Then, enter your numbers. If you plan to angle the shoulder seam, you will need to determine how deep you want to angle it, and then, calculate how many stitches you need to bind off, over how many rows.
The sleeve of the drop-shoulder or square armhole style is simple to calculate. The dimensions are driven by the armhole depth, and in the case of the square shoulder style, the armhole inset. The only other number of importance is the sleeve length.
Using Garment Designer Pattern Software
Garment Designer software (Windows or Mac) can easily handle simple shapes, and generating a schematic with dimension and stitch and row counts takes minutes. It also allows you to create a more complicated knit shape, with set-in sleeve armhole, a variety of sleeves, sloped shoulders, and numerous neckline options. Neckline, armhole, and sleeve style features are where a lot of the intimidating math lives — and where it helps most to have support.
Calculating armhole shaping, sleeve cap increases, or how a stitch pattern needs to be adjusted to fit a curved neckline is exactly the kind of repetitive, precise calculation that Garment Designer is built to handle. You make the shape decision; the software works out how many stitches and rows each decision requires. The other bonus of Garment Designer is that you simply choose your closest garment size, or better still, input your own measurements. Then, build the garment shape by choosing from a variety of style menus.
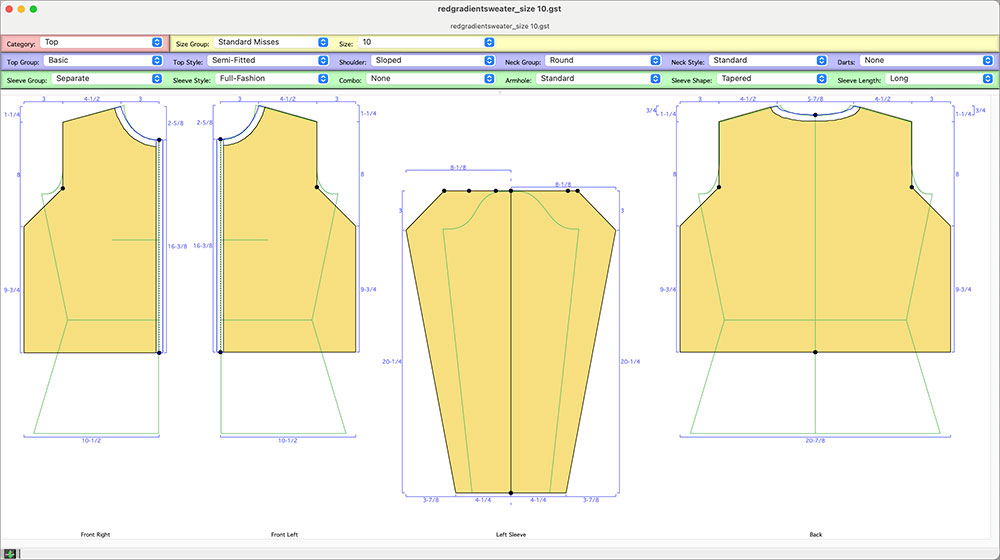
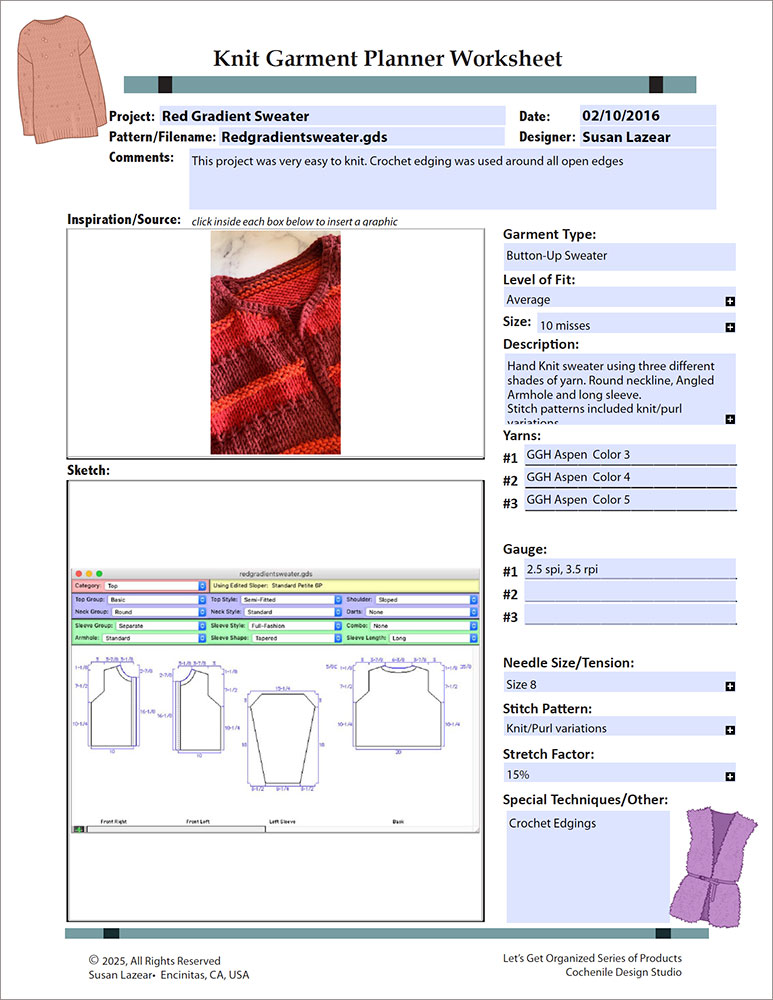
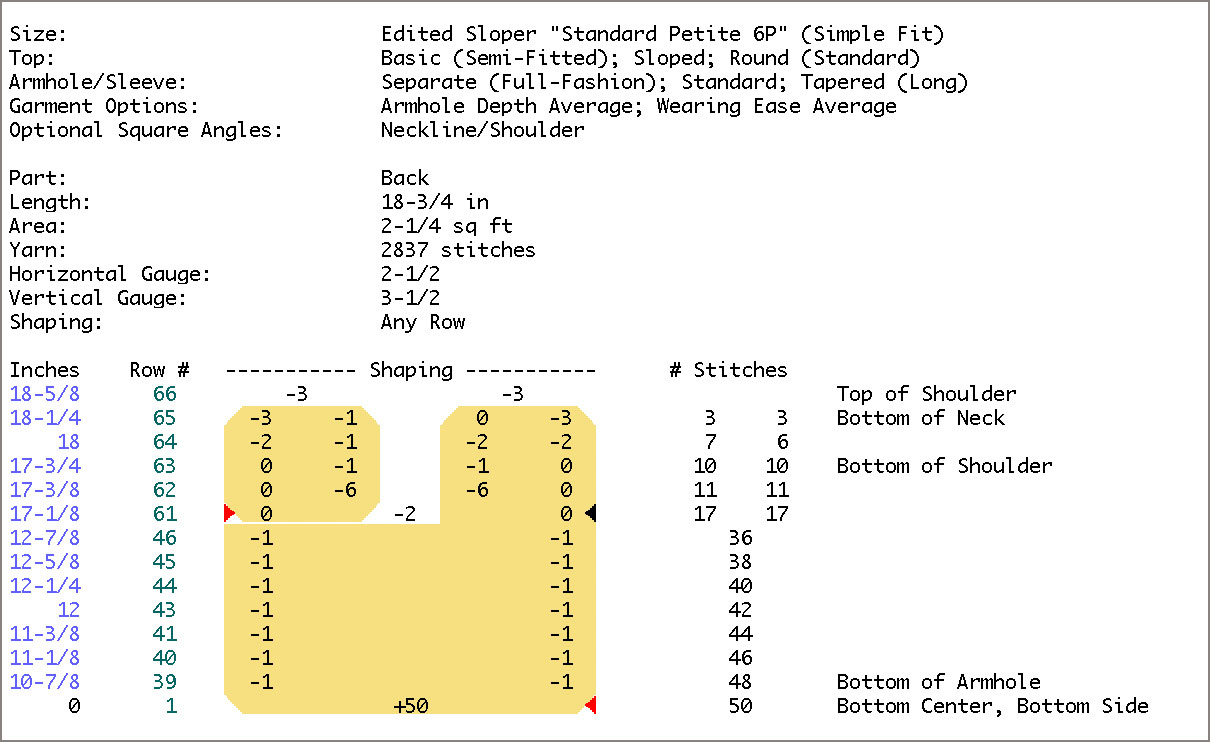
The output for shaping a garment is shown below. If you want to watch a YouTube video on how to read the knitting instructions, click here.
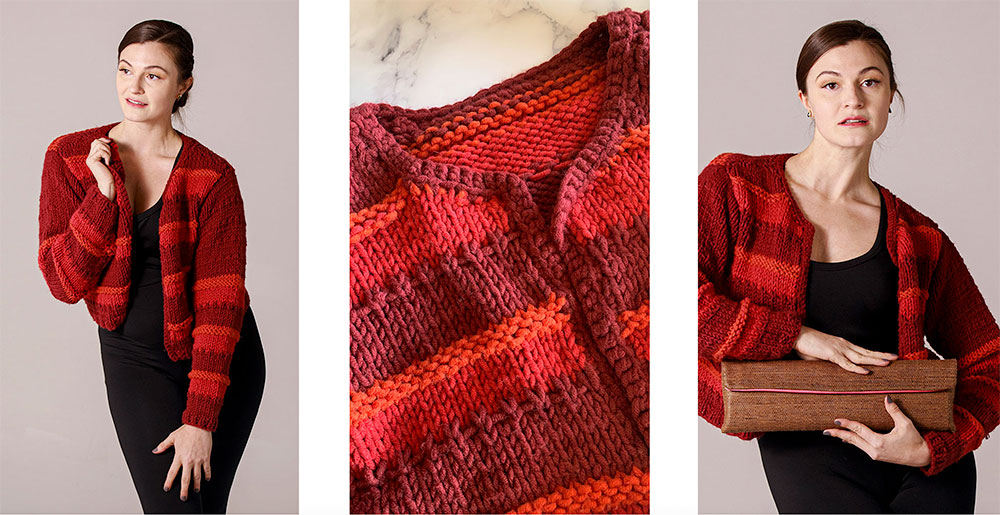
Below you can see the finished hand knit cardigan. this was a quick project, due to the thickness of the yarn and the simplicity of the design.
Let the First One Be Imperfect
Your first design will probably have something you’d change — a sleeve that’s slightly too long, a stitch pattern that shifts a little oddly at the seam. That’s normal, and it’s not a sign you’re bad at this. It’s a sign you’re designing, which always involves a bit of trial and revision, even for people who’ve done it for years.
The difference between someone who designs knitwear and someone who doesn’t isn’t talent. It’s usually just that one of them got brave and started to do things themself. So, jump… you will be so happy you did.
~~ Susan Lazear, Creative Director of Cochenille Design Studio ~~