Did you know that April is National Serger month? For those who own a serger, you should celebrate with your serger by creating a new garment that utilizes the use of this amazing sewing tool.
A serger, also known as an overlock machine, is an essential tool for both amateur and professional sewers. Unlike traditional sewing machines, sergers are designed to cut, sew, and finish the edges of fabric in one swift operation. This results in a clean, professional finish on garments and projects.
Below I will begin with a quick list of why one wants a serger in their life, and then, I will share a few of my favorite serger techniques with you.
Why You Should Want a Serger
1. Beautiful Finished Edge
One of the primary advantages of a serger is its ability to create neat, overlocked seams that prevent fraying. This is especially beneficial for knit fabrics, which can stretch and curl easily. It’s also good for wovens which will unravel if left unfinished. The serger uses multiple threads and a blade to achieve the polished edge, making finished garments look more professional.
2. Speed and Efficiency
Sergers can significantly speed up the sewing process. With the ability to cut and sew simultaneously, one can complete their projects much faster than with a regular sewing machine. If you trust the fit of the pattern, you can achieve the sewing/finishing all in one step!
3. Creative Stitching Options
Sergers can create a variety of stitches, including finished seams, rolled hems, flatlock seams, and even gathering (which I will discuss below). This versatility allows sewers to experiment with different techniques and styles, adding unique finishes to their projects.
4. Great Finish for Knits and Stretch Fabrics
Using a serger is especially advantageous when working with knit fabrics and stretch materials. The stitches created by a serger build in some stretch (generally more than your sewing machine, unless of course you are using a stretch stitch on the machine), which is crucial for garments like T-shirts and activewear, ensuring seams remain intact when the fabric is pulled or stretched.
5. Durability Over Time
Sergers produce stronger seams than traditional sewing machines, thanks to the multiple threads used in stitching. This durability is important for garments that will undergo frequent washing and wearing, ensuring they maintain their shape and integrity over time.
6. Professional Finish
Projects finished with a serger often look more polished and professional. The ability to create clean edges and unique stitch patterns elevates the look of sewn garments and crafts. Sergers do not offer the beauty of a traditional Hong Kong seam finish or a French seam, so there are times where it is just better to use traditional techniques.
My Favorite Serger Tips and Techniques
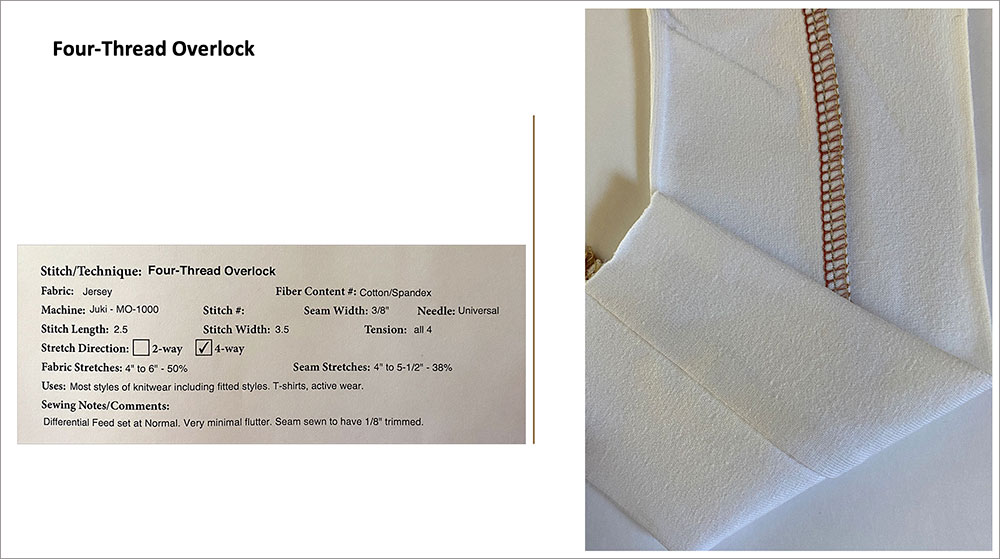
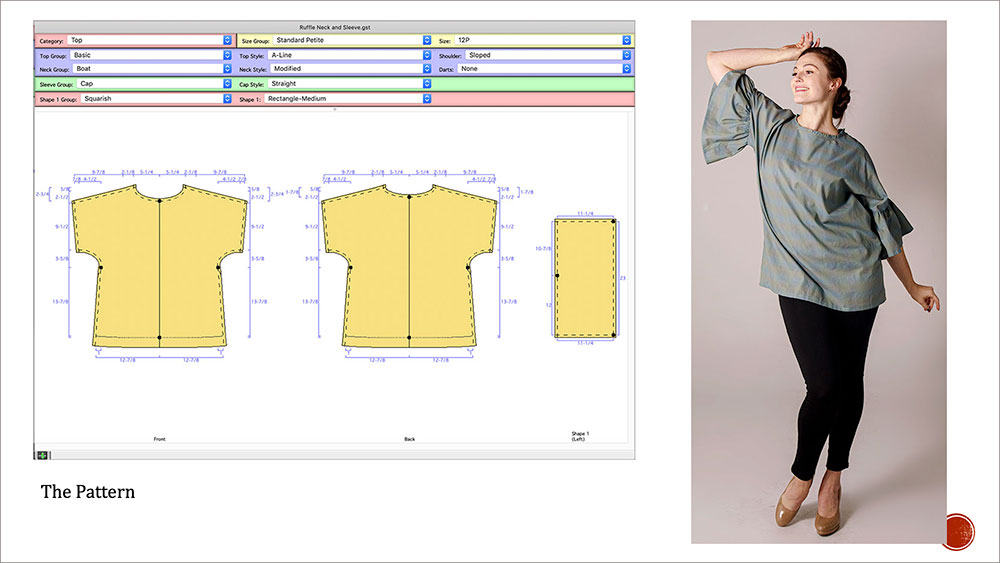
Exploring new techniques with my sewing machines and tools is a joy. I like to keep records of experiments on our Sewer’s Worksheets and add the sample and details to my binder of techniques. Here is an example of my record keeping.
This is part of our Sewer’s Worksheets, a product we developed.
Below are a few of my favorite serger techniques.
Tip *** Creative Threads
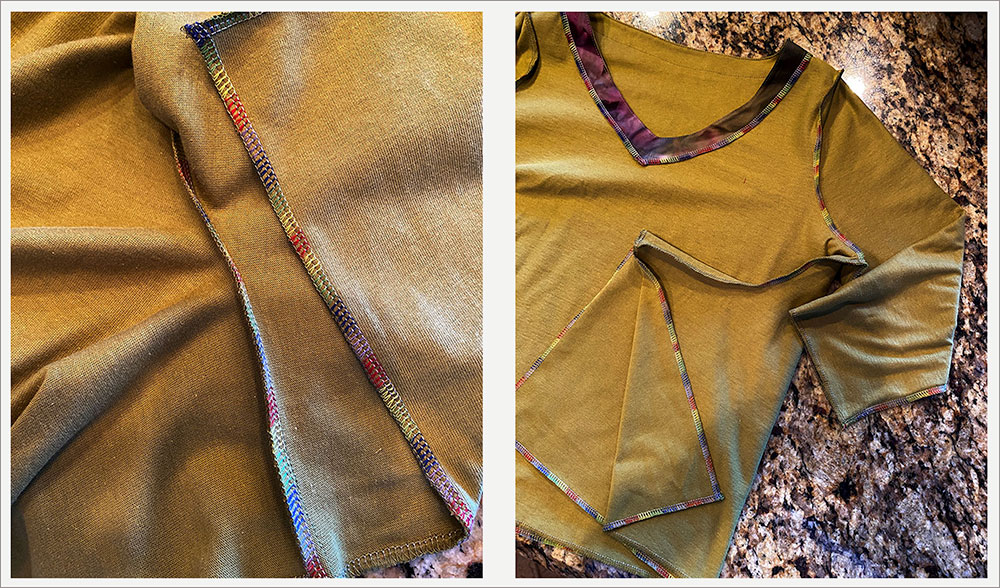
The one downside of using a serger is that you need multiple spools of each color thread you plan to use and that can get costly. My counter to this cost is to ‘blend’ colors for a project, which indeed gives a more unique look to my seam finishes. I find threads in colors that are similar or are used in the color of the fabric, and then I mix and match my serger threads. The result is a variegated subtle look. I typically pay special attention to the colors I use in the loopers as these threads will be seen the most.
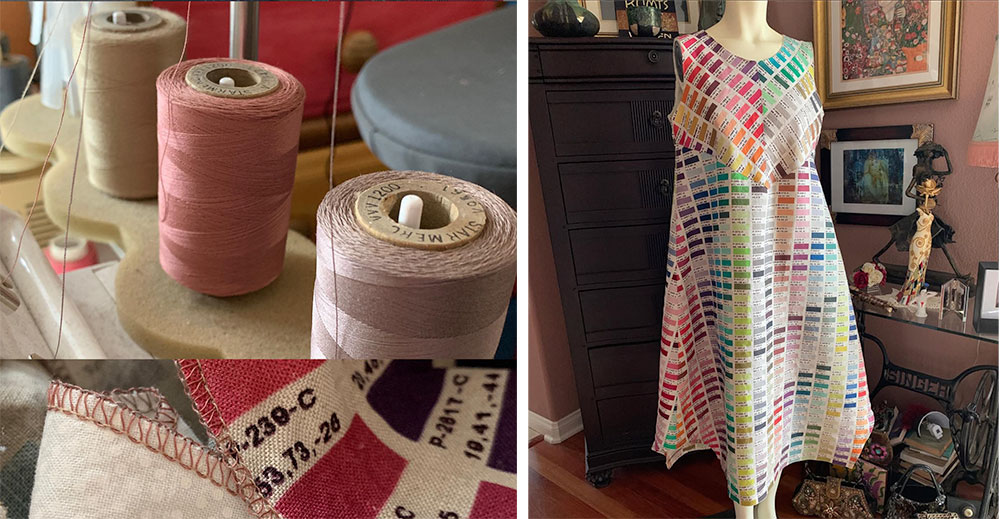
Sometimes I use a variegated thread, just for fun. This can add a bit of spunk to a garment. I will put this in the upper looper of the serger as it is seen more on the right side of the fabric.
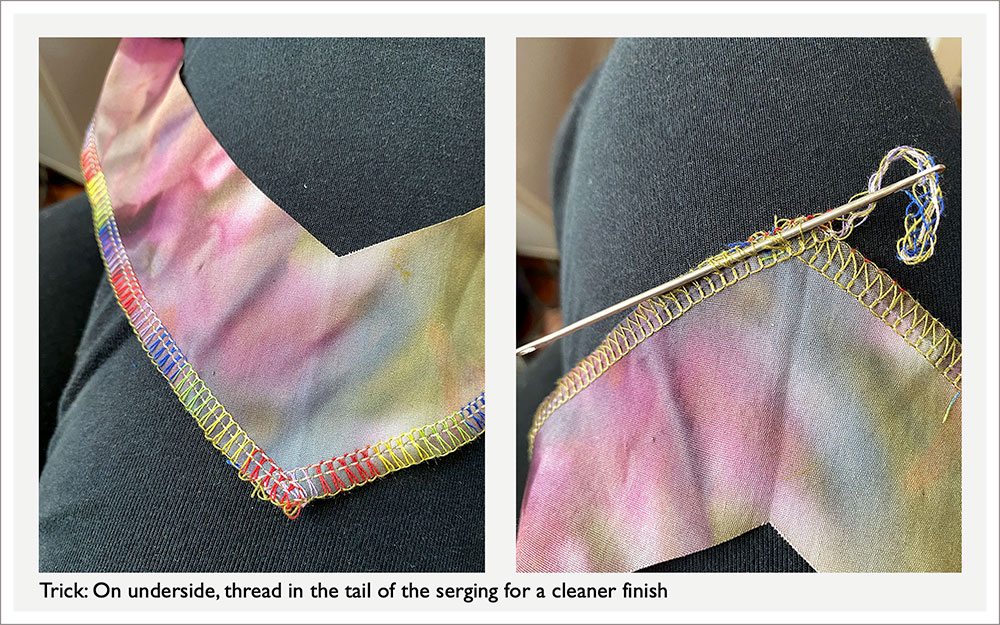
Tip *** – Threading in the Serger Ends
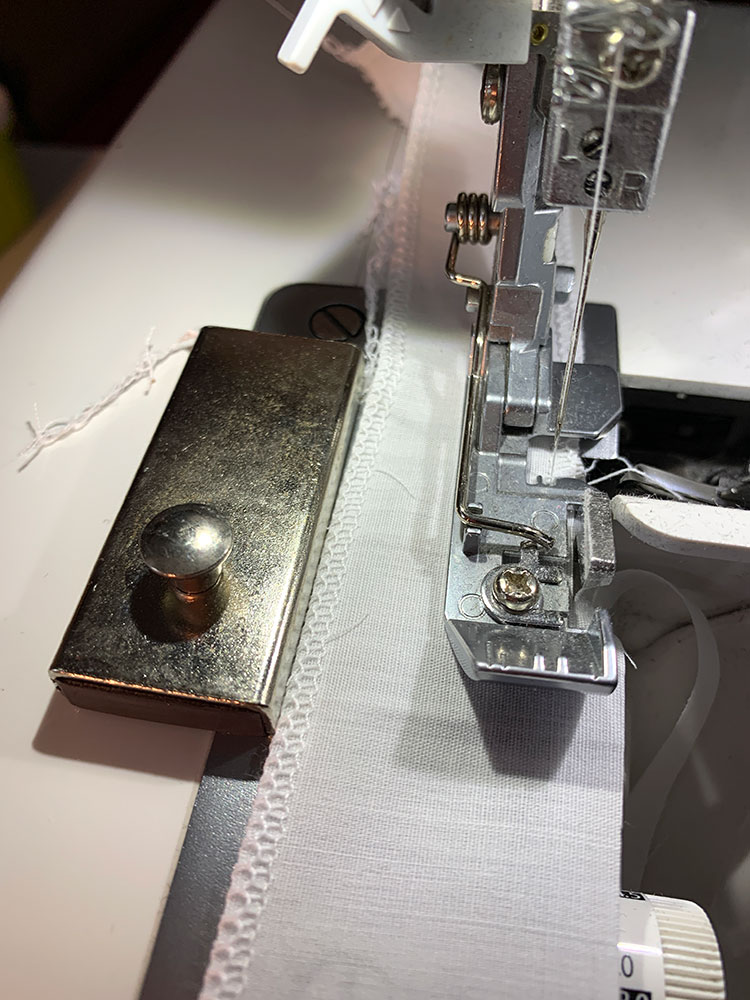
There are times where you want a cleaner finish to the tails of serger threads. For example, if I am serging the hem and it will be the actual edge of the garment, I don’t want snipped threads exposed, as over time, they may unravel. So, instead, I allow a 5” chain after serging, and then, I use a blunt bodkin (or large-eye needle) to thread it through and loops on the fabric.
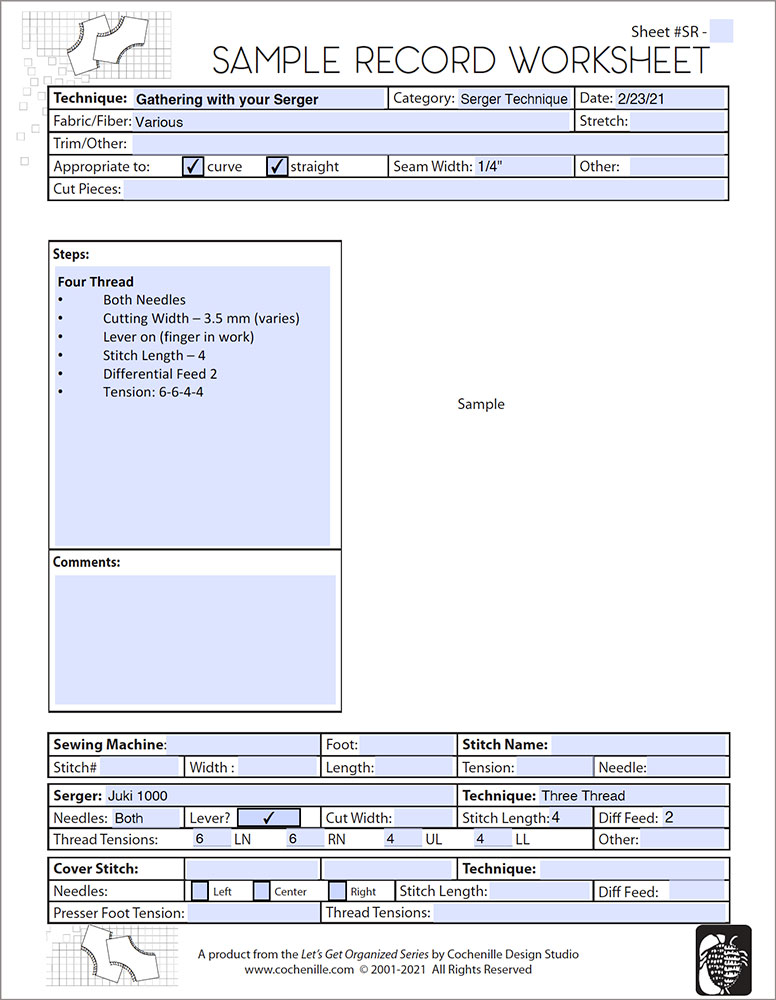
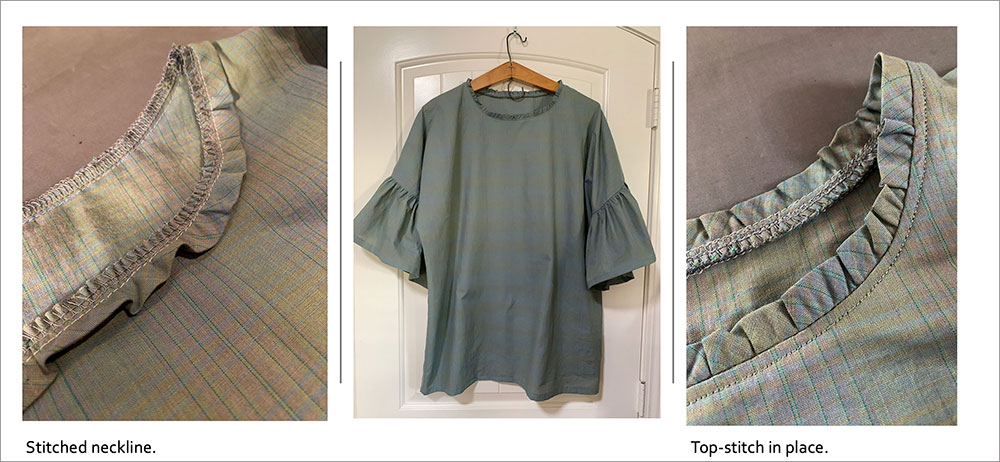
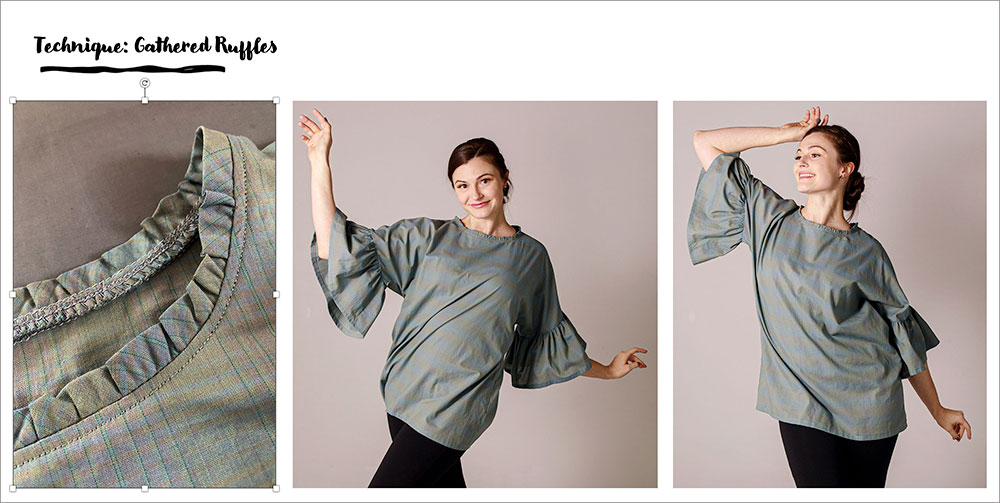
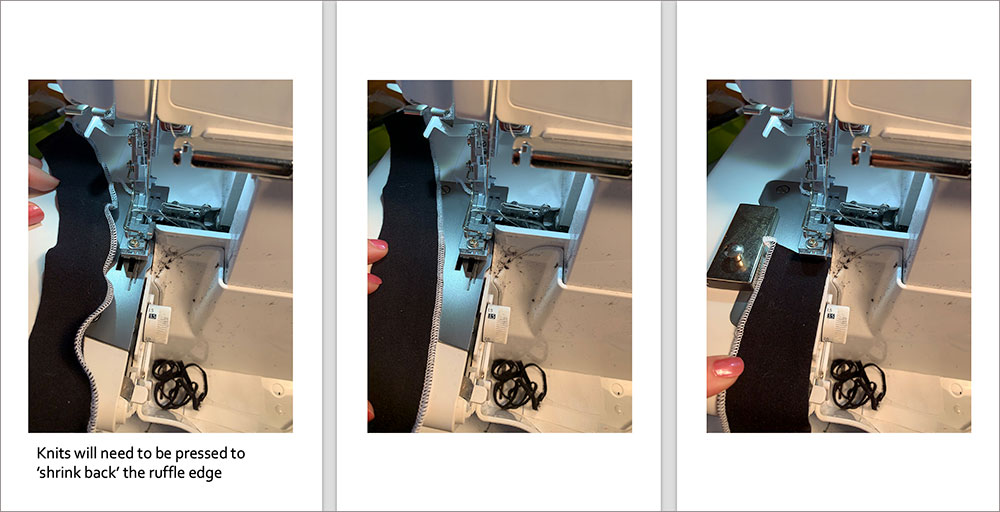
Technique: Gathering with the Serger
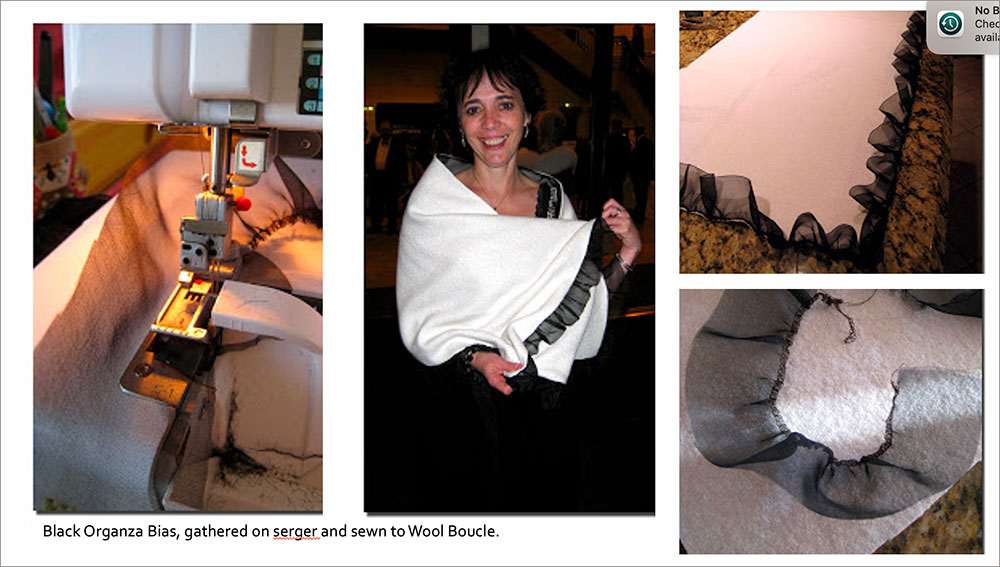
Several years ago, I was faced with applying a gathered edge of black organza to a cream-colored wool bouclé shawl. The thought of running two rows of basting stitches and evenly gathering around a 72” long shawl was daunting. I had remembered reading about how to use the serger as a gathering tool, so I conducted some research online and came up with a few good videos that walked me through the steps. Basically, you change some settings on your serger to push the fabric through a bit quicker from the front allowing it to gather.
Settings vary slightly, according to your serger model/brand, but here are the general concept is this:
- Differential Feed – Adjust the Differential Feed from the normal 1 to 2. This will feed the fabric through quicker.
- Needle Tension – Tighten the tension on the needles. On my Juki serger, this means increasing the number.
- Stitch Length– Sewing with a slightly longer stitch length allows the stitches to gather more easily.
- Needle Tensions – Tighten the tension of the two needles. The more you tighten the tension, the more gathers you will get.
Gathering can be done with a 3 or 4 thread serger. The list below is the suggested settings in the manual of my Juki MO-1000 serger.
- Both Needles
- Cutting Width – 3.5 mm (varies)
- Lever on (finger in work)
- Stitch Length – 4 (slightly longer than normal)
- Differential Feed 2 (this will feed the fabric faster, cause gathering)
- Tension: 6-6-4-4
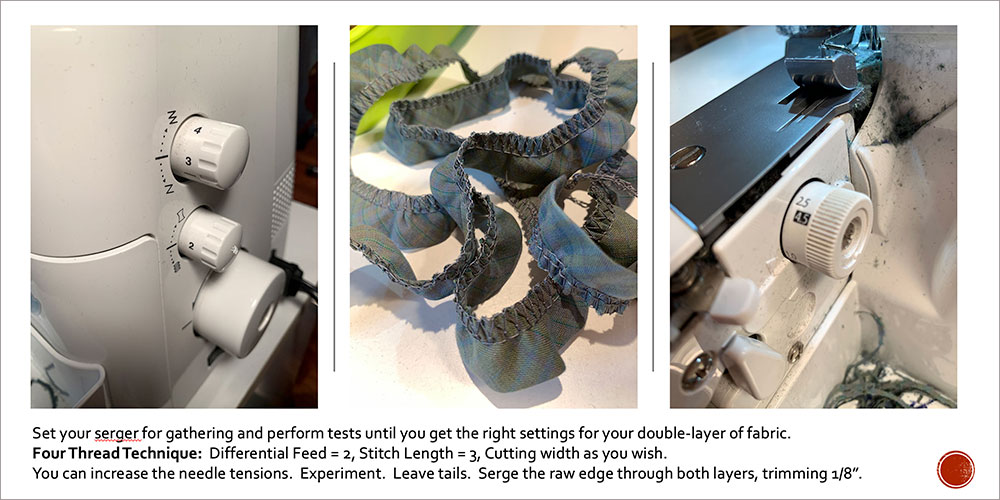
The weight of your fabric makes a difference, so one setting doesn’t work for all fabrics in the same way. Also, if you are gathering a single or double layer, this can change the amount of gathers you create. You always need to experiment. I like to leave a long tail on either end of the serging, as this allows me to adjust the length of the gathered piece a bit.
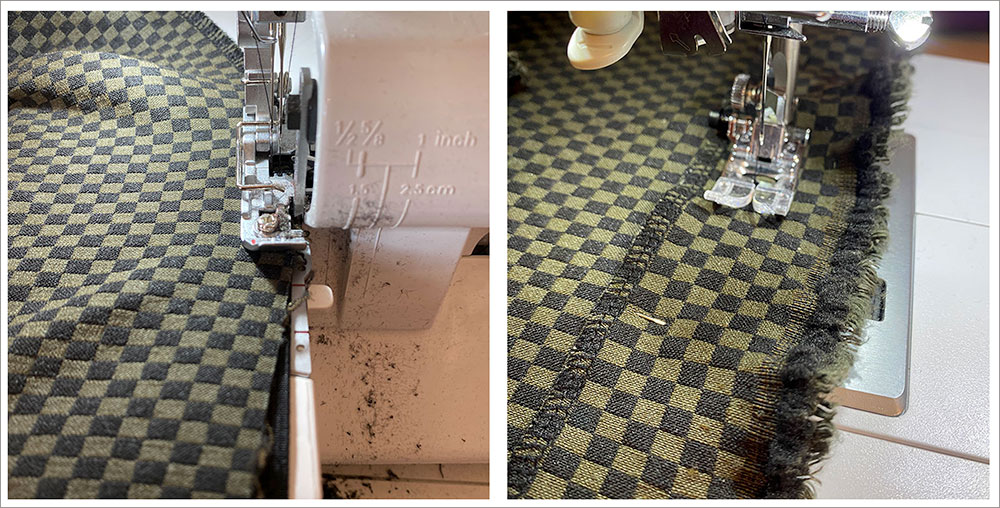
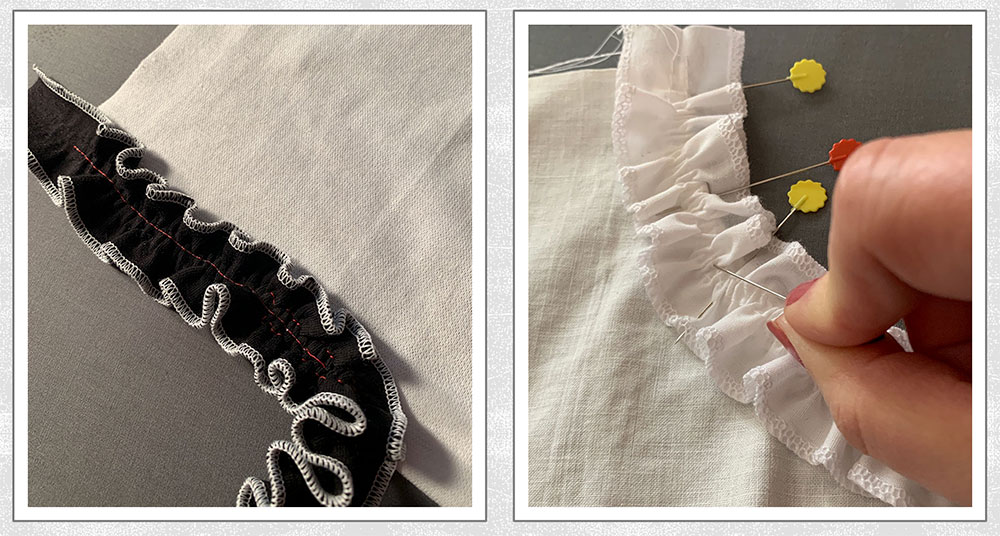
Working with a Narrow or Rolled Hem
Although this is a commonly used serger function, I find that I utilize variations of this hem for different uses.
- Create a narrow hem on the raw edge of a knit garment.
- Use this hem on both sides of a narrow length of fabric to create a decorative strip to utilize elsewhere on the garment
- Experiment with leaving the finger in or out of work for different effects.
Here is a list of general setting changes for three-thread:
- Remove the left Needle
- Lower Looper – Loosen this
- Upper Looper – Tighten this
- Minimize the Cutting Width
- Narrow Hem Mode – Your choice. When engaged, the finger causes the fabric to roll slightly. Narrow rolled hems have it engaged. Narrow hems do not.
- Differential Feed –Change the feed so that the stitches are more dense

Below are a few examples of using the Narrow Hem technique (with minor alterations at times)
So, hopefully you have a few new tricks up your sleeve. Enjoy your serger, and even more so, enjoy exploring creative variations of standard techniques that can lend a unique look to your original clothing.
See if you can get something made using your serger in the few remaining days of April, to join in the celebration of National Serger month!
~~ Susan ~~ from Cochenille Design Studio