Creative With Cochenille
Garment Designer Hogwarts Robe
Hello All,
We hope that you have been busy crafting your homemade Halloween costumes this October. Fall is always a great time for sewing projects. Between Halloween and preparing for the holidays, it is a great time to tackle those projects you have put off, the costumes for halloween festivities or to start on those handmade holiday gifts for your loved ones.
Since Halloween is already upon us I wanted to share a ‘Creative With Cochenille’ Harry Potter costume pattern I made using Garment Designer.
My friend is a taller-than-average (6ft+) gentleman, and as such, most store-bought Hogwarts robes are just too short for him to look like a real wizard. Garment Designer made it easy for me to make a custom Hogwarts robe to fit.
To start this project I took his measurements and used a refined fit sloper so that I had as much information as possible to work with. I also made sure to measure where I wanted the hem to fall on him from his High Point Shoulder to the imagined hemline. I set this as the Dress Length (Options >Top/Dress Length).
As you can see below, I used a Basic A-line Dress with a V-neck and widened the hem of the style a bit more. I also used a flared sleeve style and flared the hem a bit as well.
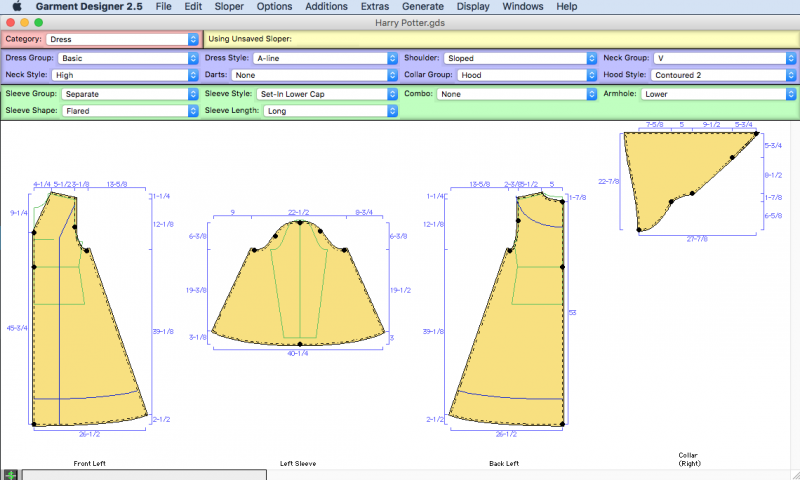
Since I did add more flare to the hems, Garment Designer let me know in a warning message that I had to fix some of my angles to make a nice seam transition when sewing the garment together. I suppressed the warning message by checking the box when it came up, then after I was finished making all my design changes I went back and fixed the angles at the points were the seams intersected with the help of my Information & Recommendations Window (Generate > Information & Recommendations).
If you haven’t yet learned about Garment Designer’s ‘Pattern Smarts’, we have a great video available for you to watch. This will help explain the ‘Warning:i’ and yellow Hazard sign symbol that Garment Designer displays in the lower left info bar at times:
For the hood, I went to my Extras Menu and chose ‘Collars: Joined at Back’, which gave me a new style menu for collars. I chose a hood Collar Group and selected ‘Contoured 2 Style’: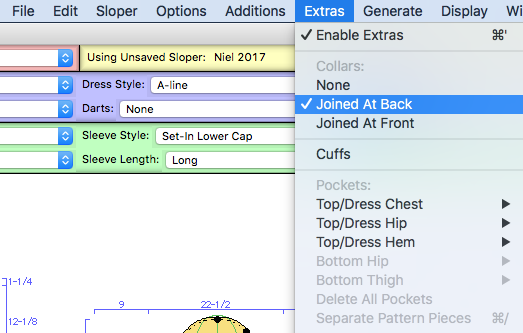

We have a video that will help you locate the hood on our webs site as well:
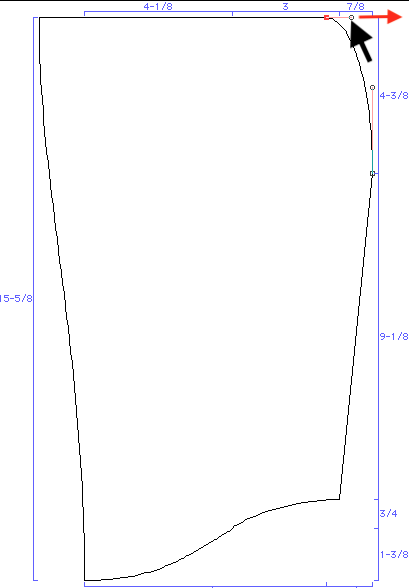
I was able to modify the round contoured style to the pointed hood style of the Hogwarts robes by moving the points around and the straightening the bezier curve points.
 I ended up lining the entire robe instead of using a facing and I was so happy with how it turned out.
The robe fit him on the first try! (face photoshopped face for privacy)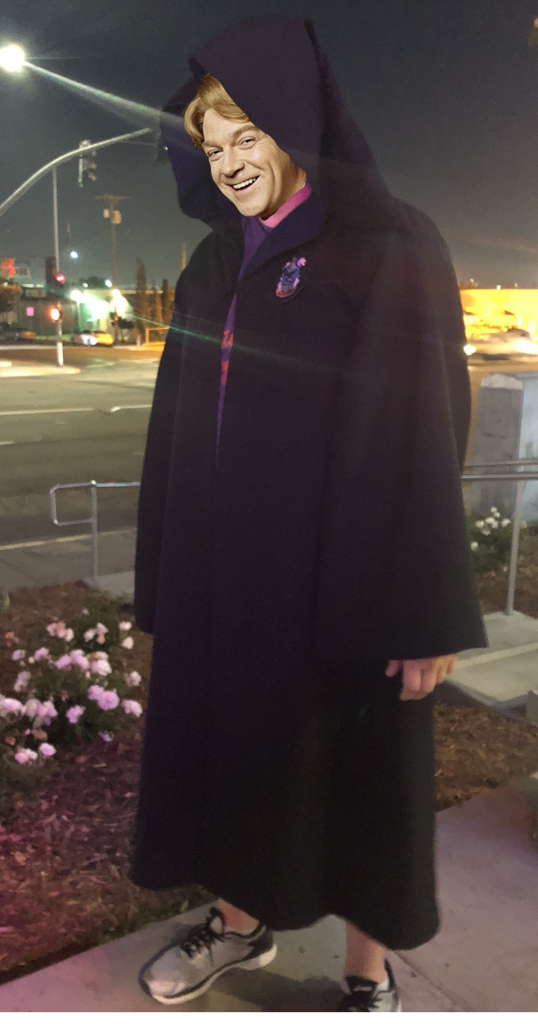 If you have any projects you would like to share with us, feel free to email us at info@cochenille.com.
Thank you for taking the time to stop by Creative with Cochenille, have a happy crafting season!