You don’t need a lot of art training to design or draw your concepts for a new garment. Mostly it takes a little practice and choosing the right aids to assist in the process. This is where the fashion croquis comes in.
Croquis? What on earth is that?
The word croquis comes from the French language and it means ‘to sketch’. A croquis is a proportioned body/figure that you use as a template or guide while you draw clothing on it and thus it is used extensively in the fashion industry and by fashion designs who need to quickly draw clothing in proper proportions.
A fashion croquis is generally measured in ‘heads’ (meaning a multiple of the depth or vertical length of the model’s head. Most fashion croquis are 9 heads tall; most people are 7-1/2 heads tall. The extra length of a fashion croquis goes into the legs. Below is an eight-head croquis I developed many years ago when I wrote a college-based textbook called Adobe Illustrator for Fashion Design, figuring it was a good blend between normal proportions with a bit of fashion length. You can find this book on Amazon, but it is several years old.
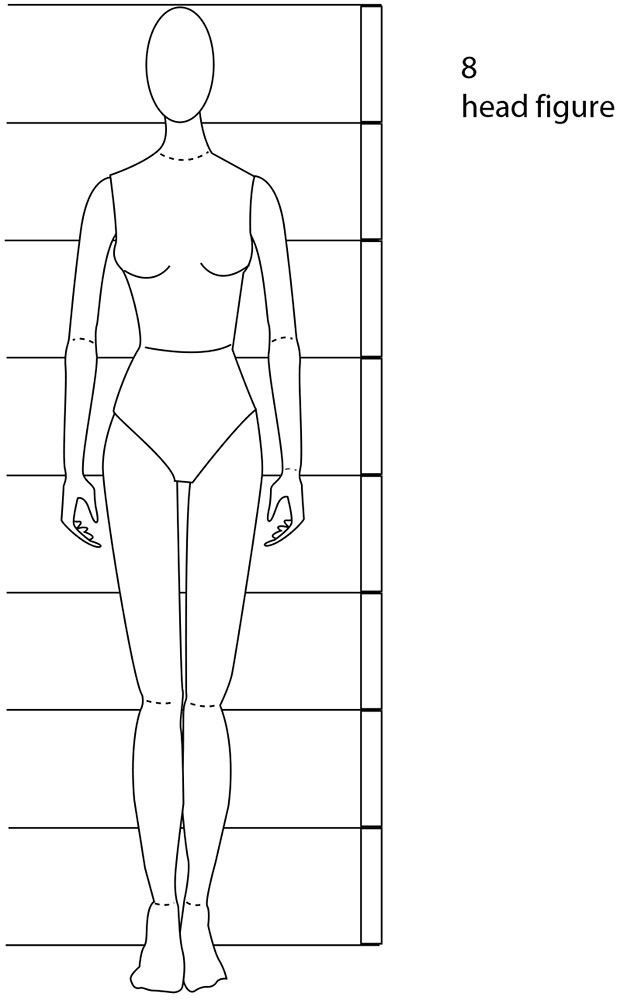
If you study the croquis above you can see the proportions of the body broken down into what is called ‘heads’. These follow standard proportions of a person’s body. In this case, we used an eight-head croquis. The proportions are as follows:
- Lengthwise:
- The waist hits at three heads down
- The hip is positioned at 4 heads down
- The knees are generally at 5 heads unless you are working with the elongated fashion croquis
- Width-wise:
- The shoulders are 1-1/2 times the head length
- The waist is equal to ¾ head
- The hip width is 1-1/4 heads
For your convenience, I am providing you a link to the above Fashion Croquis I created and use as a guide. Click here to download it.
Paying Attention to Body Proportions
When learning how to draw in a fashion design course, students begin by learning how to draw the proportioned body. It is the building of this body (or croquis) that teaches you other things about body proportions. For example, the elbows are at waist depth, and your wrists reach the full hip level. This is very valuable information as it will train you to draw clothing more accurately. If you don’t trust it, stand in front of a mirror and examine your own personal proportions.
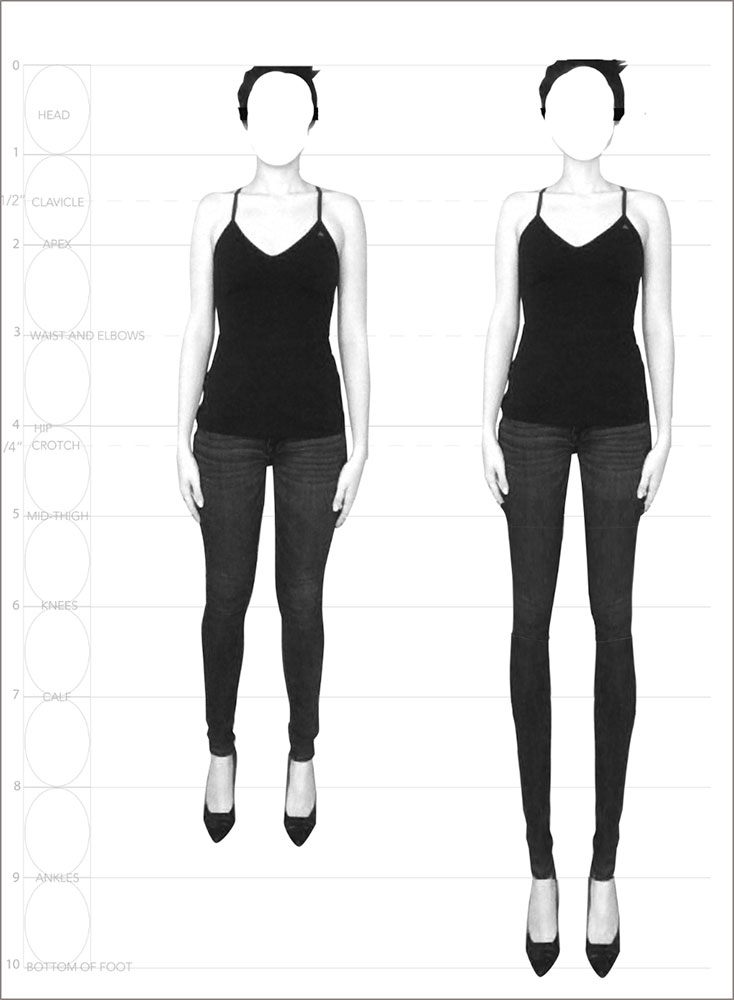
As mentioned above, the high-fashion croquis used in fashion illustrations generally is 9 heads tall. Below you can see a comparison which is explained by Amiko Simonetti (www.amikosimonetti.com). Amiko does a great job of explaining the development of a croquis and she has numerous croquis sets available for purchase.
Where Can You Find a Croquis?
Fashion croquis can be found by performing a Google search using Fashion Croquis as the key word. Add the gender to find a women’s vs. Men’s vs. Child’s croquis. Add the word ‘free’ if you are looking to find free resources. (Note: both the singular and plural of the word croquis are the same).
Here are a few other resources for you:
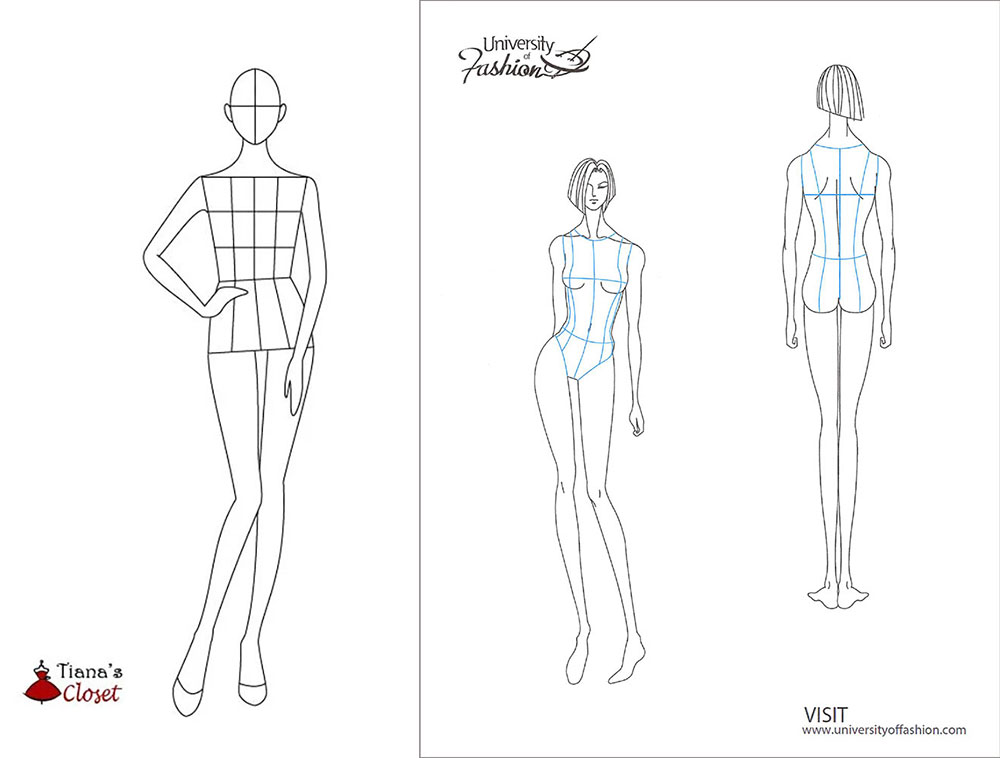
- The University of Fashion offers a free female croquis if you join as a free member.
- Tiana’s Closet also offers free croquis if they are being used for personal use. There are many different poses.
- And of course, Amiko Simonetti offers tutorials.
How do I use a Croquis?
There are various approaches but generally, one places a sheet of blank paper over the croquis and draws garments using the figure as a guide to determine the proper widths, etc. You can trace the head and hands to fill in the fashion pose if you like.
If you use a computer or a tablet/pad to design, you can load the file into your software and if possible, create a layer on top of the drawing to draw your clothing on. This is the approach I have used for years with fashion students using Adobe Photoshop or Illustrator. It will work with Adobe Photoshop Elements (a more cost-effective and capable program by Adobe – being under $100 for a non-subscription one-time purchased). I-pad users like to use ProCreate for the purpose of designing.

Customizing the Croquis..
This all sounds great, BUT.. my figure is not like the Fashion Croquis! This is probably true for most of us. So, fear not, there are various ways to create a more realistic croquis. Here are a few.
- Redraw/Edit the Fashion Croquis -You can redraw the croquis, widening and shortening/lengthening it as necessary. It helps to draw a vertical center line as a guide. Then, place a blank paper on top and trace the croquis, sliding the drawing around to widen/narrow/elongate or shorten the figure as you go.
- Use a Photo of Yourself – You can take a photo of yourself standing in a fashion pose. Try to have a blank or simple background in the photo so you can easily read the body. Choose a pose that shows some space between the arms and body so you can easily draw clothing on the figure. Wear form-fitting simple clothing so you can see the actual figure. Then, print out the photo and place a blank sheet of paper over it and trace the outline of the figure. Include your head and hair.
- Search for a Figure-Appropriate-Croquis Online – with greater detail input into your Google search, you can often find a croquis more similar to you. Think to add ‘plus-size’ or ‘petite’ as a starter.
Use Online Croquis/Figure Generating Tools
There are a several websites that allow you to enter your measurements and see the resulting figure. A few of my favorite are:
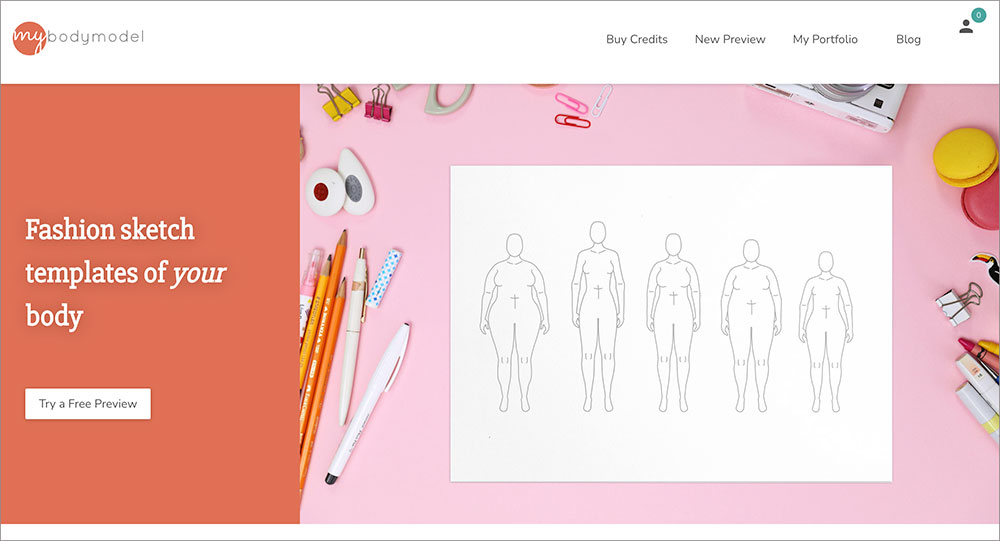
mybodymodel.com
This website provides a tool for you to input your measurements (they provide a guide on how to take them) and view a croquis of yourself. You can then choose to purchase a croquis package. Click here to go to their website.
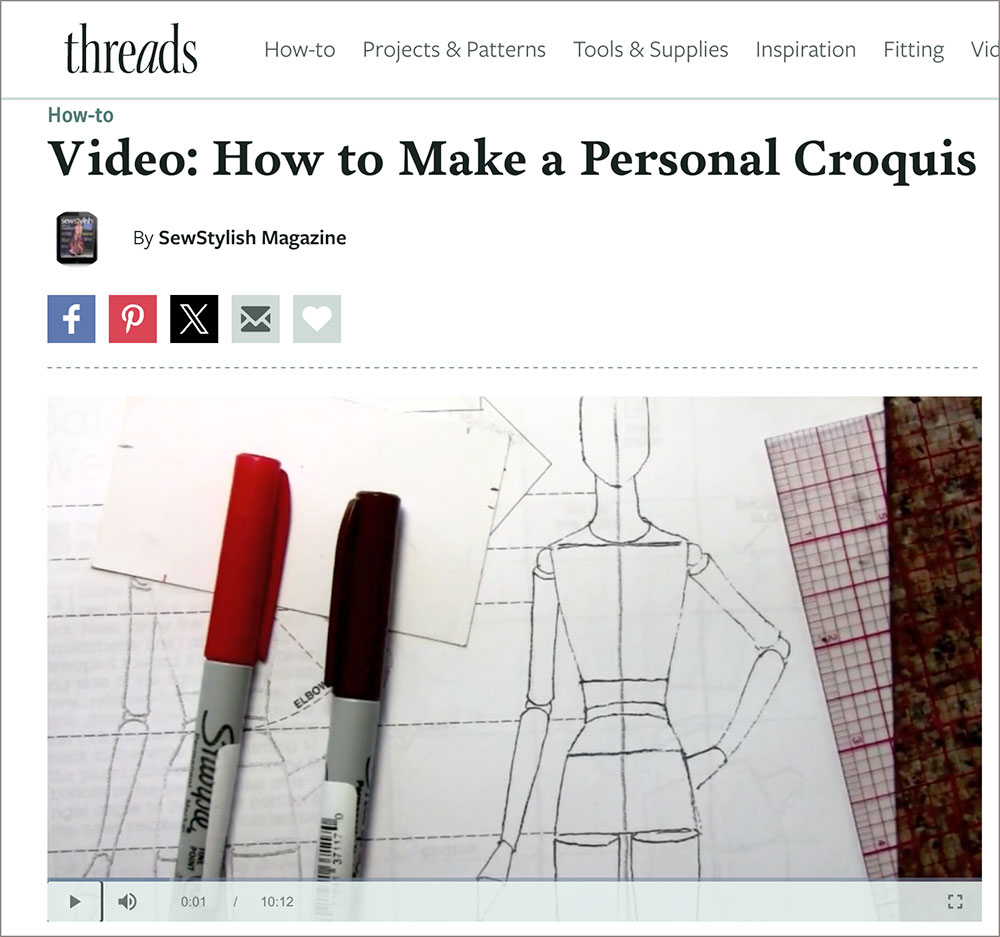
Threads Magazine
Threads has several resources on this topic, some of which are part of their Insider club and some of which are free. Here is a link to a free-to-watch video on how to create your own custom croquis. Yelen Ayé demonstrates the process.
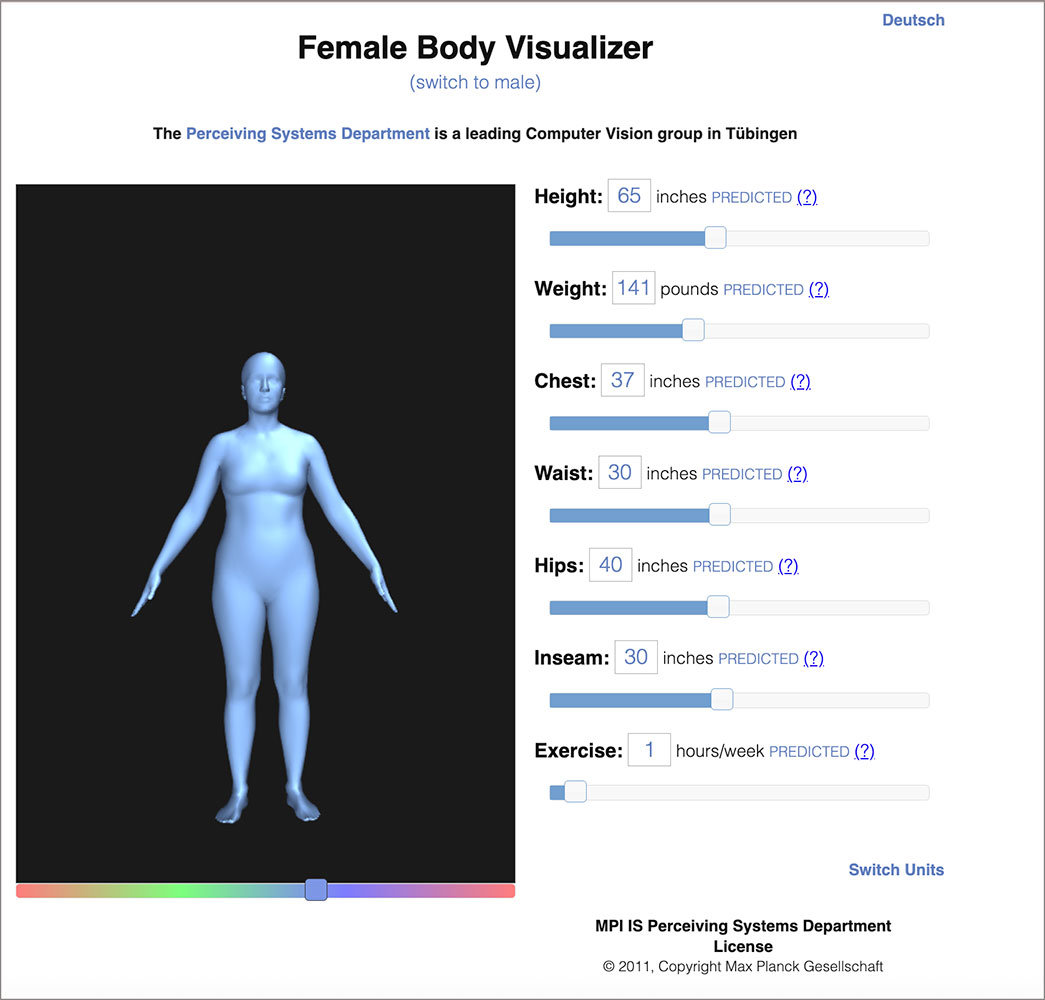
Online Body Visualizer
This is a pretty fascinating website. It allows you to input your measurements and see your body. You can rotate the figure to see all angles. What I find particularly interesting is that you can change your weight (which also changes your body measurements) and see how you will look if you either lose or gain weight. It is motivating! You can also see the impact that regular exercise will have on your general shape. Click here to explore the tool.
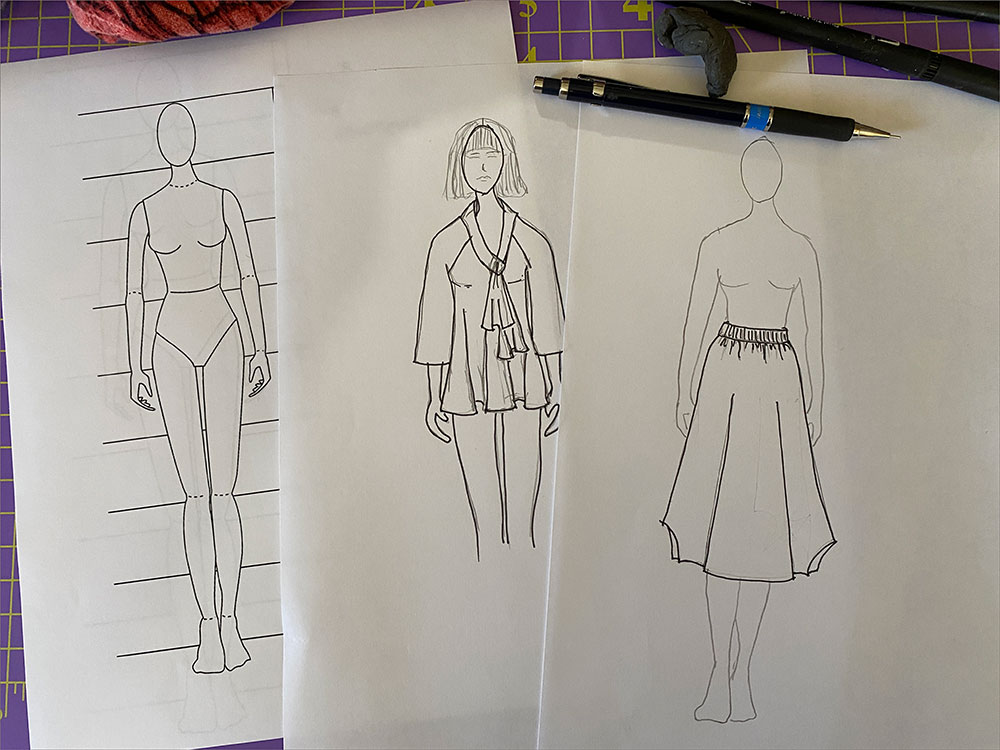
Just Do It!
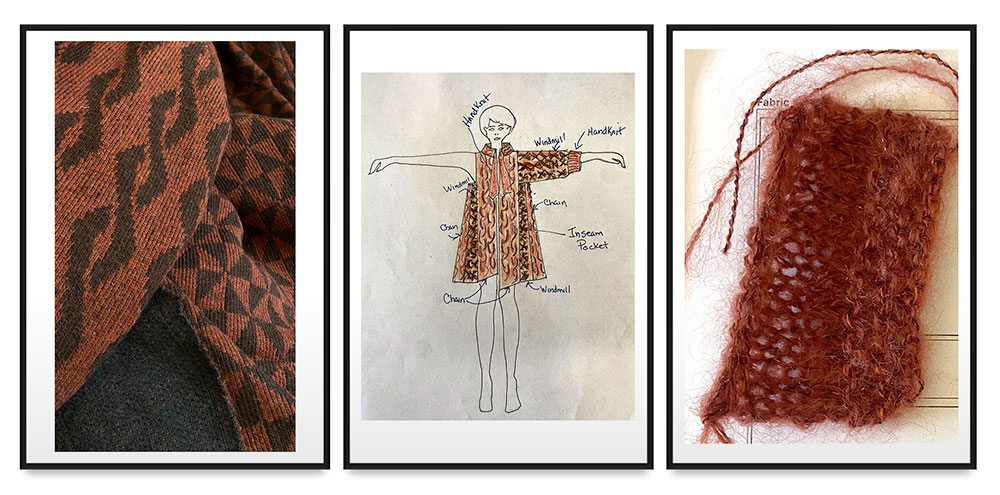
Even though you may not think you have drawing skills, I am willing to bet that if you get brave, and take the time to slow down a bit as you draw, you will begin to see that you do have some abilities. I have taken the 8-head croquis and created a pose version of it, so that one or two arms are extended.
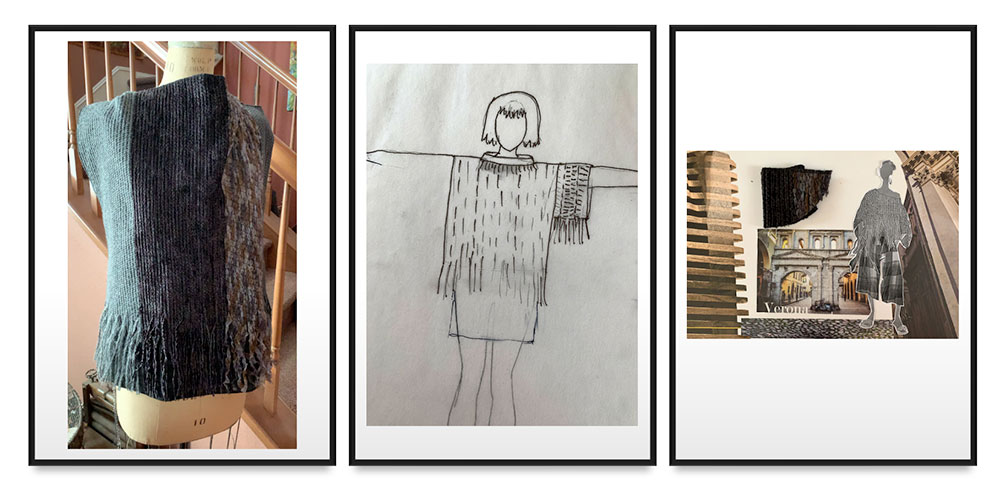
Below you can see a few projects that began with a sketch on this croquis/pose.
Here is the pattern, created with Garment Designer software.

Here is my sketch for a project where I utilized a piece of fabric that incorporated fringe in its structure. Thus, it became the theme of the project.
I hope you feel empowered to start drawing your clothing concepts on paper. Using a croquis as a design aid will increase your success. You can improve your knowledge of drawing the garment parts, simply by being observant and replicating what you see.
Enjoy.
~~ Susan~~