Upcycling clothing isn’t just a trend—it’s a creative, sustainable way to breathe new life into garments that would otherwise gather dust or end up in landfill. Whether you’re a total beginner with a pair of scissors and a needle or an experienced sewist or knitter with a stash of fabrics and/or yarns, upcycling invites experimentation: repurposing, reshaping, and reimagining existing pieces into garments that reflect your style while reducing waste.
Read on, as we explore eight different approaches, from simple alterations to full refashions, so you can find the techniques that fit your skills, tools, and wardrobe goals. I will use our software, Garment Designer, as an aid to developing patterns, but you can use an existing commercial pattern or build your own by hand.
Whether your aim is to mend beloved pieces, curate a capsule of upcycled staples, or launch a small sustainable line, these approaches will help you turn what you already own into intentional, wearable art.
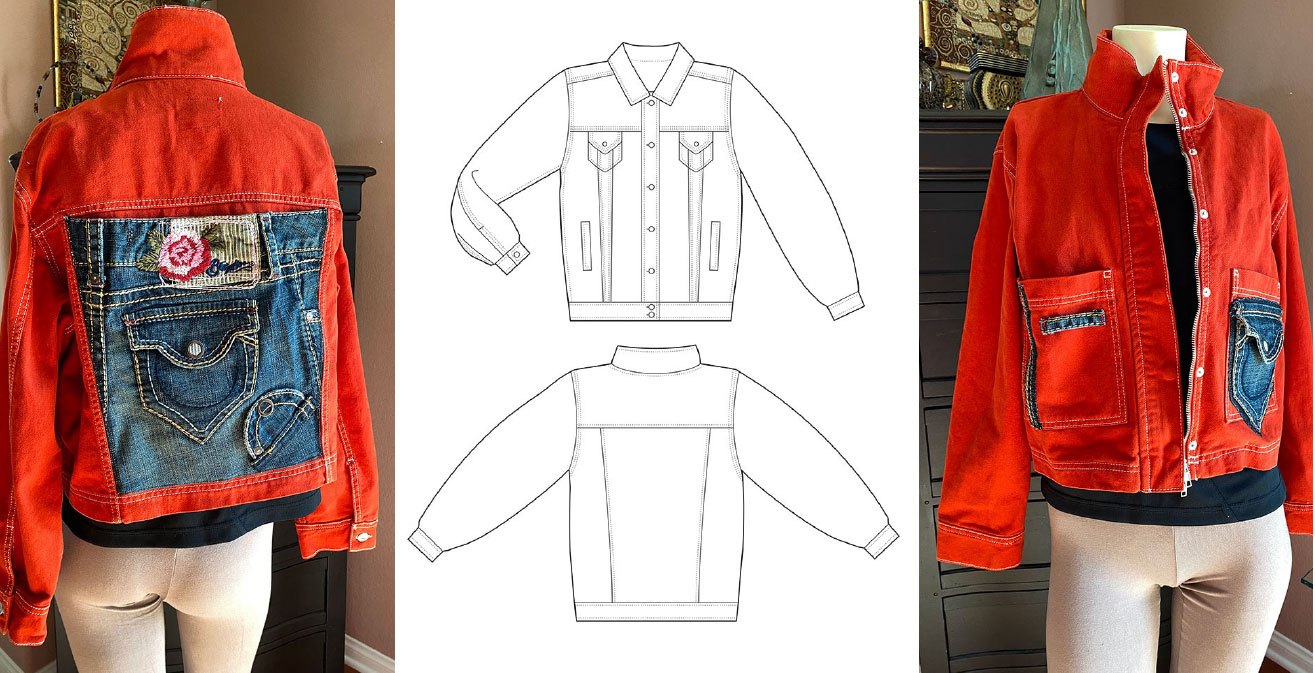
#1. Creating Overlays
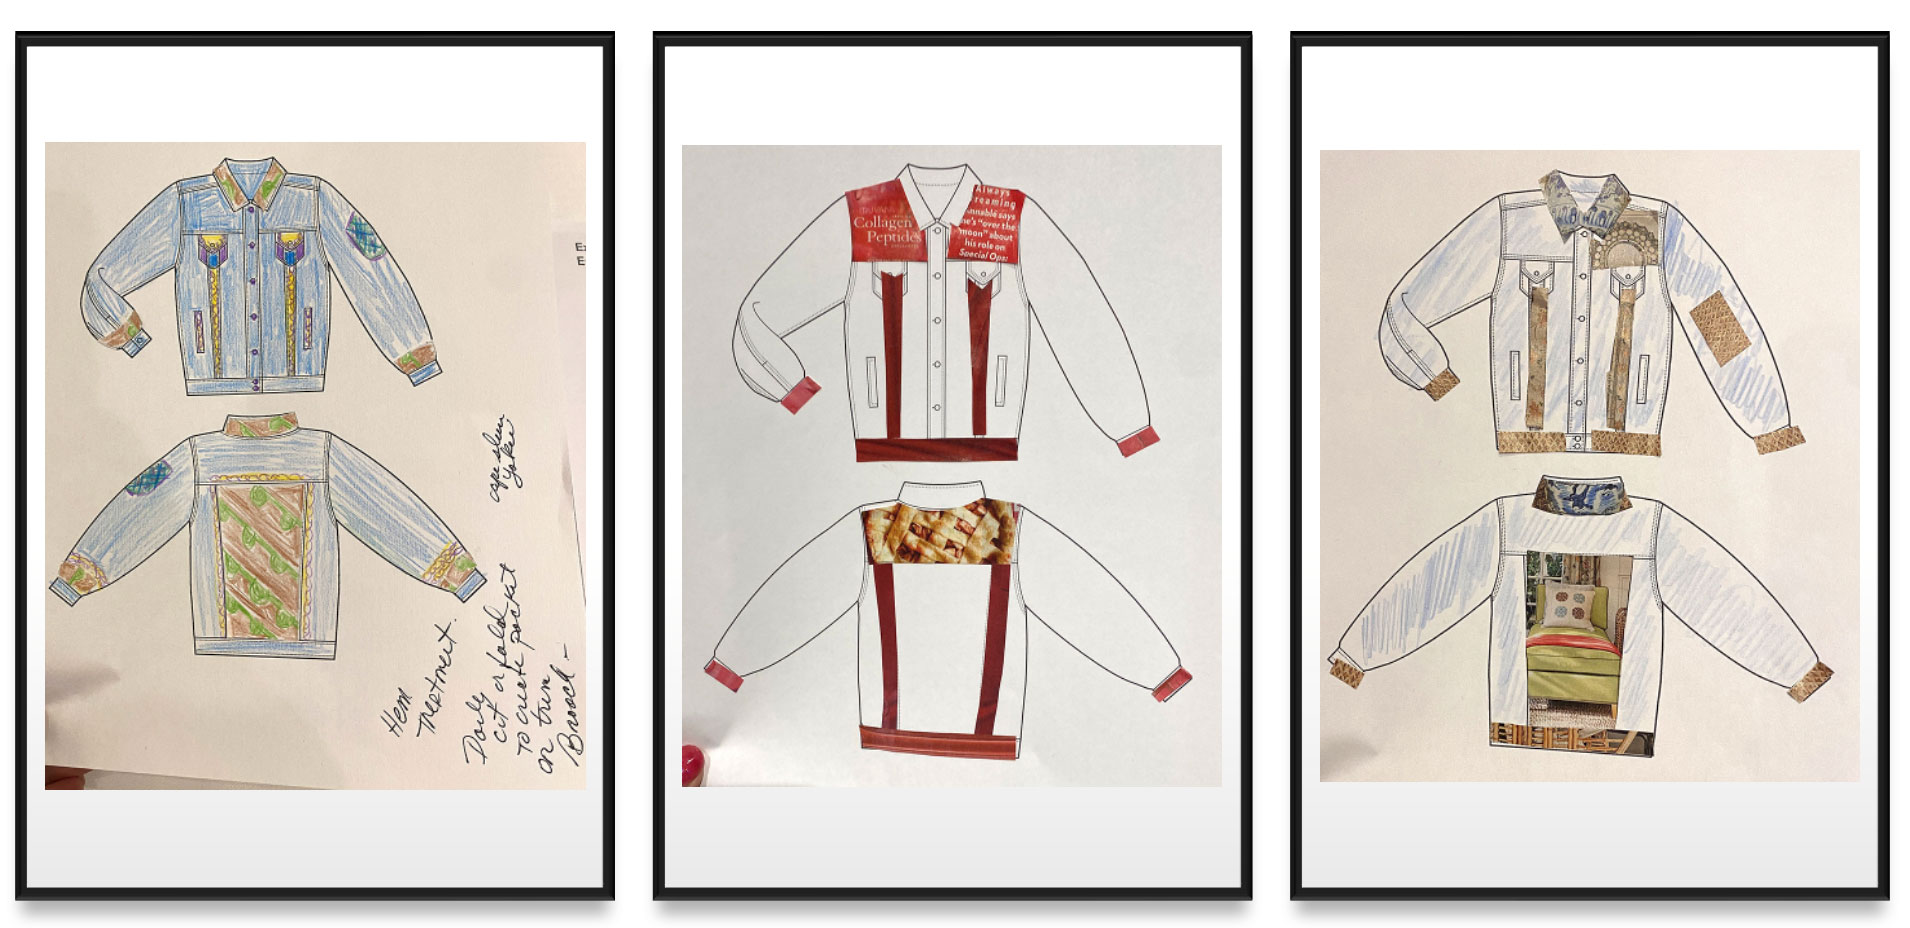
This approach involves working with an existing garment and creatively adding new fabrics or embellishments to portions of it. A great garment to start with would be a denim or jean jacket. The various panels of the traditional design offer multiple canvases for you to use. You could start with pencil and paper and a drawing of a jacket, and then creatively plan what you might want to put where. You could begin by cutting imagery from pages of magazines (which represent fabric) and glueing them in place to stir your imagination into action.
Ingredients:
- Red Denim Jacket
- Additional fabrics or trims
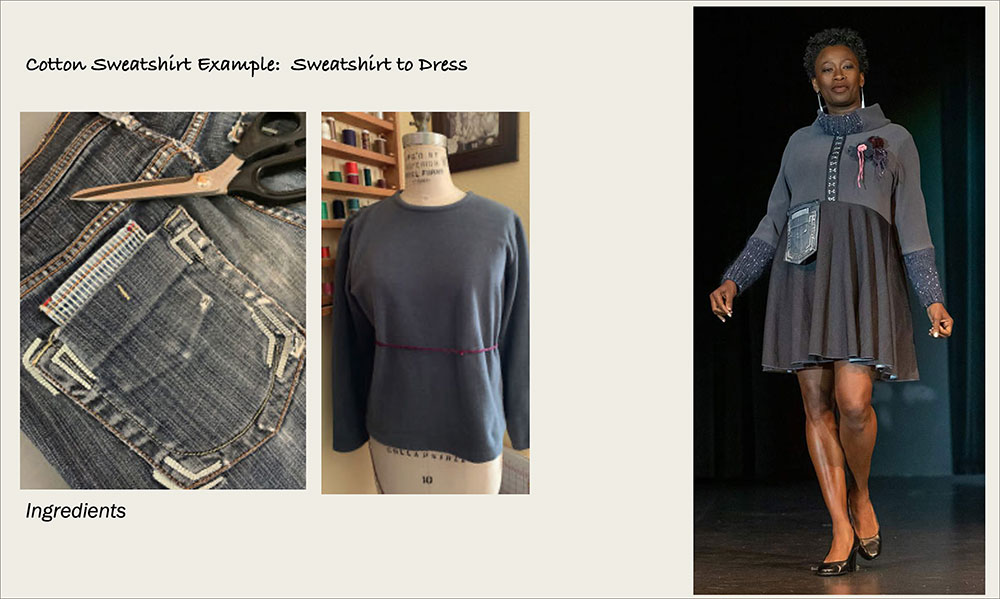
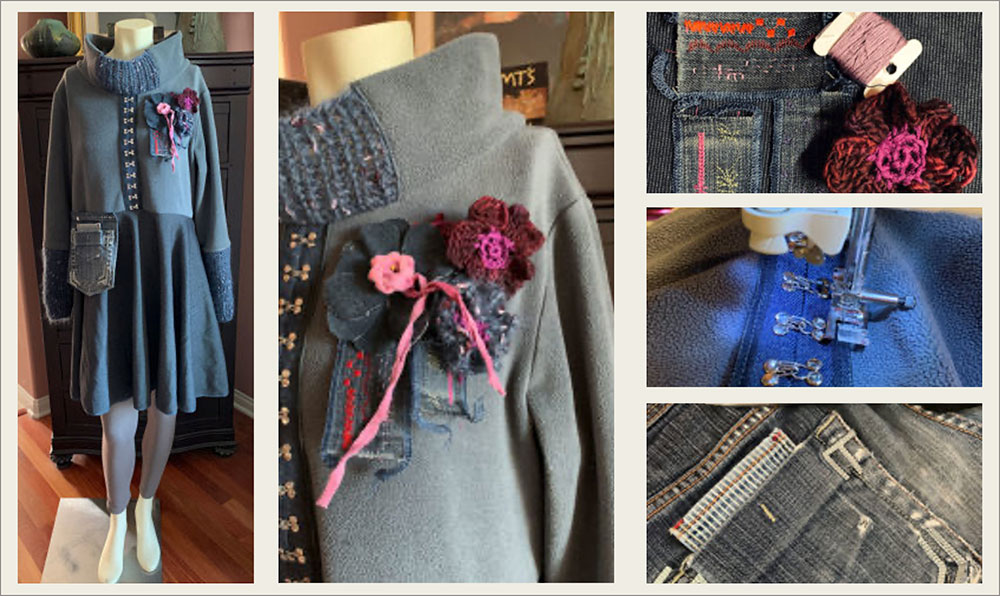
#2 Using a Base Garment as an Anchor
This is another relatively simple starting point. T-shirts, sweat shirts, and dress shirts are all good garments to use as a base. It is often helpful to start with a garment that is larger than you would normally wear. The garment becomes your anchor, and you edit it. Grab some trims, other fabrics, and commence to explore. Check out my Pinterest page to get some inspiration.
To edit a base, you could:
- Cut a new neckline
- Slash it up the center to turn it into a jacket
- Shorten the body or sleeve length.
- Embellish it
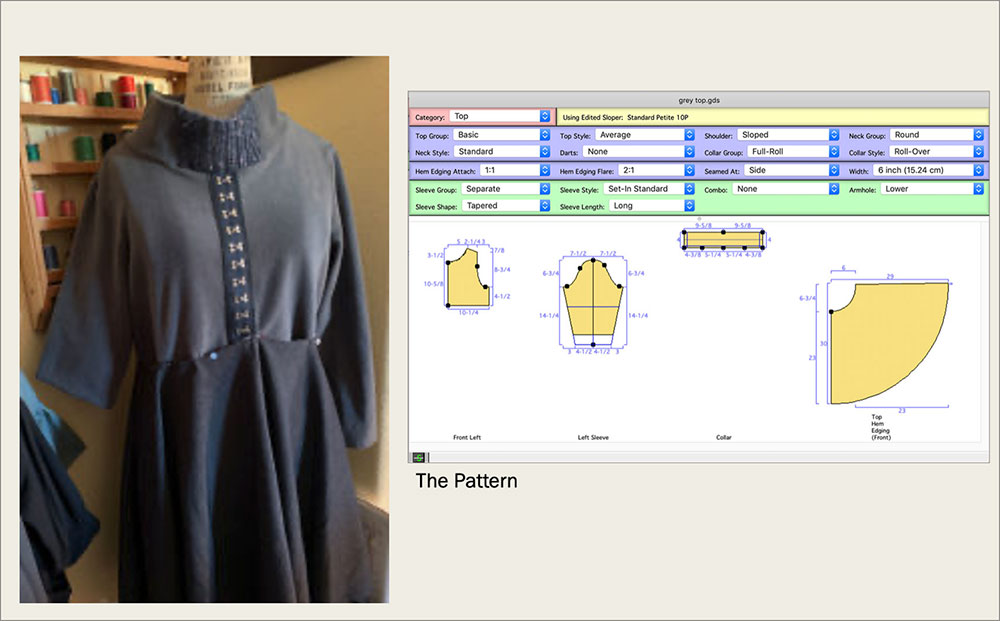
I often use Garment Designer to create the new neckline shape, or to build the pattern for an additional part of the garment. The dress below demonstrates the technique.
Ingredients:
- Polar Fleece Pullover
- Denim Jeans
- Remnant of a knit fabric
- Yarn and trims
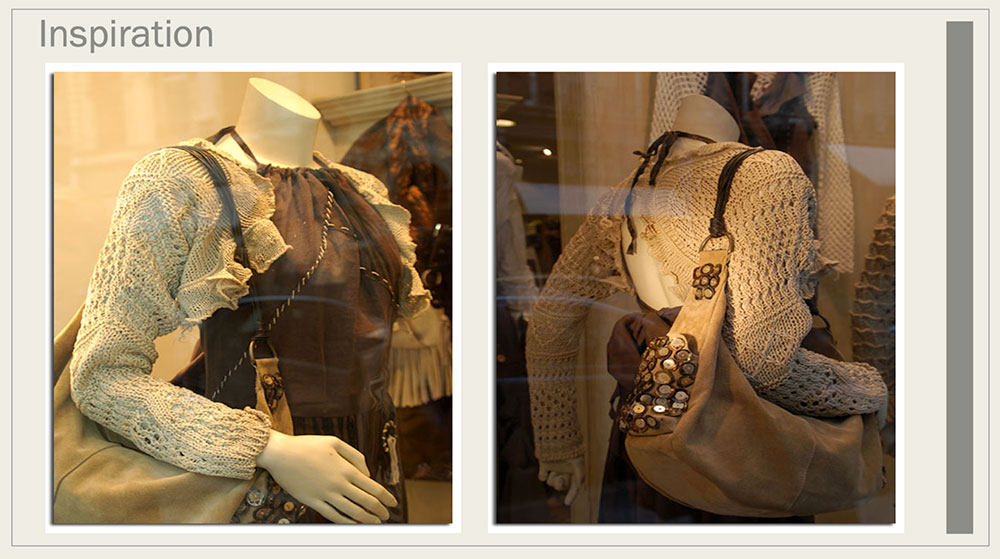
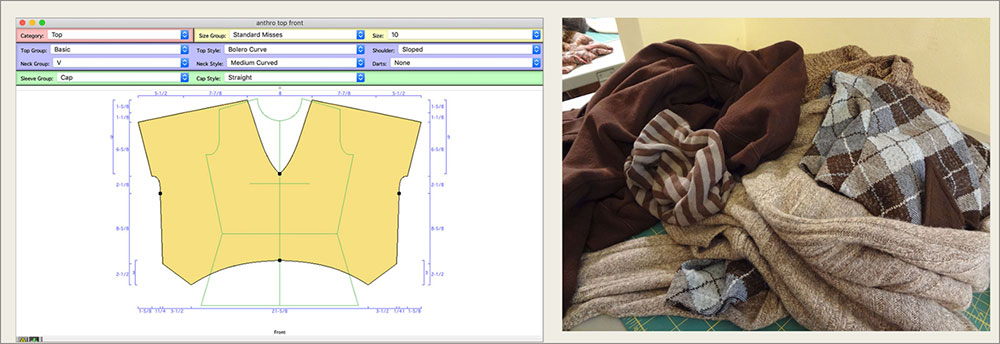
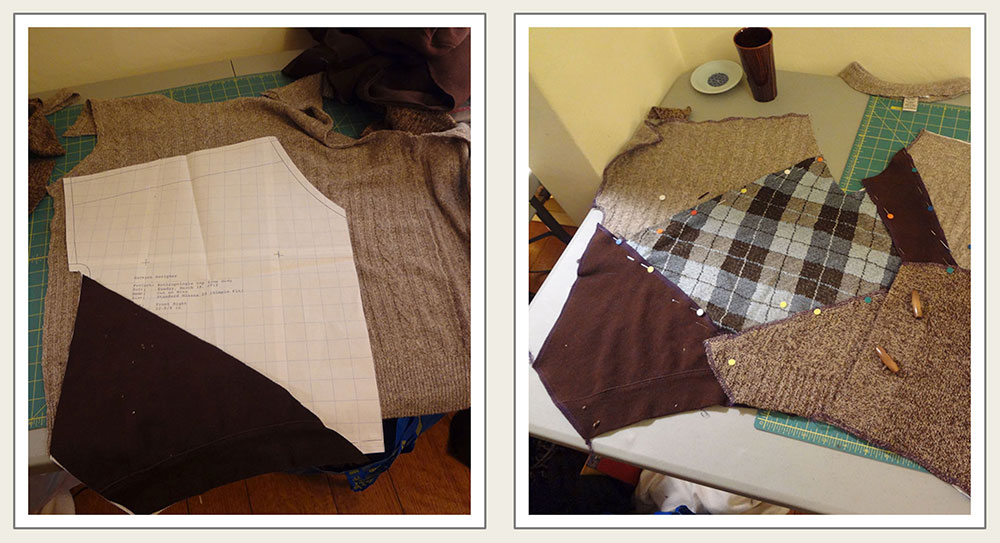
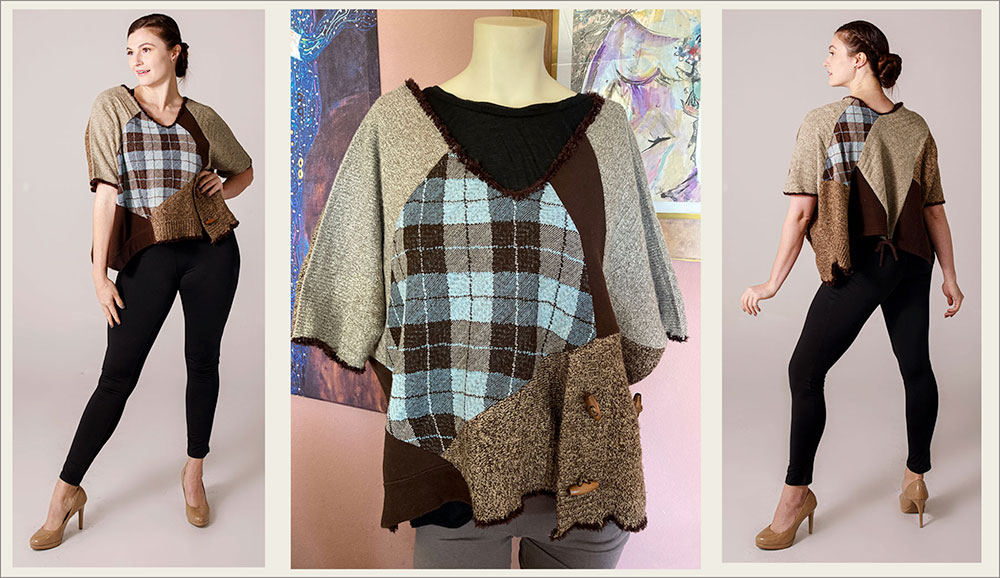
#3. Transformation: Recut/Restyle an Existing Garment
In this approach, you simply take any garment and recut it to build a new one. Again, a larger garment provides more flexibility in the designs you can create as you cut out a smaller piece.
Ingredients:
- ‘Largish’ knit dress
The example below starts with a long, knit sweater dress that is transformed into a bolero jacket top. You can see the inspiration I used below and the pattern that I created in Garment Designer. I did build a full-scale polar fleece prototype to test the pattern and was pleased to see it worked. Then, I cut the new garment and serged around all the edges. I joined all pieces and then use unraveled yarn to crochet around the edges


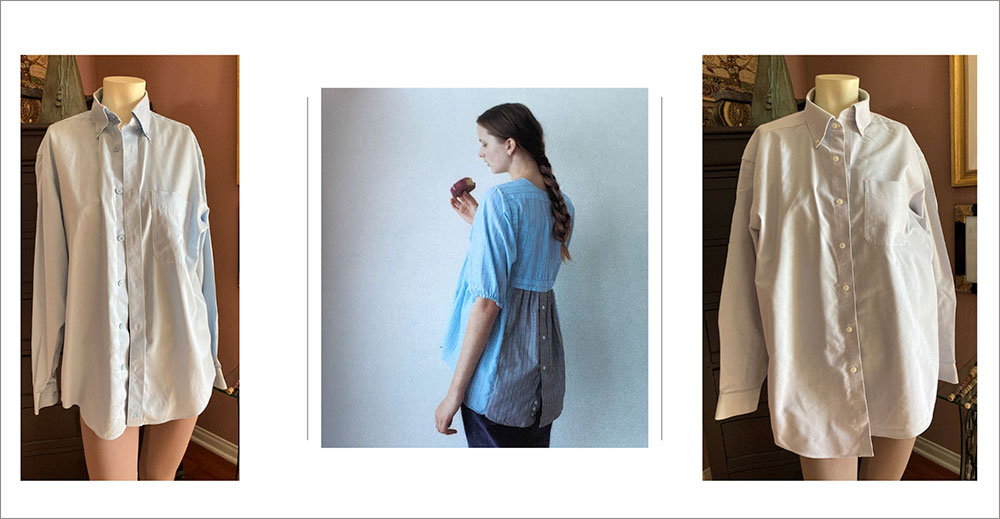
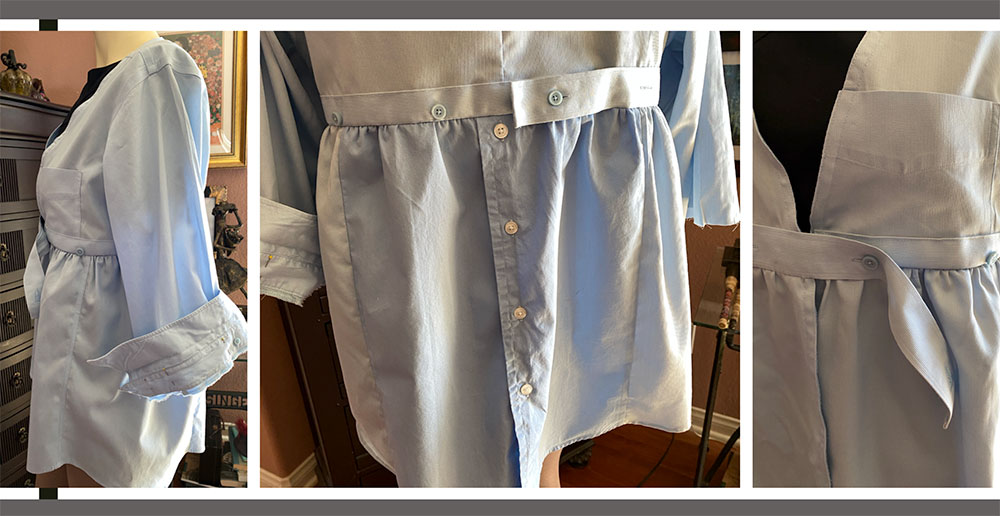
#4. Splice Garments and Rejoin
In this approach you take two or more garments, cut them apart and then rejoin them in a new way. It works well to use multiples of the same garment (e.g. a man’s dress shirt), but that is not a strict rule.
I used an inspiration from a Japanese Upcycling book. I took two size Large men’s dress shirts, and cut them apart and rejoined them.
Ingredients:
- Two men’s shirts, size Large

#5. Using a Pattern Template
A pattern template is a starting pattern that you used to define the shape of your garment. It could be a favorite pattern or one you develop. It is best to keep the shape of the garment simple and let the fabric you build take front stage. Basically, you lay the pattern down and begin to audition and piece portions of your collected clothing together. I generally start with one or two key pieces, positioned with some thought, and then build from there. For example, I might cut a portion of a sweatshirt out, maintaining the ribbed bottom, and then lay that down on my pattern aligning the hems. I build from there with the next piece. I use a lot of cutting and serging of raw edges in this technique.
Ingredients:
- A pattern to use as a template
- A collection of garments or garment pieces that work together well
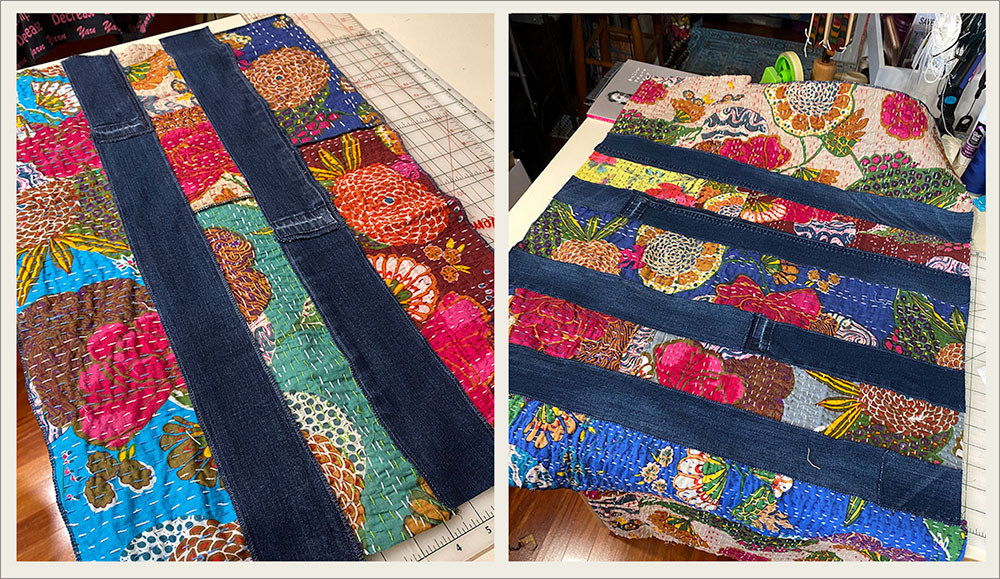
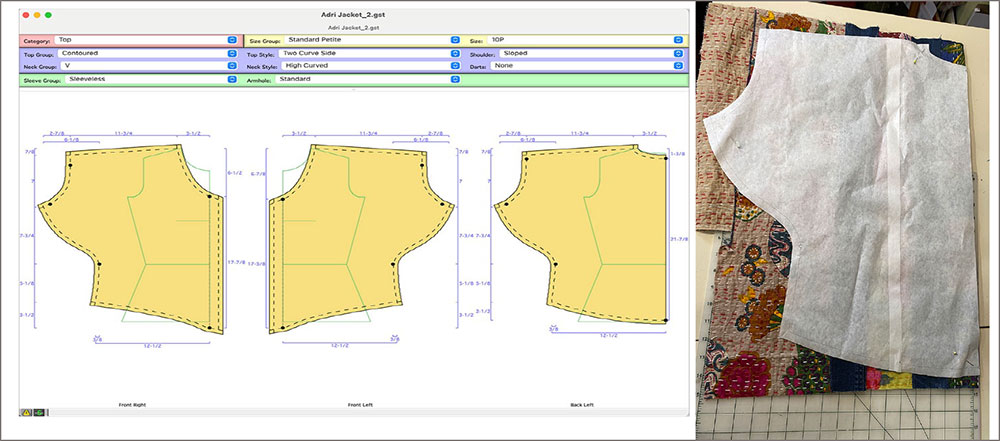
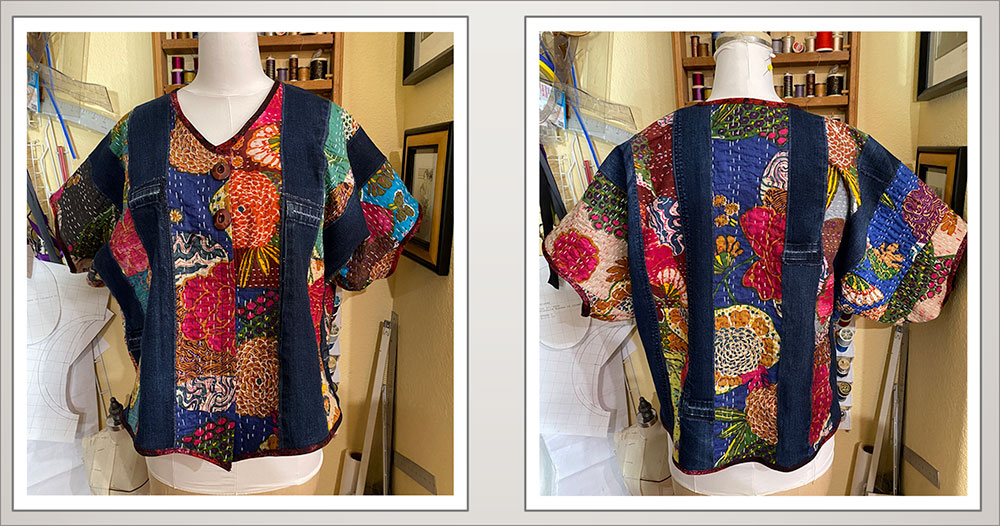
#6. Creating Your Own Fabric from Recycled Goods
A completely different approach involves building fabric from collected clothing or remnants and then cutting a garment from that fabric. I think Denim is a great fabric to be considered for use in this process. In the example below I started with a pair of blue jeans and some pieces of Kantha cloth I had purchased as part of a bundle. I cut strips of each and pieced them vertically, if necessary. I then serged all the lengthwise edges. You can explore with strip width and with placement.
Ingredients:
- Denim blue jeans
- Kantha cloth pieces
- Pattern
7. Compounding Multiple ‘same’ Pieces
This is a super creative method that involves using multiples of one part of a garment. The example below, created by Anni Edwards, uses multiple plackets and bands. This was one of many garments featured in a museum exhibit I curated several years ago, entitled Second-Time Around at Visions Museum of Textile Art in San Diego, California.

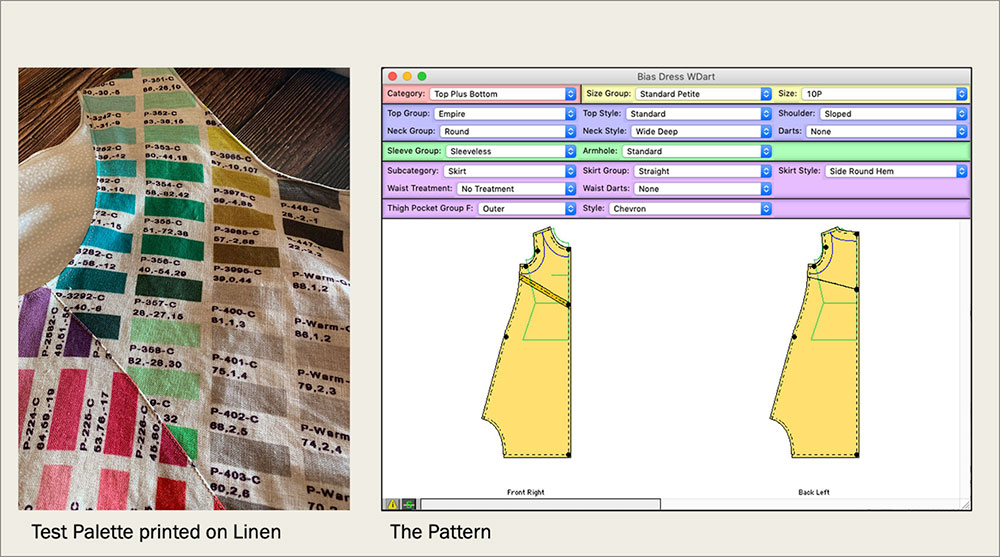
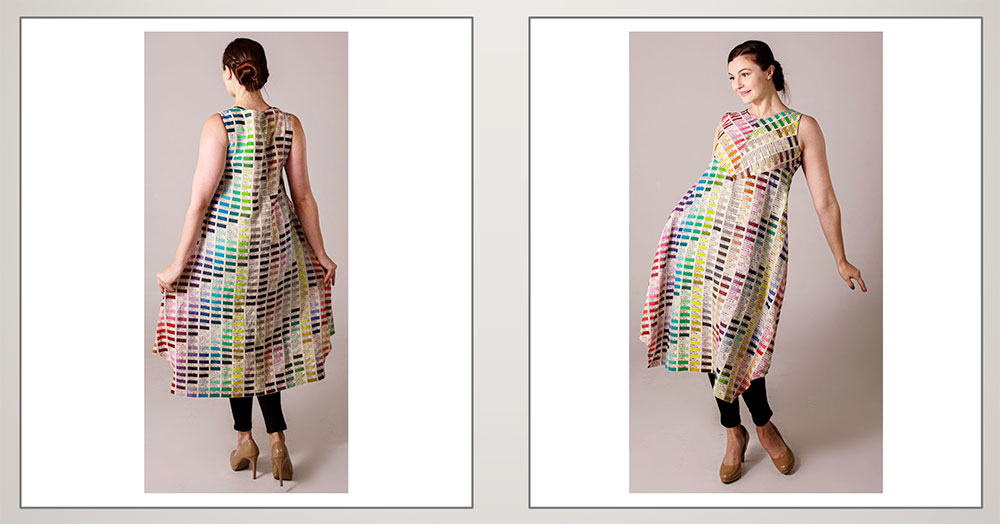
#8. Recycle Waste Fabric
In this approach, you take some non-garment item that would be considered waste and use that to create your new item.
In the example below, I used waste test fabric used by a digital printing company in Lyon, France. Companies often print their color palette on fabric so that their customers can see the exact color they would get on their fabric and choose their colors directly from the sample fabric. Other examples of waste fabric items would be shower curtains, sheets, vintage table cloths, etc.
Ingredients:
- Waste Fabric
- Pattern
You have now been introduced to eight different techniques for creating upcyled clothing. I hope you are inspired to try your hand at a few projects. As you can see, there are multiple approaches to choose from. The advantages are many, but for me, the top two win-wins are being sustainable and doing so in a creative way.
~~Susan Lazear, Creative Director, Cochenille Design Studio~~