by Lisbeth Wahl, Peschiera del Garda, Italy
Inspiration
Lately I’m very inspired by the Zero Waste Pattern making. My previous knowledge of zero waste making was based on historical models, such as this:
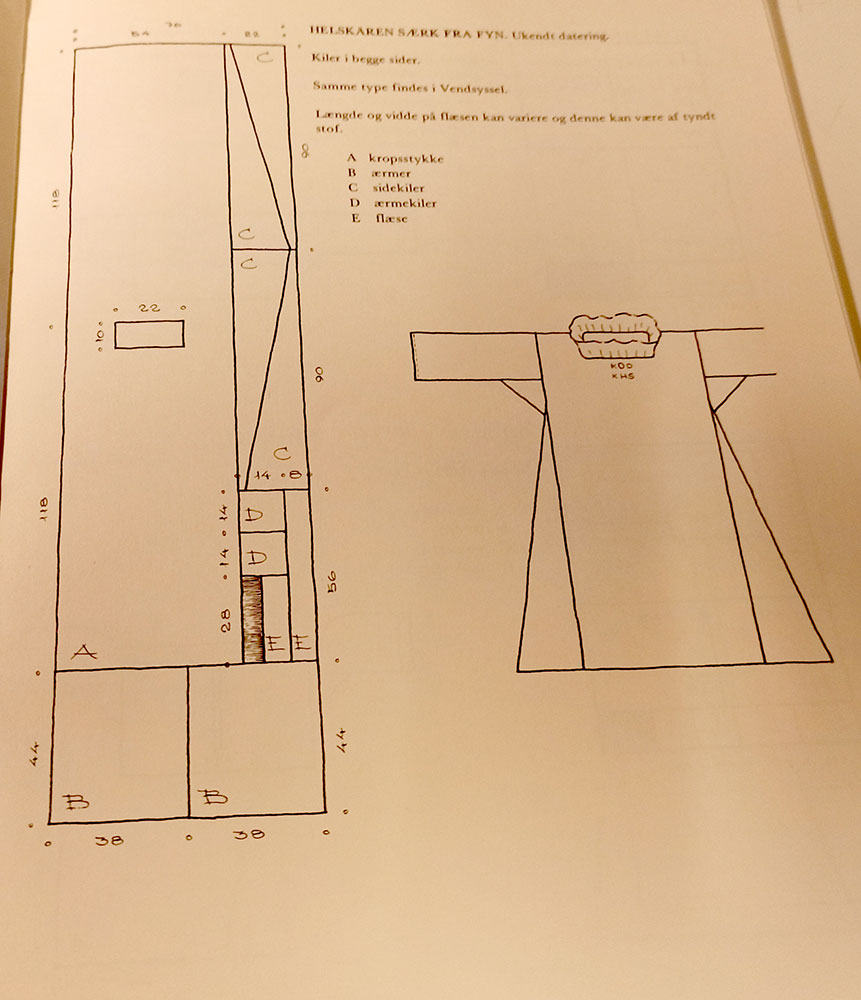
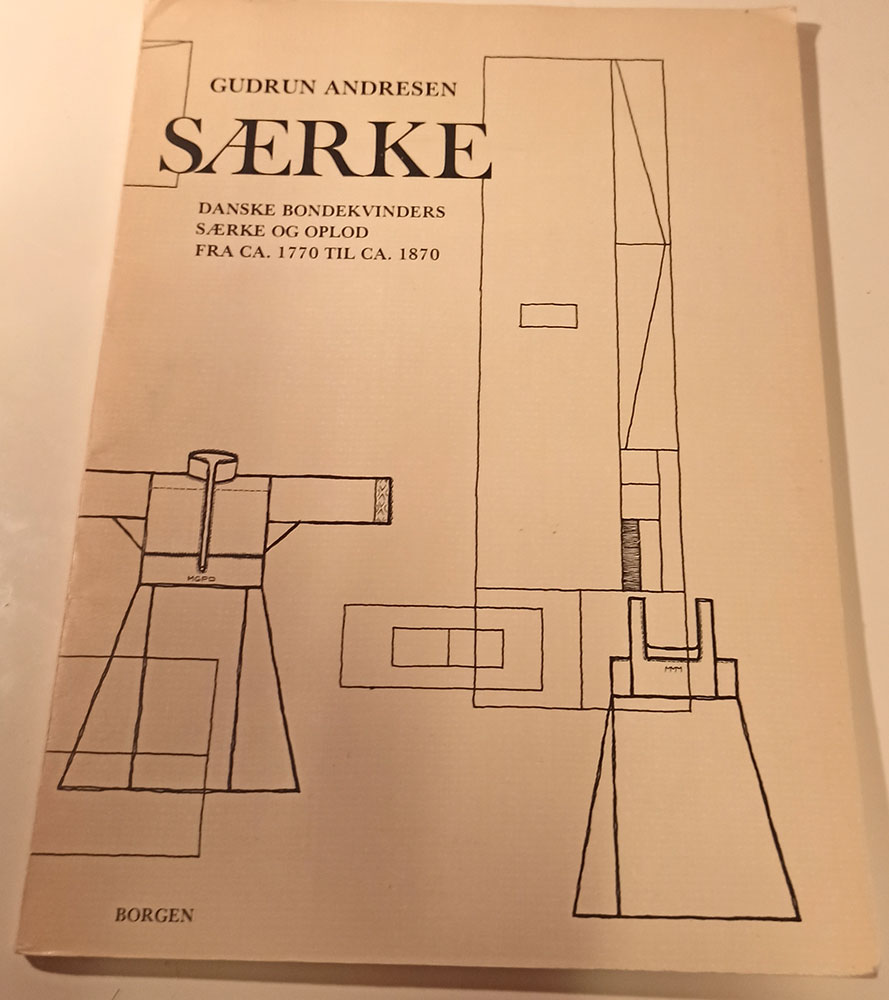
… from the Danish book:
where the amount of time put into harvesting the fibers, preparing them for spinning, the actual spinning and weaving naturally led to the need of making the most of the fabric, maximizing the use of the fabric width to create the shape and so on. Most of the patterns were/are based on simple shapes: rectangels, squares, triangels.
So when I stumbled upon the book:
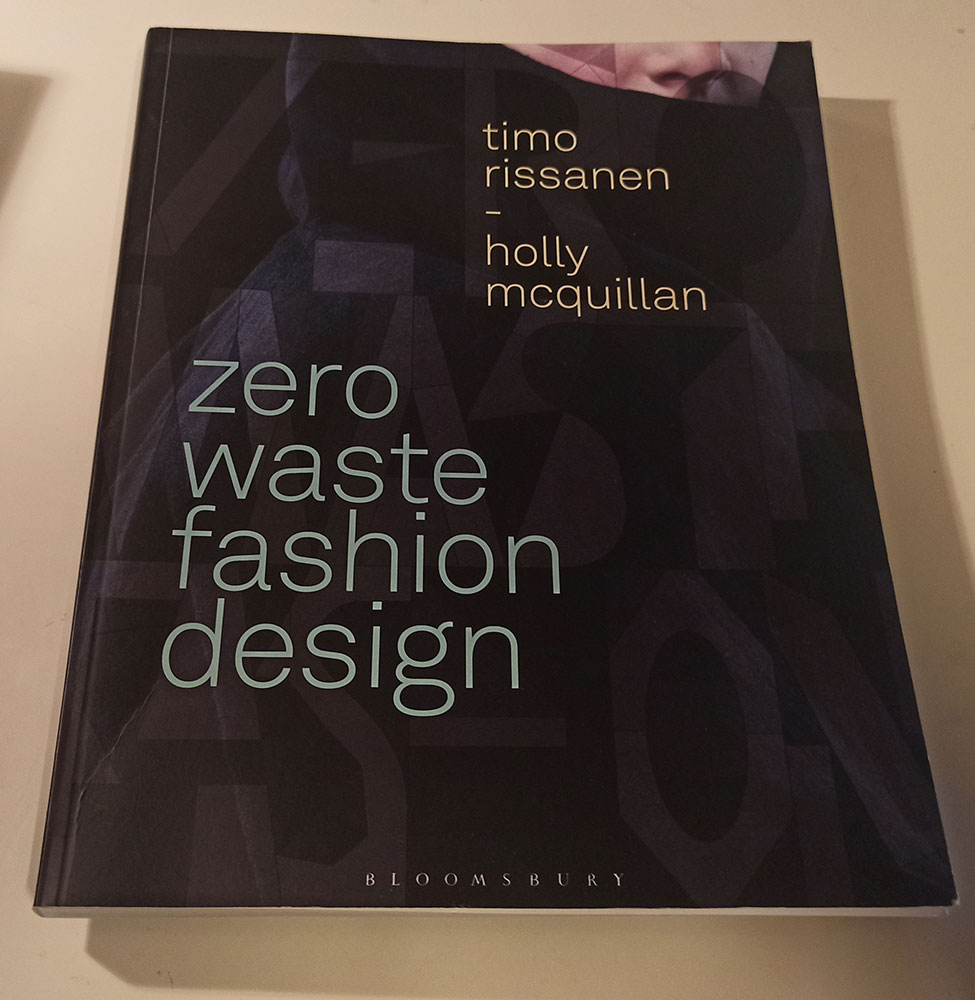
So full of curves and playful exploration within the zero waste principles. I was hooked!
It blew my mind and turned everything I had learned about Pattern making upside down. The whole approach to creating the garment being so different.
More about that in the following project.
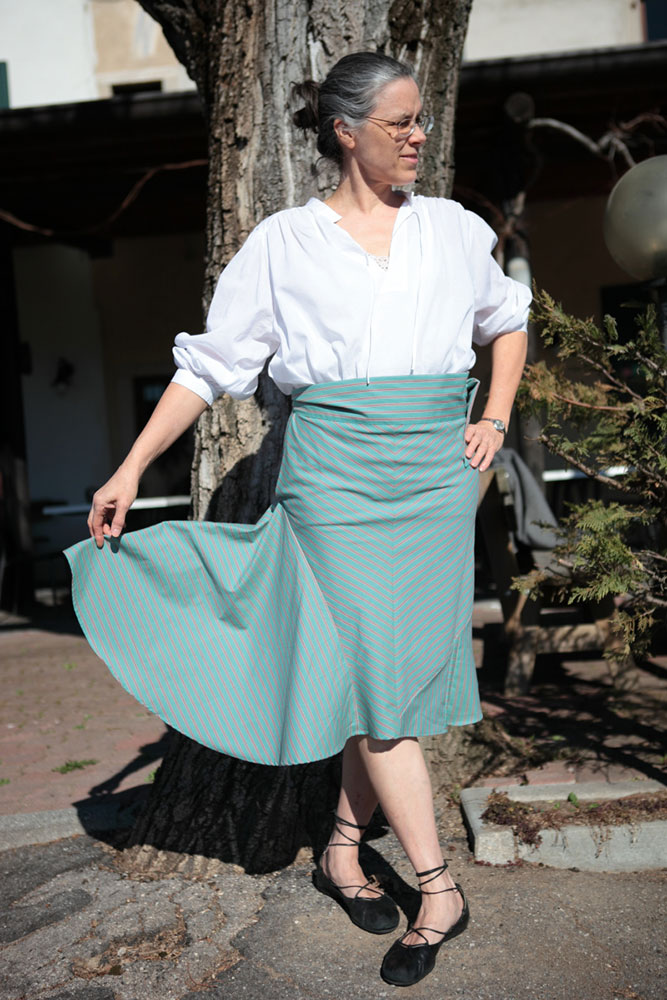
I set myself up for the Garment Designer Stripes challenge to use a piece of shirt cotton from my stash to create a skirt with little (preferably no) waste.
One evening I just felt like watching an easy romantic movie and BANG came across this skirt, captured in the Danish movie “The Big Day” (2005).
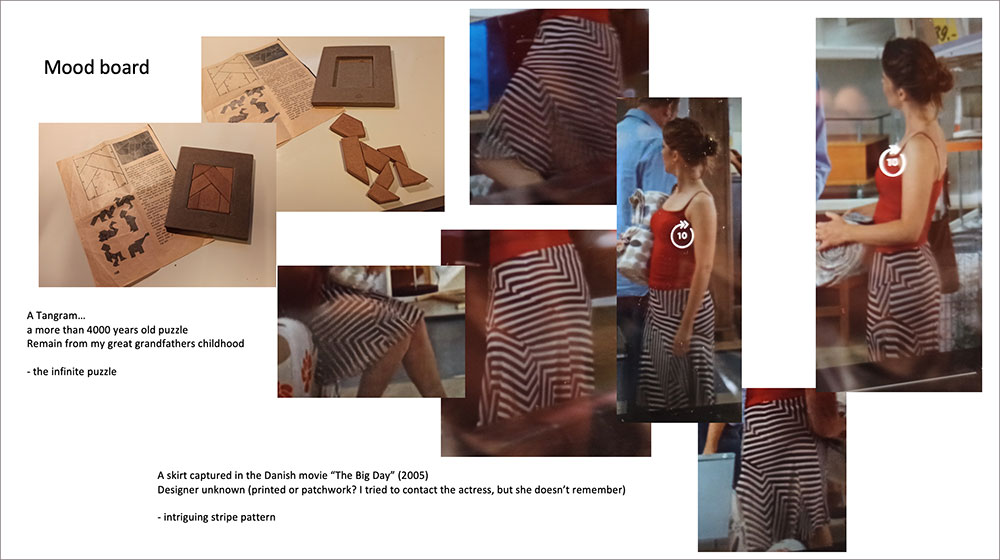
I’ve tried to trace the designer, but haven’t succeeded yet, so actually I’ve no idea if it is made of printed fabric or a patchwork.
I find the pattern so intriguing
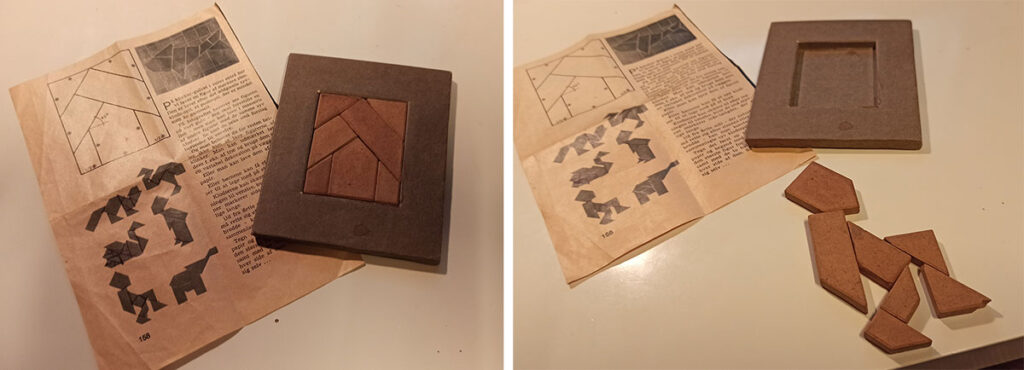
On the other hand I have this Tangram. A more than 4000 year old kind of puzzle, a remnant from my great grandfathers childhood. The infinite puzzle, where you can continually create and discover new designs, placing the pieces in different ways.
So these where my kick starters:
- An intriguing movie skirt
- A Tangram
- A square piece of striped fabric, in my stash.
Pattern developed in Garment Designer:
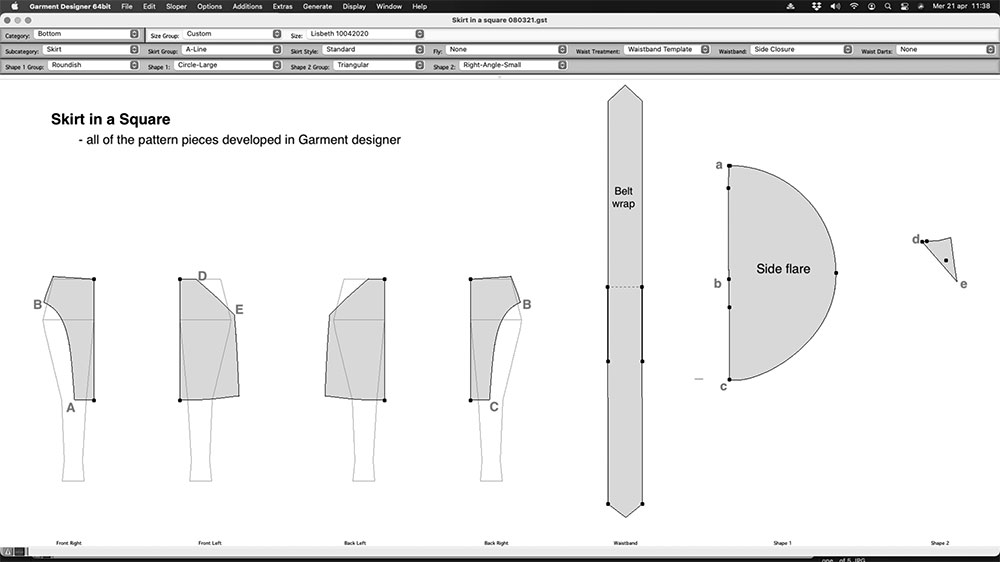
- I started out with a simple skirt form, using my measurements.
- I figured I would have enough fabric to make it just below knee length.
- I choose the Skirt group: A-Line, in order to have the possibility to create a curve on the side seam.
- The curve ABC was created on one side seam. The length of the curve was measured.
- A half-circle shape was created (Shape 1: Circle-large), for a side flare. The length abc equals the length of the ABC curve. On the fabric abc was positioned along the selvedge.
- A line was drawn DE/de on the front and back panels and separated. de (two pieces; one for the front and one for the back) were positioned along the grain line on the fabric.
- The width of the belt wrap is based on how much fabric I had available.
Quarter scale Pattern
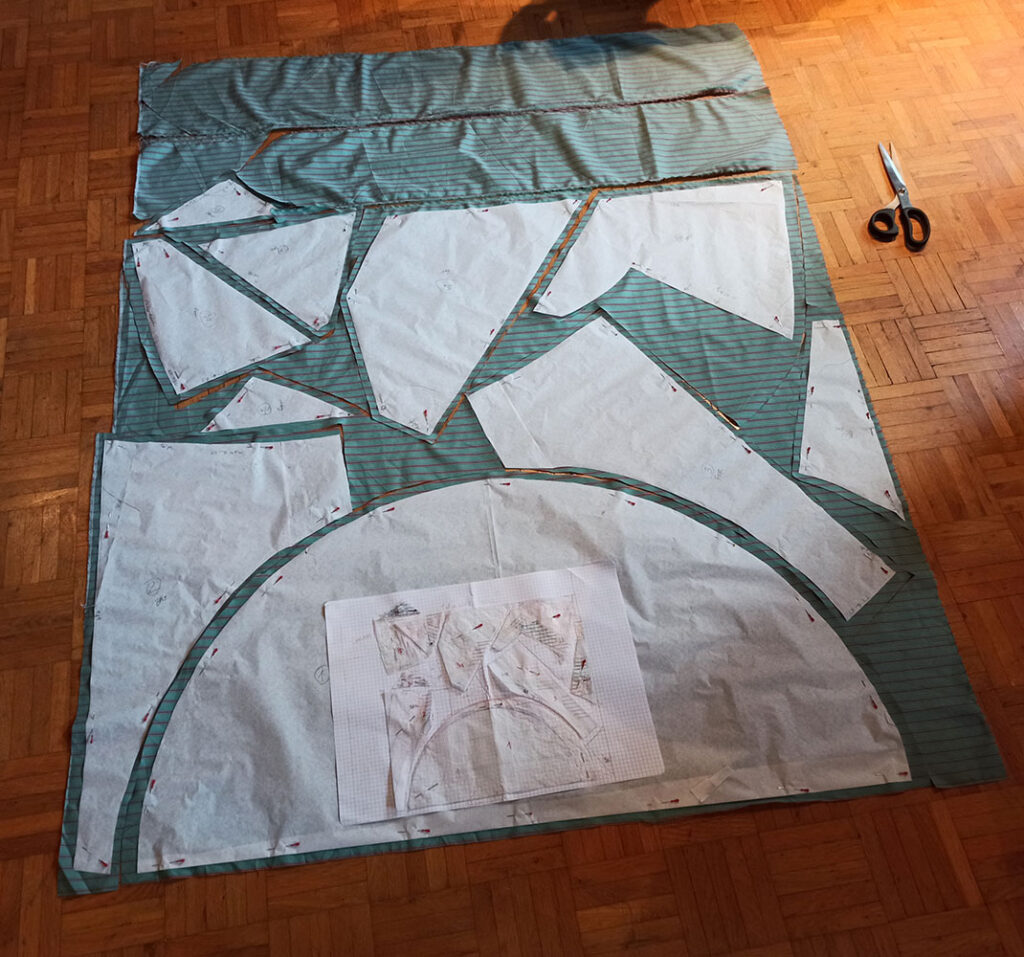
Thereafter I cut out a quarter scale pattern (of the pattern designed in GD) in transparent baking paper, so I could easily have an overview of the overall design and be facilitated in marking the direction of the stripes.
Then I drew the surface area of my fabric on a squared piece of paper.
My aim was to make the pattern pieces match the surface area.
Pattern pieces: (no seam allowance incorporated)
1. Side flare
2. All back pieces
3. All front pieces
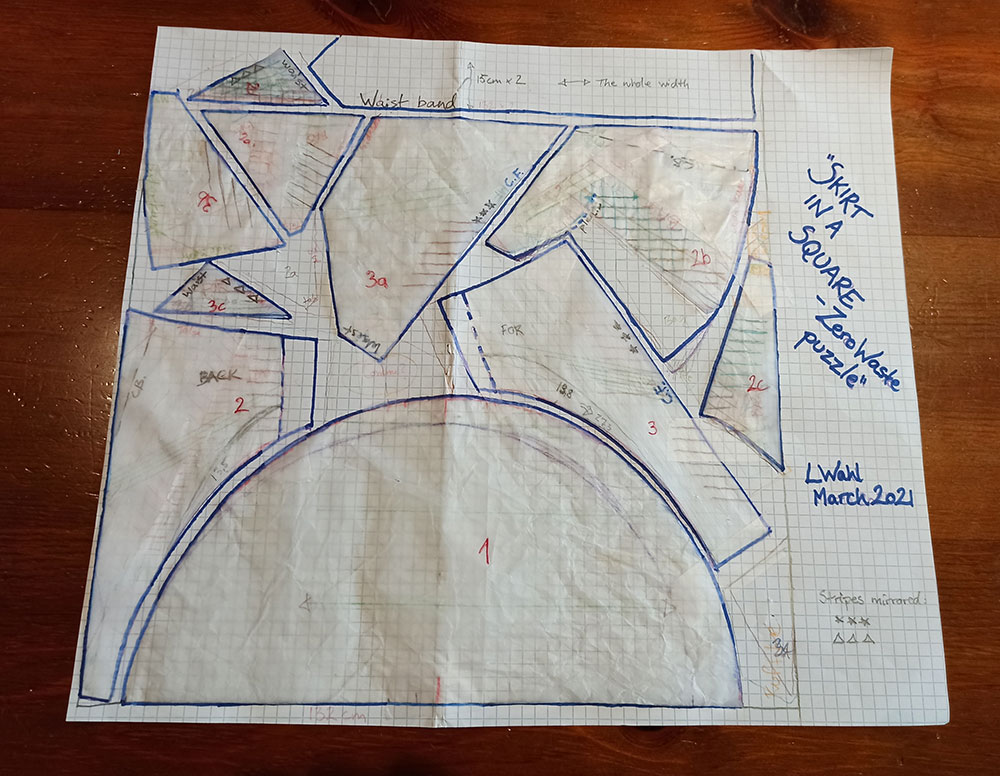
The big puzzle
First piece 1 was positioned along the selvedge. Piece 2 was laid down to match the curve of piece 1, and the Center back line was slightly tilted to go along the cutted edge of the fabric (left side on the illustration). On the other hand piece 3 was laid down to mach the curve of piece 1, but put strictly on the bias. With the help of the underlying squared paper the grain directions were marked. From piece 3 I transferred the stripes direction to its counterpart 3a, to have the stripes match in the center front line. I wanted to keep the upper shape of piece 3a large, so I figured the only place I could lay it was in the position that you see on the illustration (to have the stripes matching). So the diagonal line along the grain came quite naturally (seperating 3b from 3a).
I also transferred the stripes direction on the pieces 3c & 2d.
At this point I had the pieces 1, 2, 3 & 3a positioned, with the stripes directions marked on 3c & 2d as well. The big puzzle could begin.
2b got its form by trying to lay down the piece (2a, 2b and 2c were still united in one piece) along the grain line next to 3a, touching the cutted edge of the fabric (seen on the right). So where 2b meet 3a and 3 I drew and cut the shaping lines. On piece 2b, with a closer look you will notice that a part is without baking paper, because here I decided to add a couple of pleats to create a little more volume for the movement. So 2c has the shape of the cut away piece from 2b.
Thereafter the pieces left to position were 2a, 2d, 3b and 3c.
In the beginning I tried to puzzle the 3d inside the suare and have the two parts of the waist band/ belt wrap cover the whole width of the fabric. If I hadn’t been dependent on the direction of the stripes, it wouldn’t have been a problem…
As you might notice in the upper left corner are pencil drawings beneath the baking paper, as the pieces 2a and 3b initially were in other positions. But I didn’t find the stripe positions interesting in the overall design. So it got sacrificed and a new layout had to be done.
The total amount of cut offs
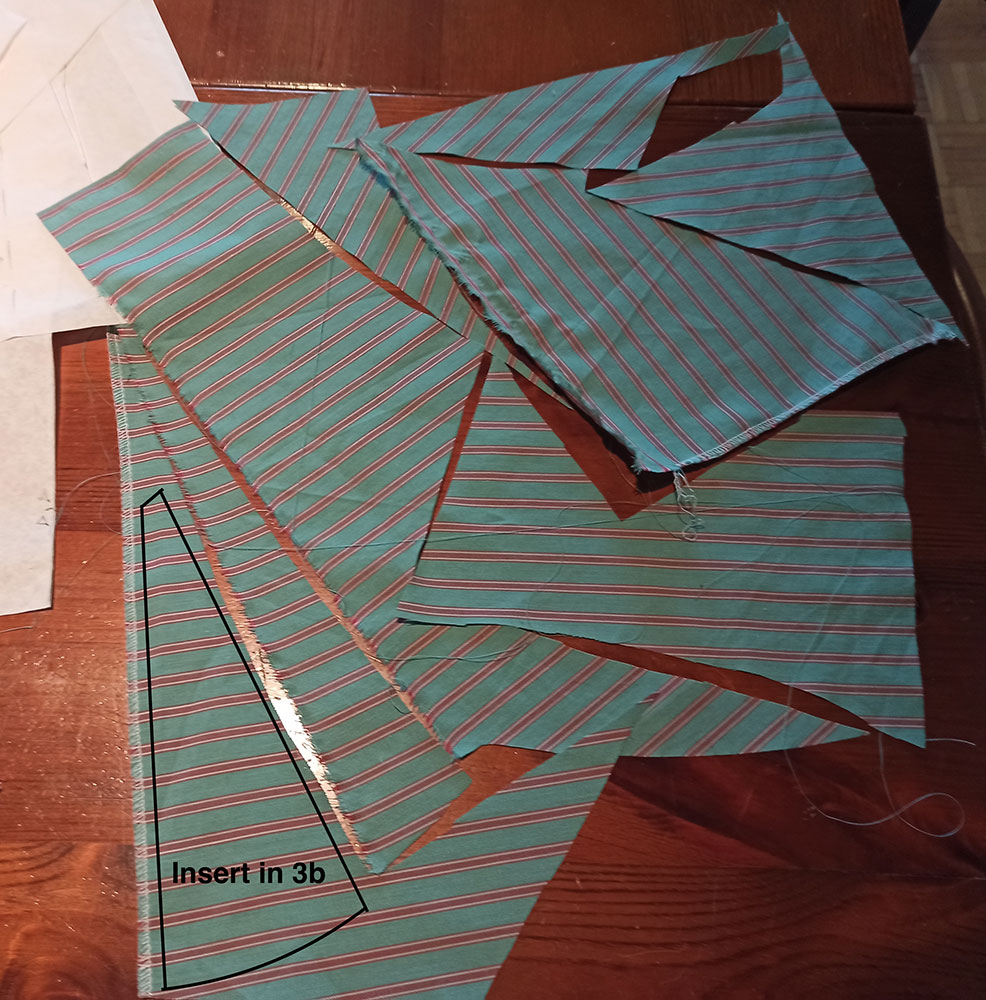
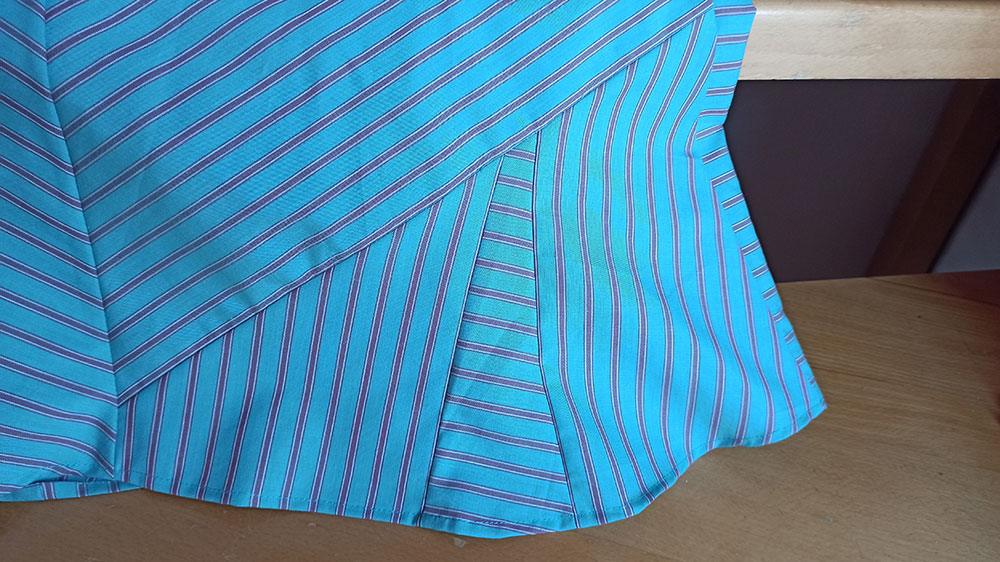
The insert, in piece 3b, I choose to add at the very end. When the whole skirt had been sewn, piece 3b seemed to “flat”, so I added a little rhythmic flare.
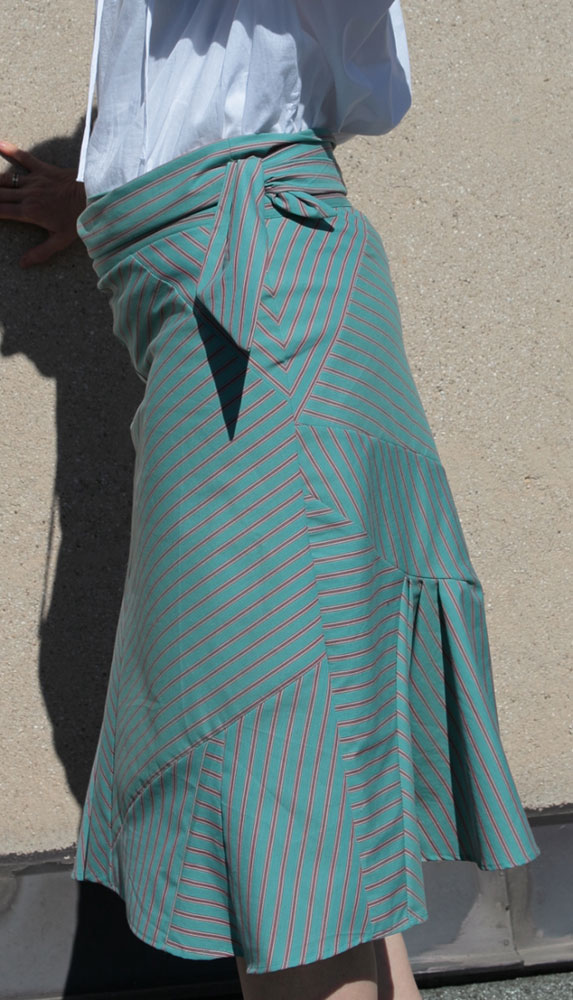
The position af the pattern pieces in the finished skirt.
Numbers corresponding to the previous images.

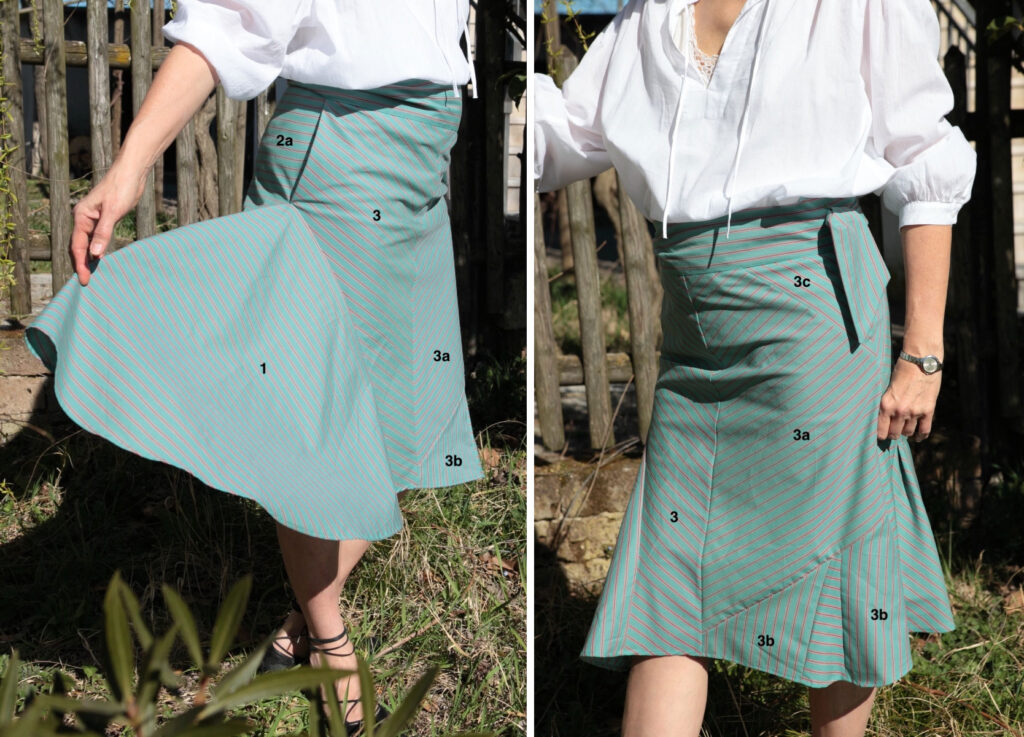
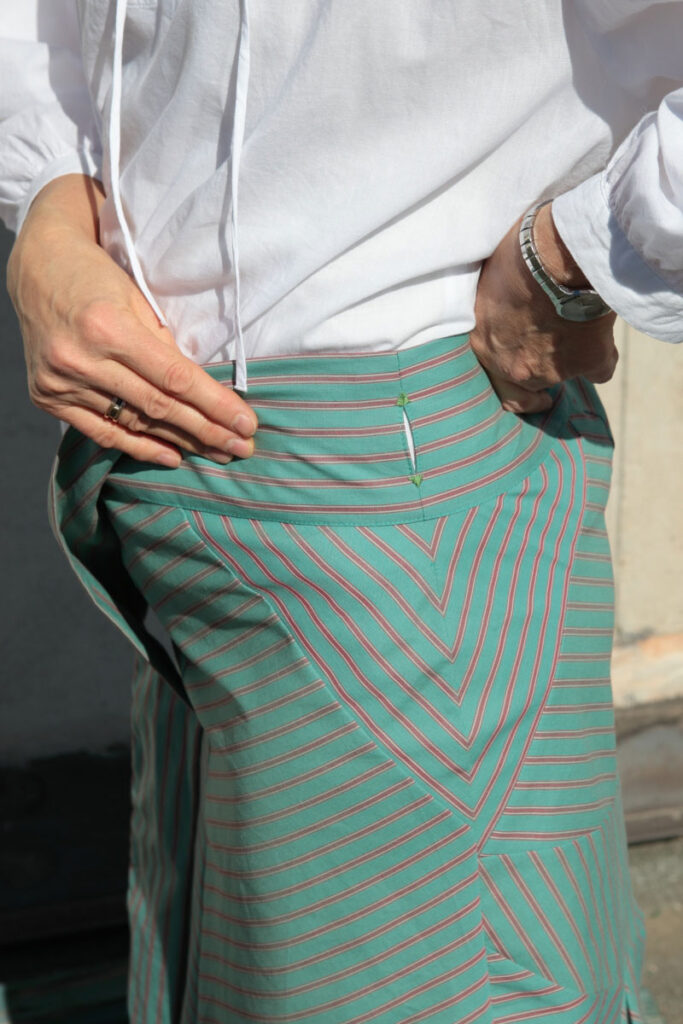
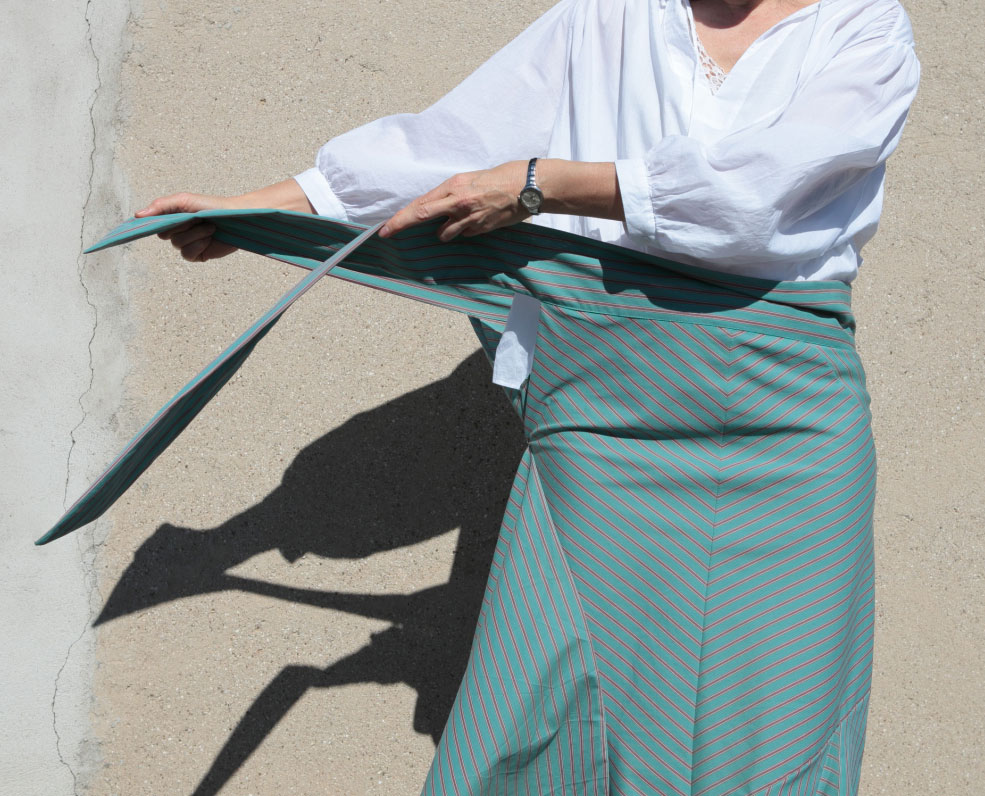
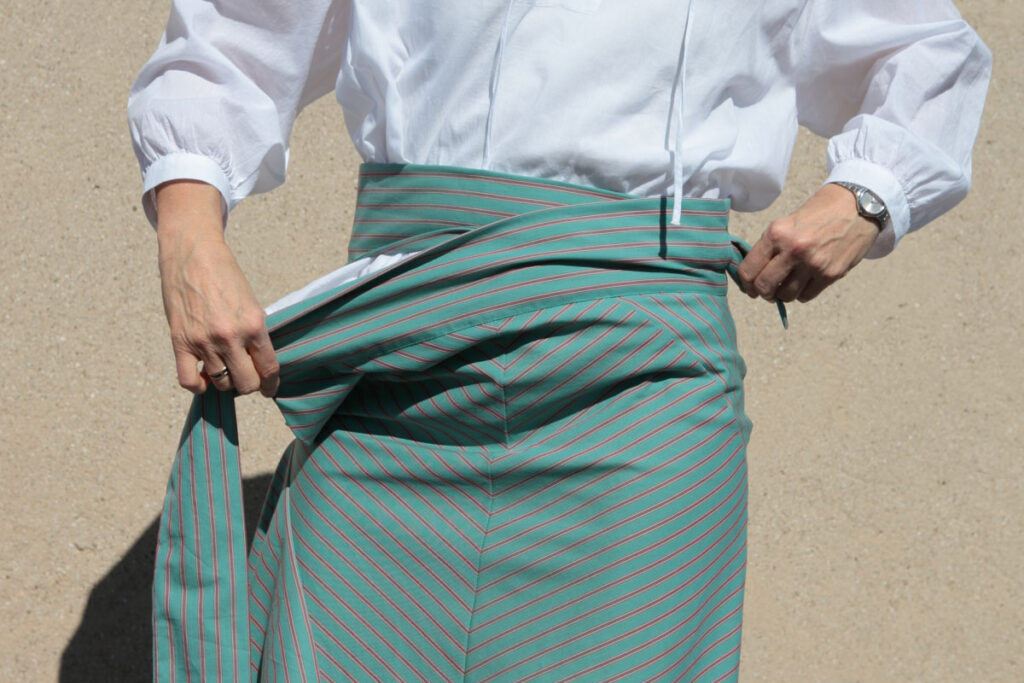
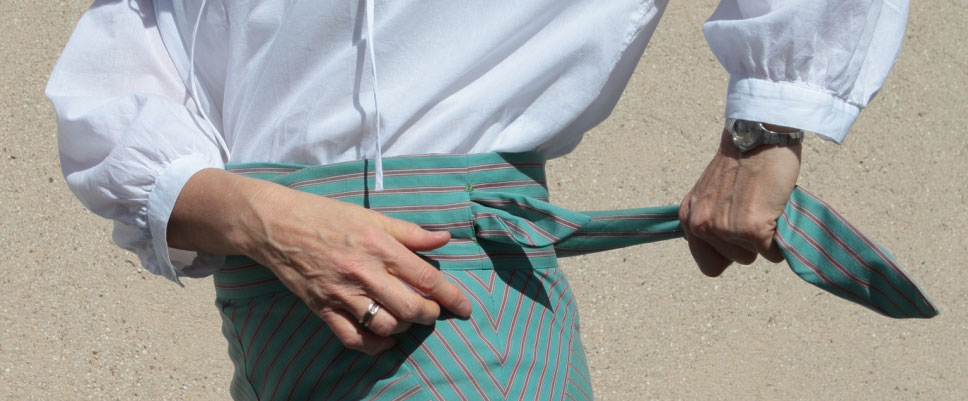
The Waist Band/Belt Wrap
The Aftermath
Going for the zero waste full use of the fabric is a continuous work in progress. It’s a mind-blowing journey, where you have a completely different approach to pattern making. A whole new world seems to be unfolding. Suddenly I see patterns everywhere! In the veins of a leaf, in the “cut” of the fields surronding… it’s quite playful and enjoyable.
Some of the challenges I met in this specific project was that I had decided to have the stripes meeting in certain lines; Center front(marked:***) and in the upper side seam, where the two triangular shapes meet.
It would have been useful to have added a bit more seam allowance (some was eaten up in matching the stripes) and create a little more ease. I find this skirt slightly to tight in the fitting.
As you notice here there seem to be a lot of cut- offs. I had imagined to create an invisible pocket in the side seam, made out of cut-offs. I did give it a try. But I found it too bulky and dropped it.
Considerations to make when going for creating a Zero waste (or low waste) pattern, is evaluating which lines/measurements are essential for the fit, and which are flexible. For instance what would have happened if I didn’t hold on to the hemline/the final length of the skirt? What would happen if I had let the “bottom” pieces make the most of the fabric available, in the position they are in now? Take for instance piece 3b, that here has a slightly curved hem line along the cutted edge of the fabric… or piece 2b (where I added two pleats), next to piece 2c.
Not to mention what happens if I want to replicate my pattern with another piece of fabric, that happens to be let’s say 10 cm/4 inches wider?
Or I want to grade it up to another person with a wider hip? It would probably result in quite a different layout, at least if the Zero waste principle is sought after.
I love the challenges unfolding along this journey. There is so much to explore, discover and learn.
Resources to Learn More
If you are keen on getting some inspirational input there is a very blooming community…
www.zerowastedesignonline.com has been founded recently. On Instagram: @zwdo_collective. This platform offers community calls, webinars, various forum and contact to other creaters ranging from beginner/home made to designers.
And If you’re plain curious, but it seems complicated I can highly recommend this book:
Easy to approach patterns in multiple sizes. No paper patterns. The patterns are drawn directly onto the fabric, based on your measurements. The book includes many ideas on how to develop the models further & tons of tips on details in the making.
The author’s contacts are: www.zerowastesewing.com with a great blog as well.
On Instagram: lizhaywood3754
You can also find me on Instagram: lisbeth.wahl.fiberart
Zero Waste Fashion Design by Holly McQuillan and Timo Rissanen (Bloomsbury 2018)
Zero Waste Sewing – 16 projects to make, wear and enjoy by Elizabeth M. Haywood (Cooatalaa press, Australia, 2020)
Særke – Danske bondekvinders særke og oplod fra ca. 1770 til ca.1870 by Gudrun Andresen (Borgen 1976)
Thanks for sharing your design process – so interesting to see how your inspirations all came together.
Thanks for the book mention too 🙂