We recently ran our France Digital Design Retreat in Valsonne, France. This is a collaborative effort with Label Graine, a digital fabric company there. Here, in this blog, I will share the process of creating an engineered printed design using Garment Designer pattern making software.
Garment Designer is a great pattern making software program which allows you to create garments that fit you as it can address your personal measurements. It is also a great creative tool, in more ways than one.
One of the unique ways of using Garment Designer is to create and print engineered imagery designs. What we mean by this is that you can lay imagery into the full scale pattern using Photoshop or Photoshop Elements, or a similar paint style program.
The general process is as follows and the example I am using was printed with Label Graine in Valsonne, France:
Prep Work
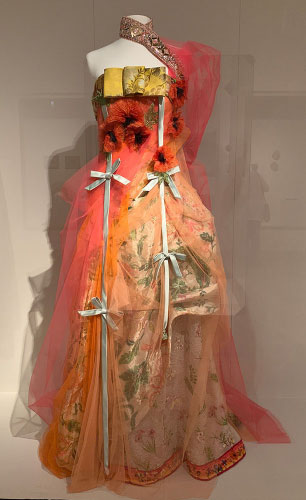
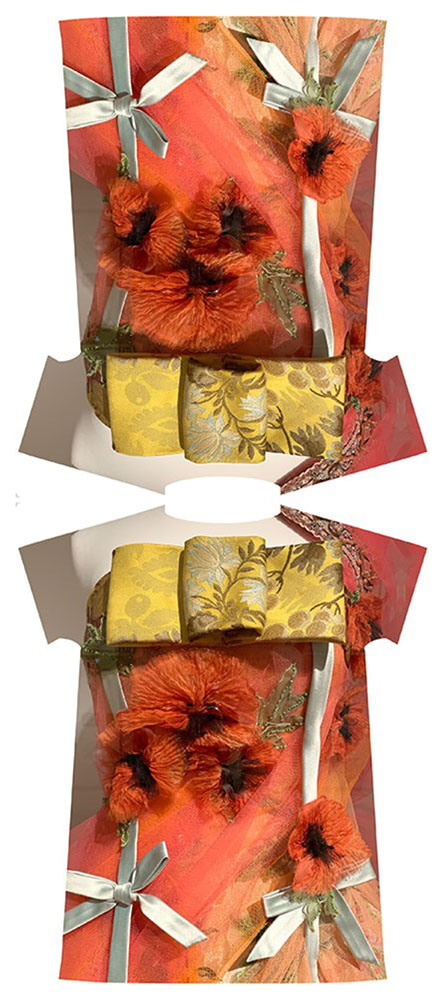
Find a photographic image (or images) that you want to use for your design. In this example, I chose a photograph I took at the Textile Museum in Lyon. It was of a dress by Christian Lacroix.
Think about the style of garment that would suit the imagery. Bear in mind that if the fabric design is the focus, you will want to keep your pattern design simple.
Explore digital printing companies (online) and the fabrics they offer. Every fabric has a printable width and you should note that, as it may influence your choice of garment width. I have used Spoonflower (https://www.spoonflower.com/) and a few other companies in past. Of course I have used Label Graine in Valsonne, France as well. (https://label-graine.fr/en/)
Pattern Design in Garment Designer
- Create the pattern you want in Garment Designer. As you can see, I chose a simple A-line dress with cap sleeves. Add hems and seam allowances.
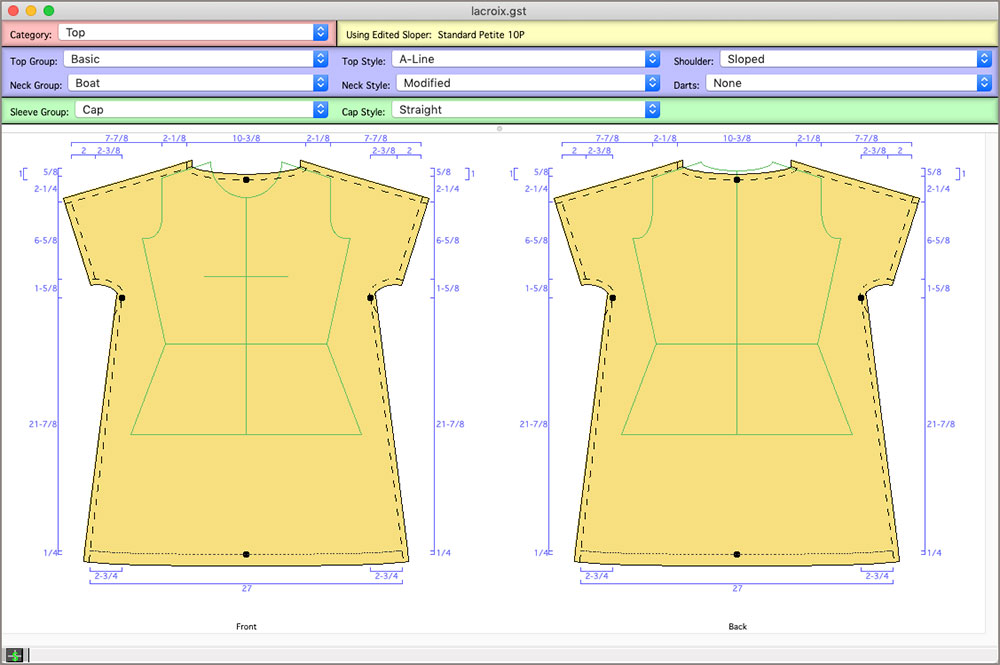
- Scale to Actual Size.
- Save the pattern as a PDF file. On the Mac this is simple. On Windows, you may need to explore freeware or other Print to PDF type software if you can’t get the Windows Print to PDF to work for you. Bullzip is an example of a program that Windows folk use. (https://www.bullzip.com/products/pdf/info.php). Another good utility (free) is CutePDF.
Prep Work
- Find a photographic image (or images) that you want to use for your design. In this example, I chose the Christian Lacroix dress.
- Think about how the style of garment that would suit the imagery. Bear in mind that if the fabric design is the focus, you will want to keep your pattern design simple.
- Explore digital printing companies (online) and the fabrics they offer. Every fabric has a printable width and you should note that, as it may influence your choice of garment width. I have used Spoonflower (https://www.spoonflower.com/) and a few other companies in past. Of course I have used Label Graine in Valsonne, France as well. (https://label-graine.fr/en/)
Photoshop Work
This type of project usually requires working with Adobe Photoshop or Adobe Illustrator. When I work with photographic images, I usually use Photoshop. Thus, the instructions below pertain to Photoshop or Photoshop Elements.
- Open Photoshop or Photoshop Elements or other paint-type programs that can handle large files.
- Open the PDF file of your save pattern. (you will need to open each pattern piece as a single file and cut and paste them into one document when you go to send the design to a company who does digital printing.
- Use layers as necessary.
- Use the Selection tools and Paste Into functions to lay your imagery into the pattern. Move the imagery around to determine the best layout.
- Choose the fabric you want use for your project on the website of your chosen digital print design company. Note the printable width.
- Create a layout of all your pattern pieces in one file that is set to be the printable width according to the fabric you have chosen.
- Save your file in Photoshop with Layers intact so that you can come back and change things.
Now, you can see below, the pattern and image layout I created using Adobe Photoshop.
Uploading your Design
After you have prepped the Photoshop file in a manner that is required by the printer you have chosen to use you will upload your design. Follow the steps below.
- Review the format that the digital printing company requires for files. There is usually a maximum file size as well as a list of file types.
- Save the file in a manner that can be received by the digital printing company. This may involve Saving for Web or similar, in order to reduce the file size.
- Upload your design to the website of your chosen digital printing company using the fabric you had chosen.
- Choose the fabric on their site and match it with your design.
- Pay and submit.
And now… you can wait patiently for the fabric to arrive at your home!
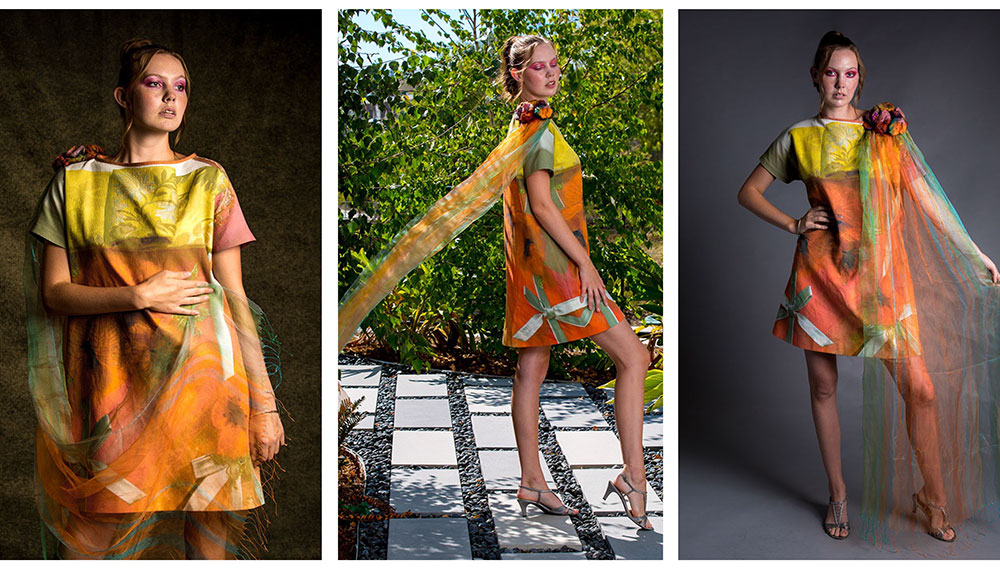
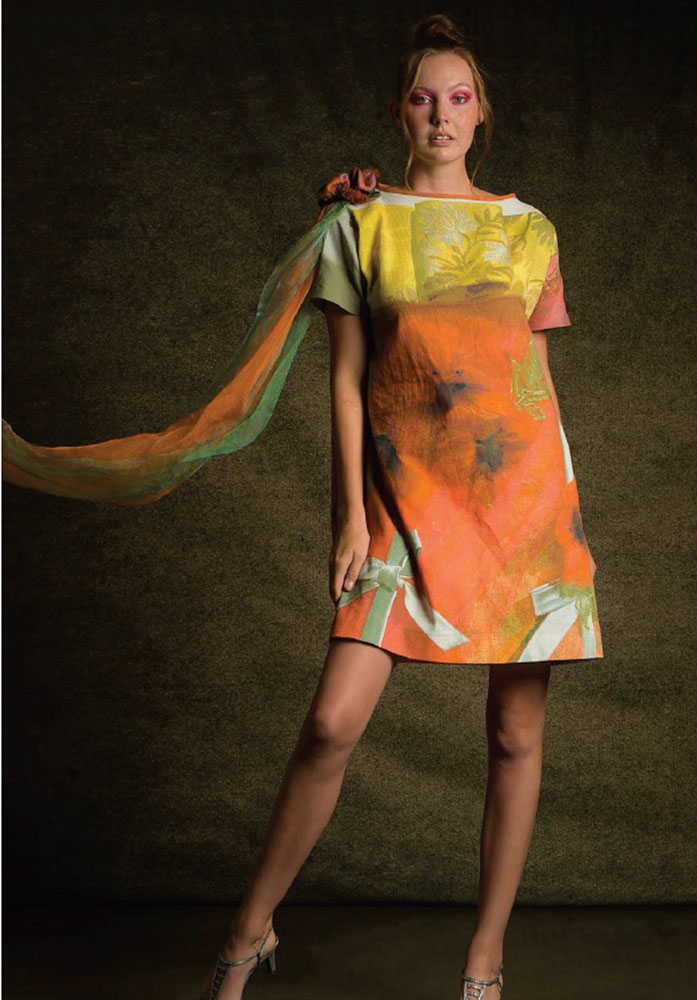
When the fabric arrives, it is a joy to cut out the pieces as they are there in front of you. Here are photos of my finished dress!
Susan.. Cochenille Design Studio