The Theory of Base Patterns
In the world of music, many composers developed a song based on a musical phrase or motif, and then they varied it as the song progressed. Examples include pieces by Mozart and Bach’s Goldenberg Variations, etc.
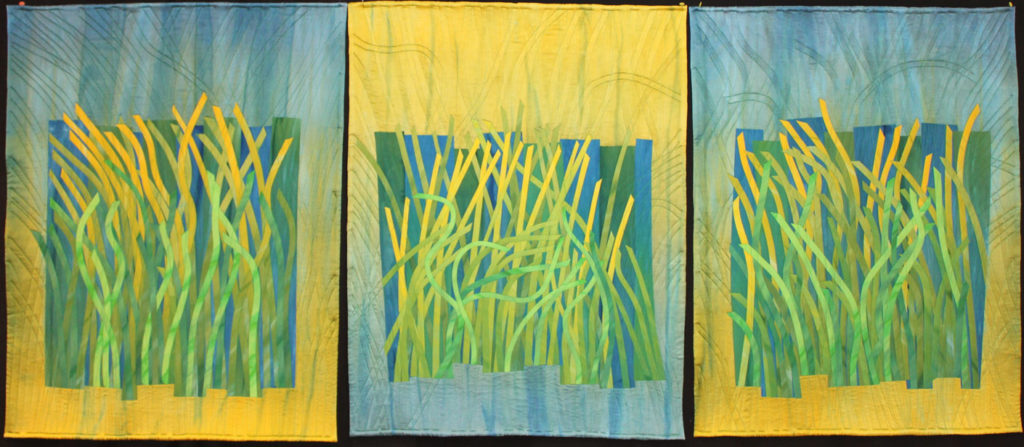
Similarly, in the field of art, many artists choose to work in a series, creating multiple pieces. There is a relationship between each and yet, they are different. Various art quilt designers choose to work in a series over a period of time. Here you can read more about quilt artist Frieda Anderson in her blog where she discusses working in a series.
Moving into clothing design, we can take this Variations concept into the garment development world. The process starts with a favorite garment; one that you wear often and choose over others.
For sewists and knitters (or crocheters), this should become your base garment, and it is from this you can create more versions… Variations on a Theme.
Advantages to this Approach of Pattern Design
There are many advantages to using this Variations on a Theme concept for clothing. These include:
- Confirmed Fit– With the fit established, you feel confident that any new garments you create will have the same basic fit.
- Speed of Creating New Garments -After developing the first garment, all others can flow quickly, without much thought or need to go through the usual preliminary processes
- Pushes Creativity – Since there is less thinking over the fit and body style, you can push the creative elements of a garment; explore new necklines, try a different sleeve, etc.
What are the Elements of Base Style
Here is a list of what I consider important elements or components to a Base Style:
The Process of Design
- It Suits Your Figure – Choose a style that suits your figure. Stop and think which garment in your closet is a basic go-to. Chances are, you intuitively wear this style because if looks good on your figure. Performing a quick figure analysis, and identifying what you camouflage vs. emphasize will also help you find that perfect base garment
- It Suits Your Wardrobe – A base style is one that is versatile in your wardrobe. It has many ‘friends’ amongst your other garments. Ideally, it can be dressed up and dressed down, dependent upon the occasion.
- It is Moderate in Design Details – A good base design sits in the ‘middle’. It is not too tight nor too loose. It is average in length, has average sleeves and a minimum of details.
- It is Flexible for Redesign – If you follow the above you will be creating a pattern that is flexible to re-design.
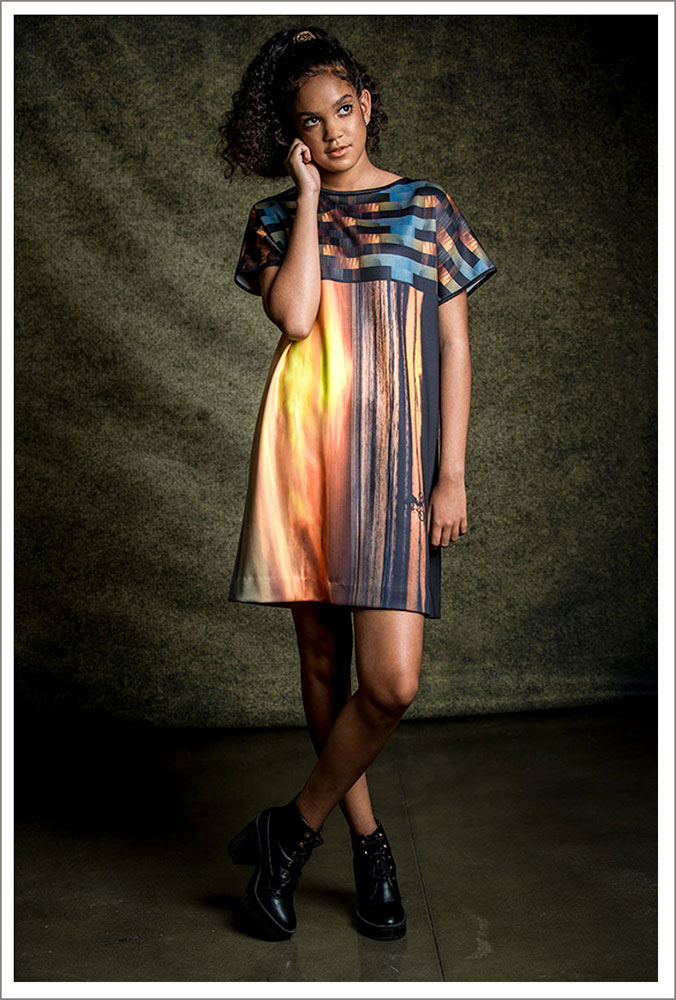
Below, you can see an example of one of my favorite garment silhouettes, a cap-sleeve dress. The A-line silhouette suits my figure and the cap sleeve is a go-to for me as I like cover over the arms. Although it is a dress, it is easily shortened into a top. This pattern is very flexible for redesign.
In the development of a base, consider the steps below:
- Identify the Style – Determine which garment you are going to develop, based on many of the factors already discussed.
I will use the A-line dress you see above. - Analyze it for its Design Elements (neckline, body style, sleeve style, etc. )– Now, look at the garment and break it down.
The garment has an A-line silhouette with cap sleeves and a wide, gentle boat neck. - Take a piece of paper and write a description of it. The process of doing that will make you actually ‘look’ at it and identify its style elements.
- Note the Fabric Used – The fabric used in your chosen garment is an important element of why the style works. You should take note of its weight, hand (fluidity vs stiff) and so on.
The fabric in this garment is a lightweight, double-knit polyester. Since I was sublimating the imagery onto the fabric, I needed to use a polyester fabric. - Note how much Ease exists – Pay attention to how much ease is in the garment at the bust (if a top) or at the hips (if a bottom). This is directly tied to the fabric.
There is about a 2-inch pinch of ease on each size to give a total of 8 inches of ease at the bust. There is a 3-inch pinch of ease at the hip giving a total of 12 inches of ease. - Draw a Flat Drawing of the garment. – This step also makes you take note of design, proportions, details, etc.
We will just skip to the pattern as you are looking at a sewn result of my pattern - Add Dimensions to your Drawing – Use your favorite garment as a guide.
You should now be ready to develop the pattern.
Pattern Development
If you are using Garment Designer, you are now ready to sit down in front of the computer. If you are using commercial sewing patterns, you need to locate a pattern that you can use as your starting point. Sometimes it means that you will be combining two patterns.
Remember, that in developing a base, you are ideally setting up the average garment (average fit, average length, average neck style and width, armhole depth, etc.)
Determine the typical fabric that you will be using, as this is related to the ‘fit’ of your garment.
In Garment Designer- we will use a Top as our example.
- Create a folder on your hard drive where you plan to save your base pattern and all its variations.
- Open a Document and Set it Up – according to your preferences (pattern pieces, dimensions, etc.)
- Save this File – do this immediately so you don’t forget. Save it with a name that includes ‘base’ in its title and continue to save the file as you work. Save often as you develop the pattern.
- Choose your Size.
- Choose the Category and Top Group
- Find the Top Style – that gets you close to the level of fit you want
- Set the Length – this allows you to see the pattern in a proper proportion
- Now, working in a clockwise manner, set the neckline, shoulder, armhole, and any other style element.
- Confirm your pattern measurements.
- Add all finishing parts such as hems, facings, seam allowances.
- Save.
- Print the final pattern.
Since I was sending the garment/imagery to be printed via sublimation, I save the full-scale pattern as a PDF file which I took into Photoshop to lay the imagery into place. I discuss the general process of how to do this on a past blog entry on Blogspot. I changed the pattern somewhat from the blog.
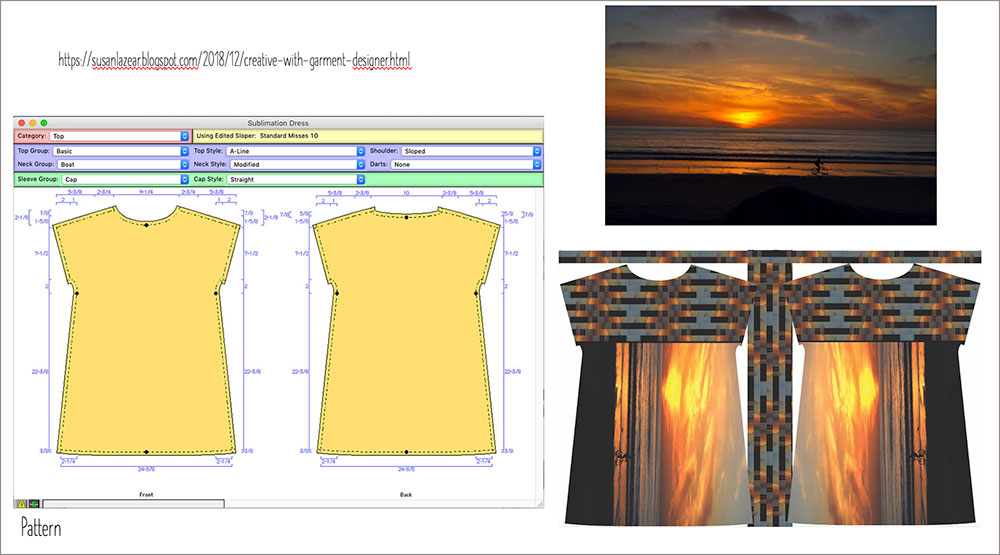
The imagery is a San Diego sunset.
Test the Pattern by Creating a Garment
Test the pattern either by sewing the garment or by knitting/crocheting it. Confirm the fit. Make any changes you deem necessary and update the pattern.
Variations on a Theme: Now to Change It Up…
There are various ways to change up your pattern which I will cover visually in the next blog entry. But here is an initial list to get your creative juices flowing.
- Adjust the Length to create a cropped version, a dress, etc.
- Change the hem. Consider a high-low, angled, or other style hem.
- Change the neckline. This is one of the easiest ways to get a different look. Just make sure the style is suitable to your facial shape and figure.
- Change the Fabric. If you change the fabric type, you may need to adjust the ease in the garment. A general guideline is ‘the thicker/stiffer the fabric, the less ease you need, and vice versa.
- Combine fabrics
- Change sleeve. You can work with..
- Sleeveless vs. SleeveLength
- Style (bell, tapered, gathered)
You now have a general plan for how to approach Variations on a Theme. In the next blog entry, I will share multiple images of garments/patterns I have made, all based on one general theme.
~~ Susan Lazear, Cochenille Design Studio