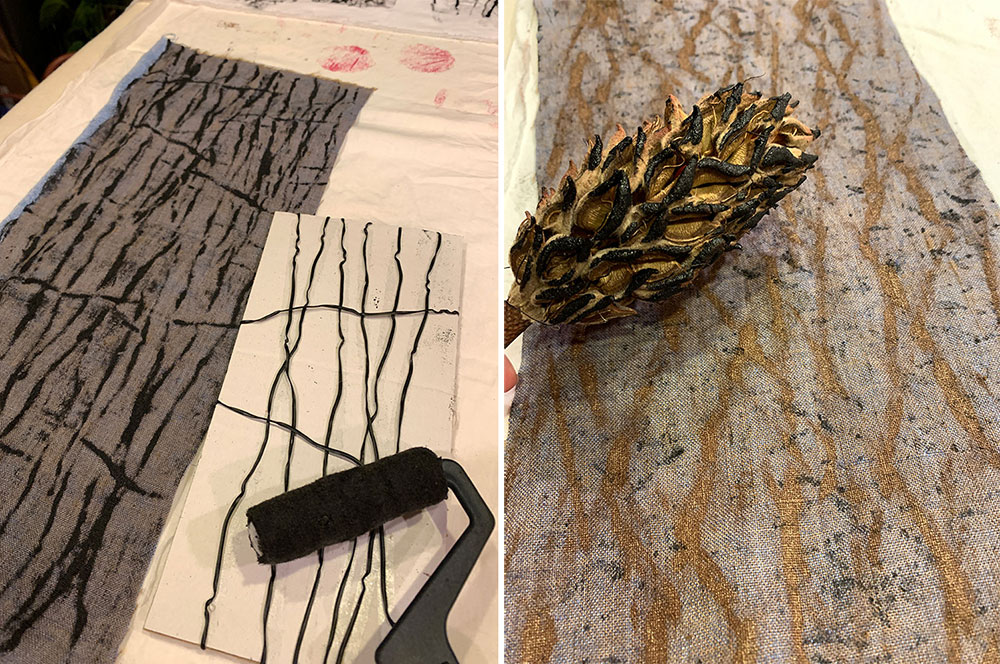
One of my favorite textile arts is surface design. I adore anything to do with fabric, but creating my own fabric has to top my list of having fun. This past weekend I was prepping to teach a class at Stitches At Home Expo (Nov. 6-8) on Printing with Found Objects. You have no idea what your pantry, fridge, and junk drawer hold for you as far as inspiration and tools for print design.
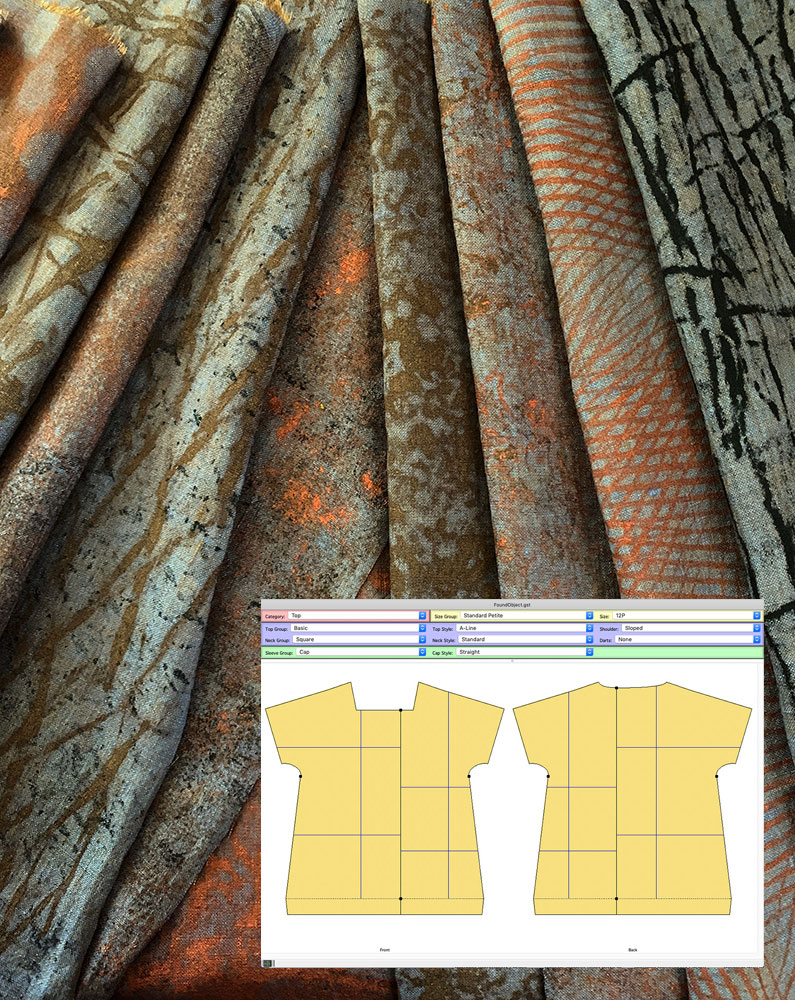
Linen fabric printed with a variety of ‘found objects’
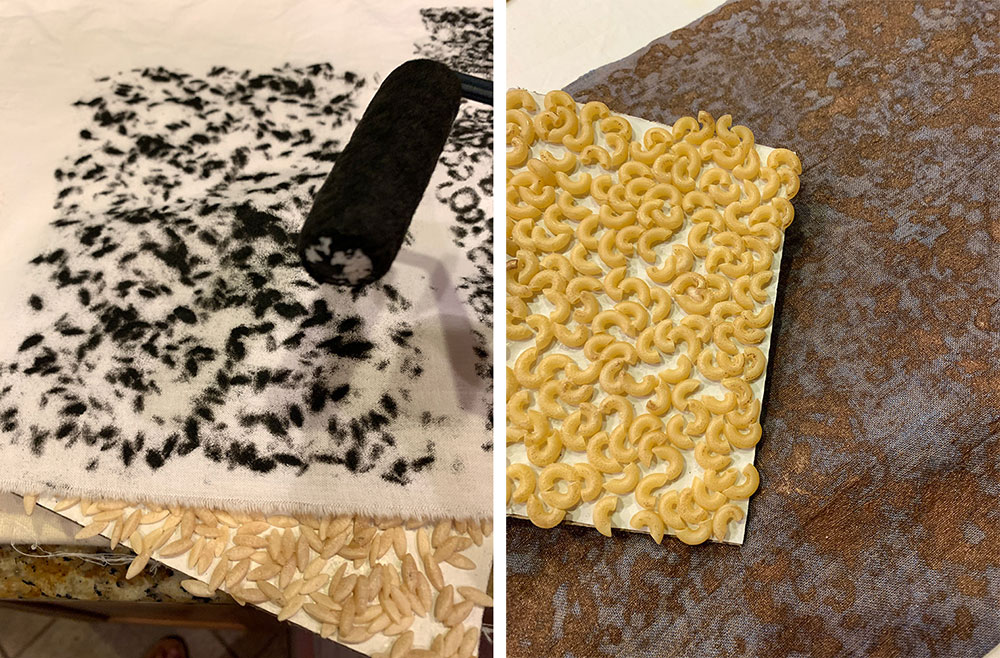
The investment to get started is minimal (under $10.00). You need textile paint or acrylic paint (textile paint is better because it isn’t as stiff), a foam roller paint trimmer, a foam brush, some kind of flat surface (an old cookie sheet or piece of glass), a padded surface of some sort (it could be felt, polar fleece, or a towel), and of course, fabric to print.
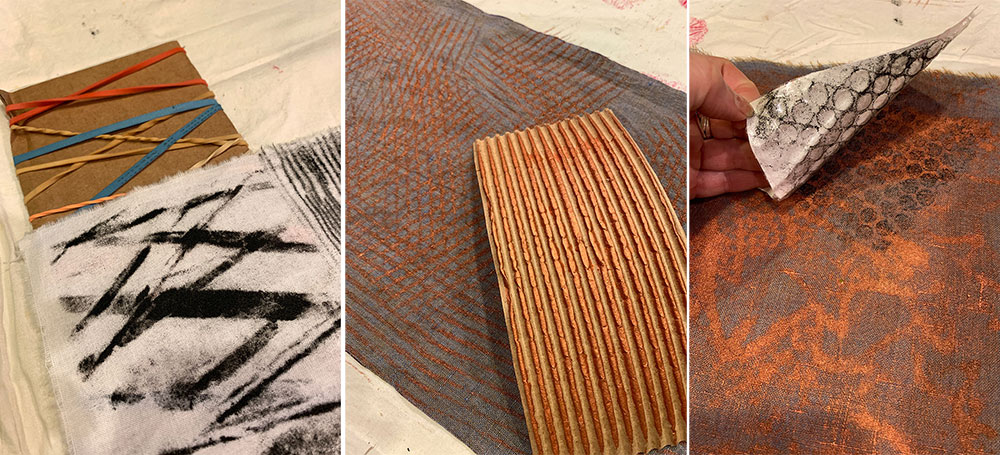
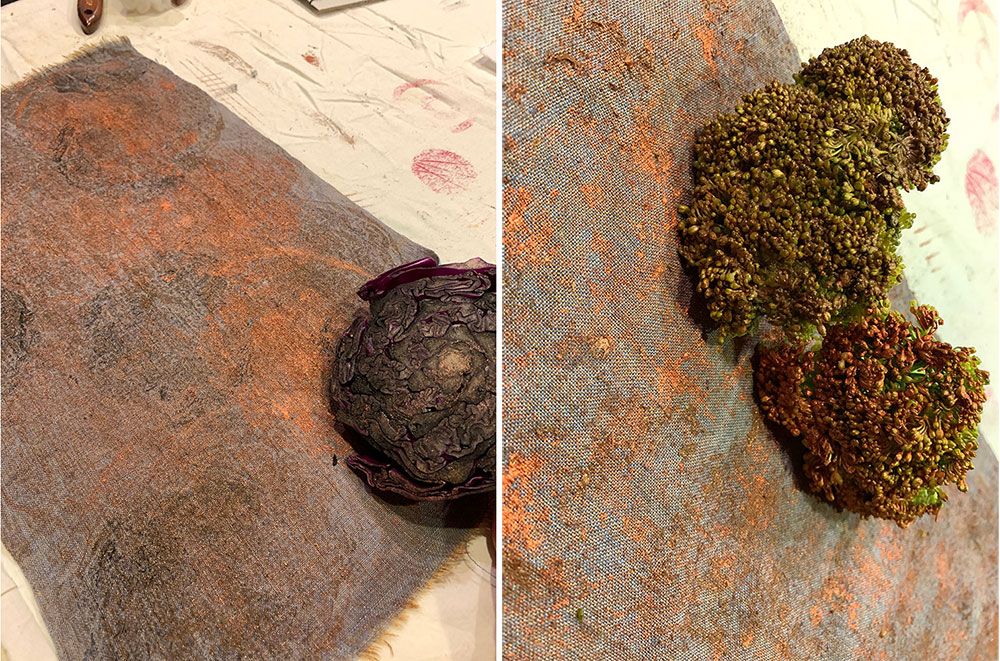
I chose two fabrics: a plain cotton to do my testing, and a light-colored linen fabric for the final print.
Below are some of the substances I used in my print process.
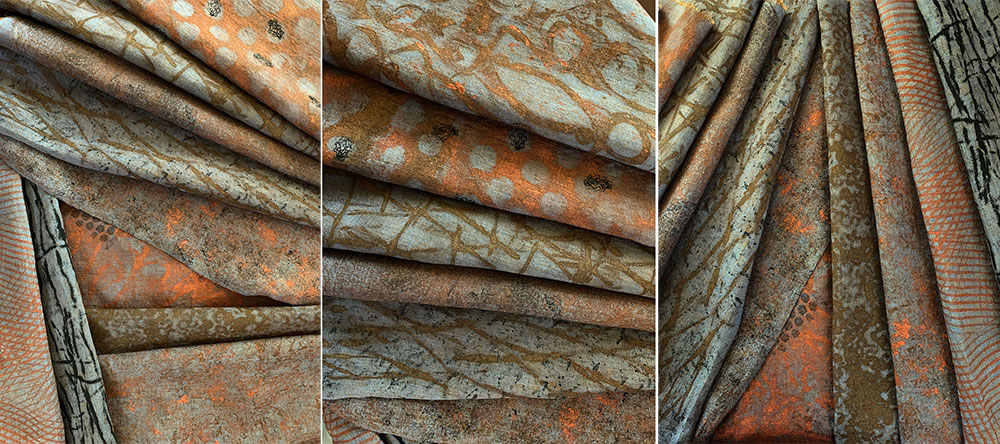
So… you may ask, what shall one do with them? Well, since my various fabrics are all relatively small, I decided to do a pieced garment. Here is the pattern that I created in Garment Designer Software (www.cochenille.com). I was able to use the Facing function to create division lines so I could plan out a pleasing division of space.
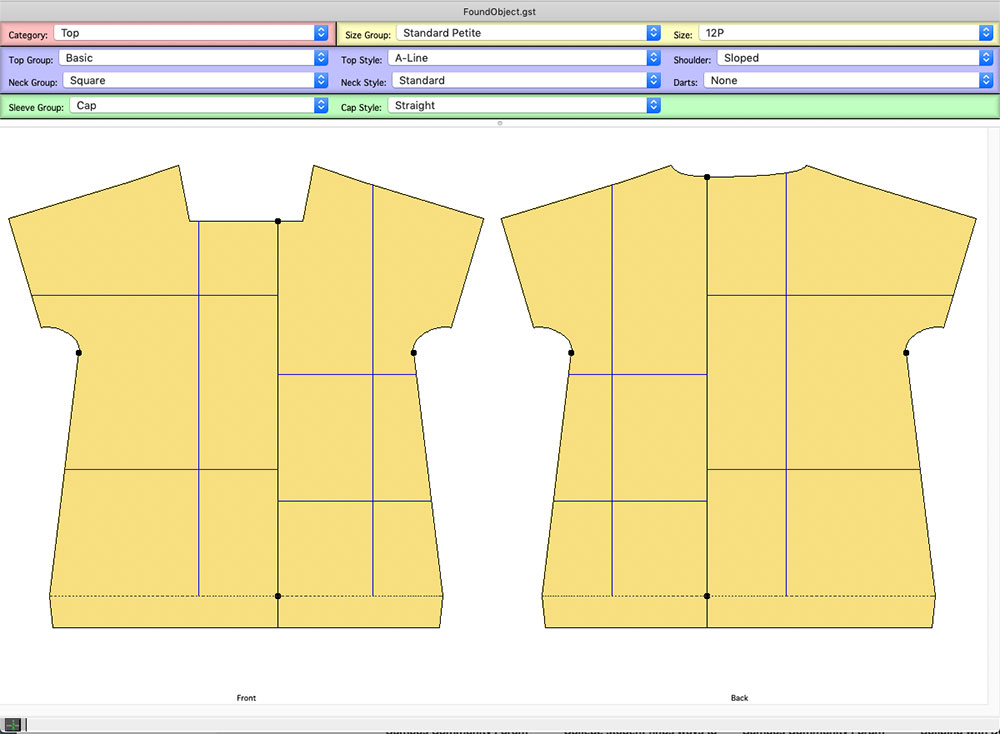
I’ll print the pattern in full scale with the grid on, and use it as a guide. I’ll either separate all the pieces and add seam allowances as I cut my final fabrics, or I’ll piece section together and then piece the sections. Either way will work.
I still have to heat set all the fabrics, but then the final step can begin: the putting together of fabrics at my sewing machine.