Currently at Cochenille, we have challenged our users to create a mixed media garment which involves some combination of fabric/yarn/embellishment, etc. So, I am going to share the design process for a garment that suits this type of challenge. Hopefully this will inspire people to jump in and create their own mixed media design.
I recently taught a class for Stitches at Home entitled East Meets West; Simple Shapes, Great Design. As is often the case, I decided to do the project homework just as my students would.
Inspiration
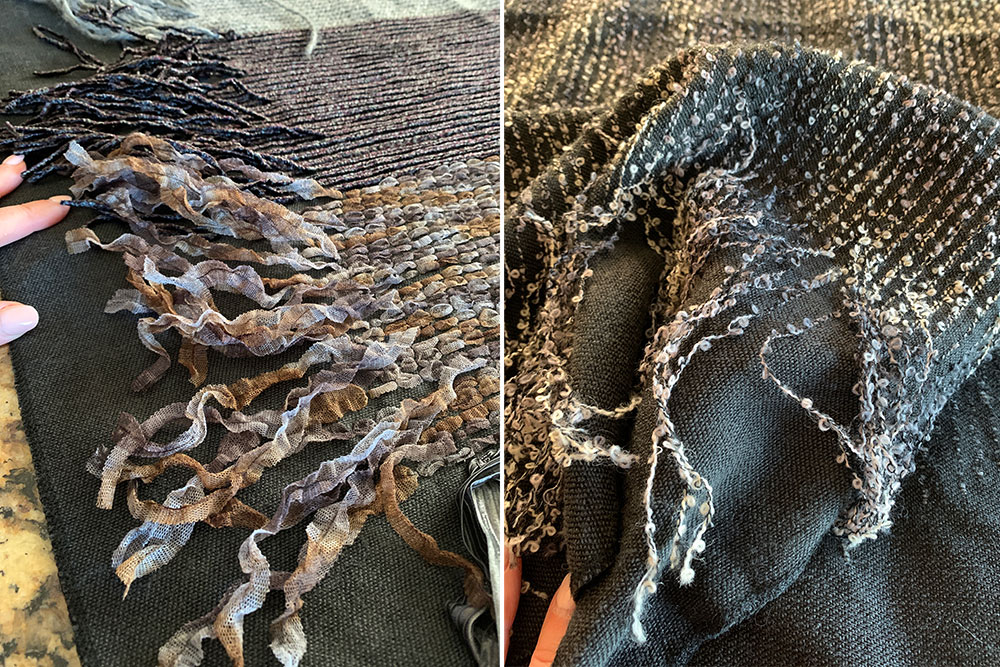
I often start a project with an inspiration. For this project, I chose a piece of hand-woven fabric that I had purchased in Paris several years ago. It was a remnant cut that measured 44” wide by 24” long. What I loved about the fabric was the varying yarn fringe. There was a base cloth and then several novelty yarns were inlaid into the base. The overall look of the cloth reminded me of old stone structures, cobble-stone streets, and other natural (and old) substances.
Concept
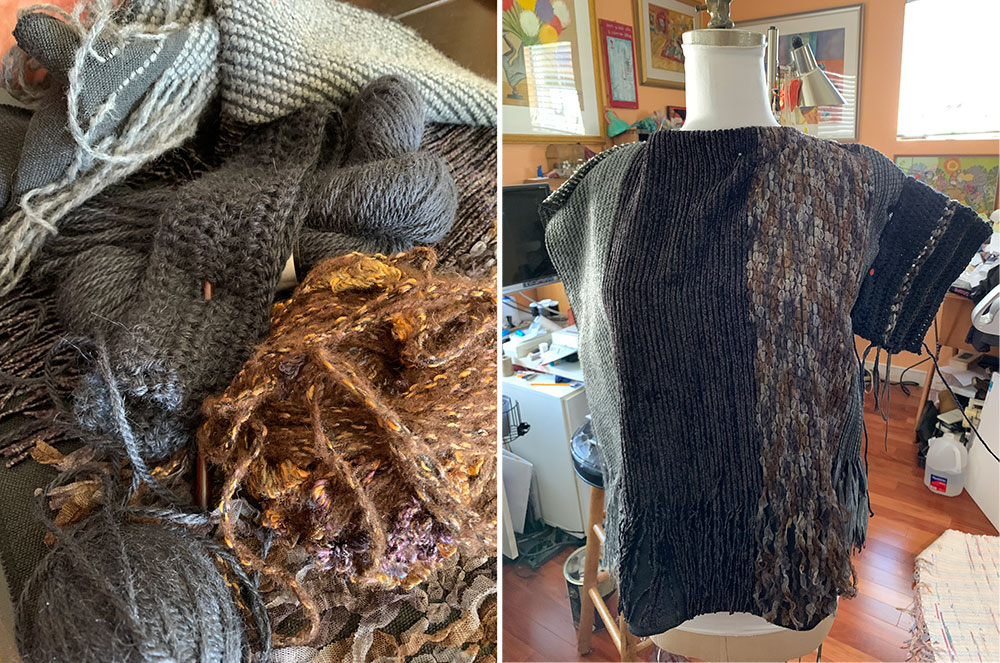
My concept was to build a garment that centered on the fabric but added yarns and crochet to complete the look. The fabric would serve to build the body of the garment, and I decided to add the yarn to create sleeves and possibly a collar. I also decided to continue the fringe feature. So, off to my stash to locate yarns that could work with the fabric. This is always my favorite part of design; finding the ingredients. I chose a grey Alpaca/Silk yarn as my primary yarn, and then a few other yarns that would carry through the texture or color of the hand-woven fabric.
Theme and Mood Board
In design, often the process begins with the creation of a Mood Board. This is a collage or composite of images that allows one to focus their thoughts on a chosen theme. You can do it by hand, or using an online tool called Canva (www.canva.com). Although I love Canva, this time I decided to go the hand-building route with collaging.
In Mood Board building, one often comes up with a name that expresses their theme. I decided upon Threads of Time. The hunt for a few images that communicates your theme began, and as always, I had way too many, and thus the curating begins. Below you can see the Mood Board I created. I have a few images, a fashion pose with the model wearing a garment similar to what I’m after, and samples of the yarns I plan to include. Initially I left a ‘spot’ for the yarn and fabric, as I had yet to cut up the handwoven.


Garment Plannning: The Sketch
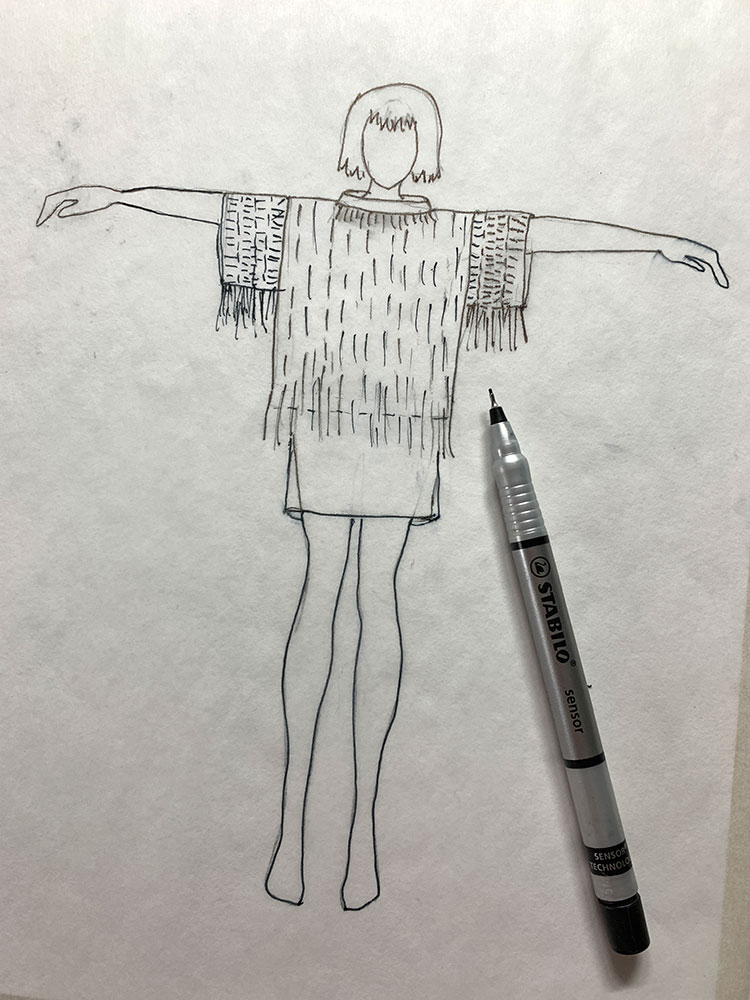
Once the Mood Board was settled, I sketched out my concept garment using what is called a croquis. This is an 8-headed model that you use to keep your garments in proportion. Below you can see the sketch of the garment as I planned it. I laid a piece of tracing paper over the croquis and drew in the lines of the garment. I began with the fabric body, and then added sleeves as I envisioned them, using yarn and crochet. Initially I didn’t have the fringe drawn…. That came a bit later… as you might guess, design evolves.
Crochet
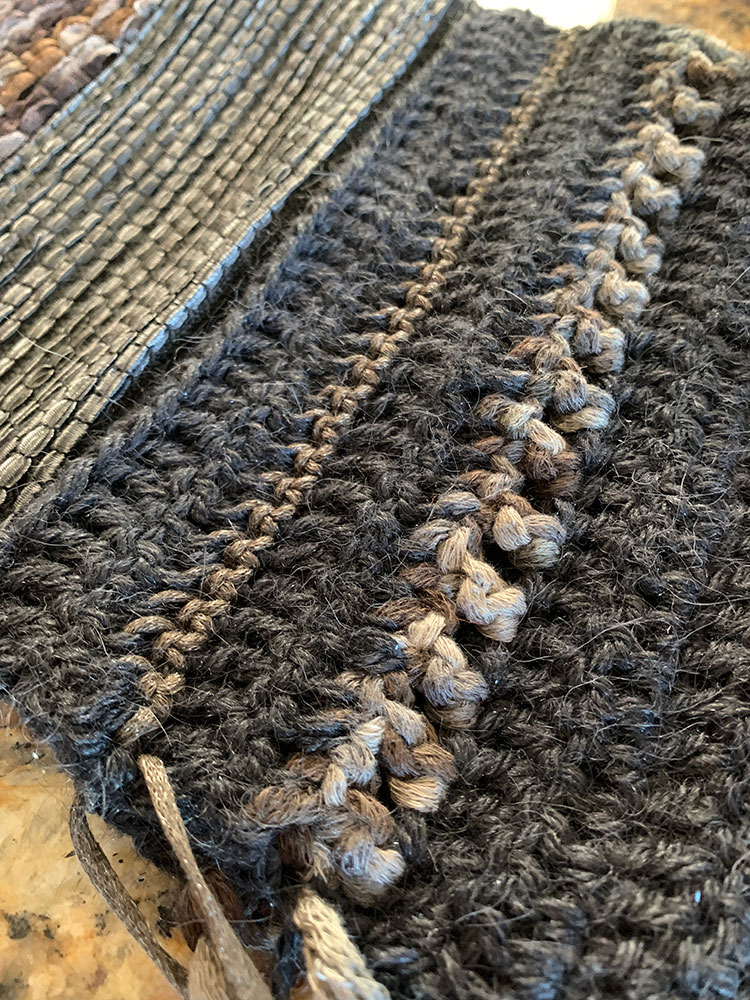
I crocheted a small bit of the sleeve, to get a sense of how it would look. I had decided to make the sleeve about 8” deep. The primary yarn is an Alpaca/Silk mix (it is scrumptious). My main stitch was a double crochet. I added a couple of rows of contrast yarns.
To confirm my decisions, I took my fabric and crochet band to the dress form and pinned things in place. Then, I continued to crochet the second sleeve and a neckband.
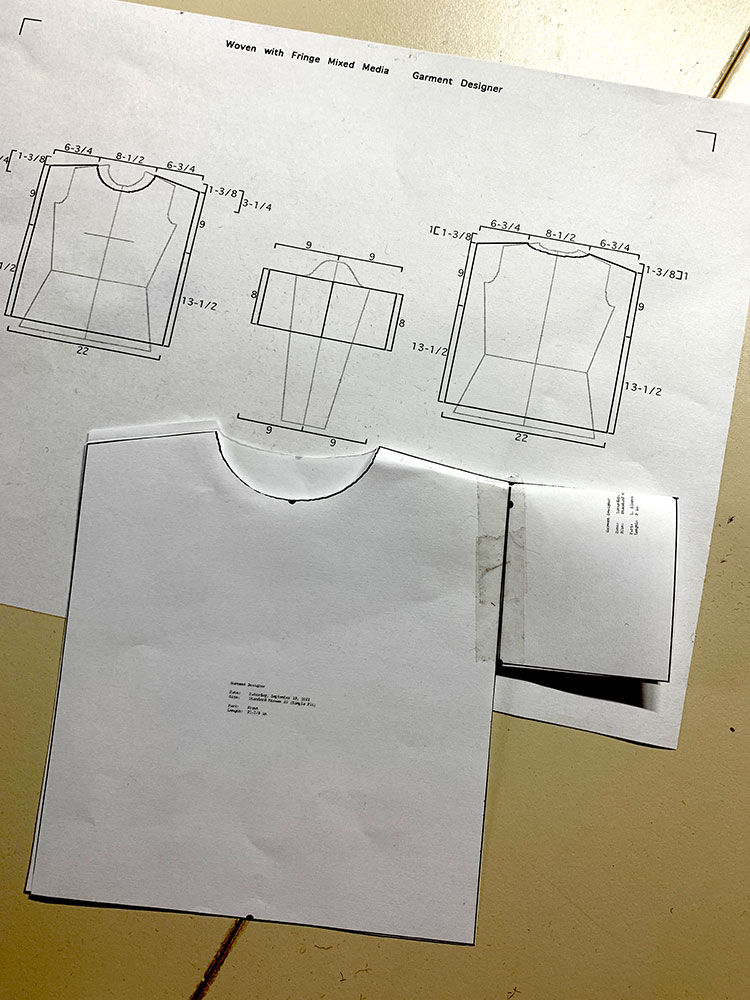
On to Garment Designer
Since the silhouette of my planned garment was to be more or less rectangular, all I really needed Garment Designer (www.cochenille.com/ ) for was a confirmation of proportions and a neckline. Below you can see the pattern I created, and my little quarter-scale mock-up which helped me determine how long I wanted the sleeve. I decided it was too long, and so, planned to shorten it when I completed the crochet.
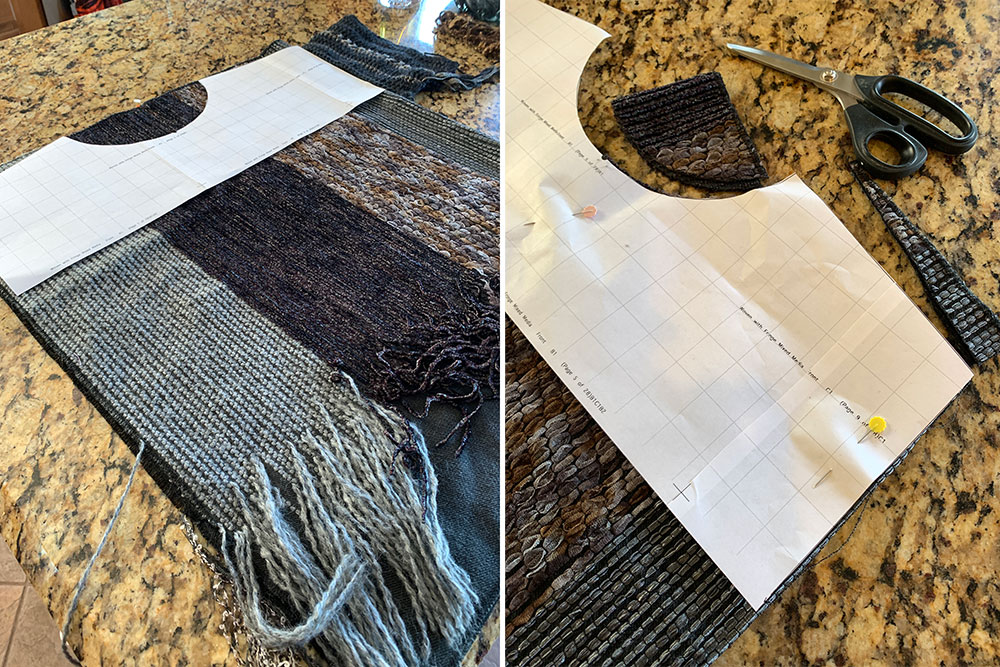
Cutting/Sewing/Serging
It didn’t take much to cut divide the fabric in two (for the front vs. back) and the cut out the necklines . By the amount of waste you see below, this project becomes a minimal/zero waste garment. I used the excess pieces on my Mood Board.
I serged the raw edges of the fabric, and then sewed the shoulder seam and pressed it open. I left the side seams open, in anticipation of the crochet bands.
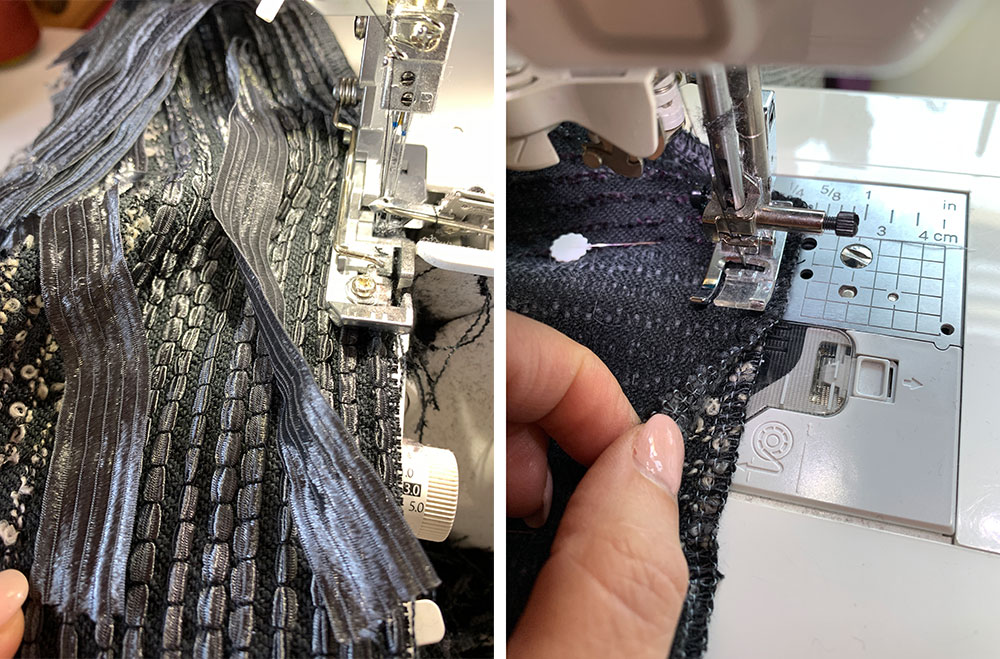
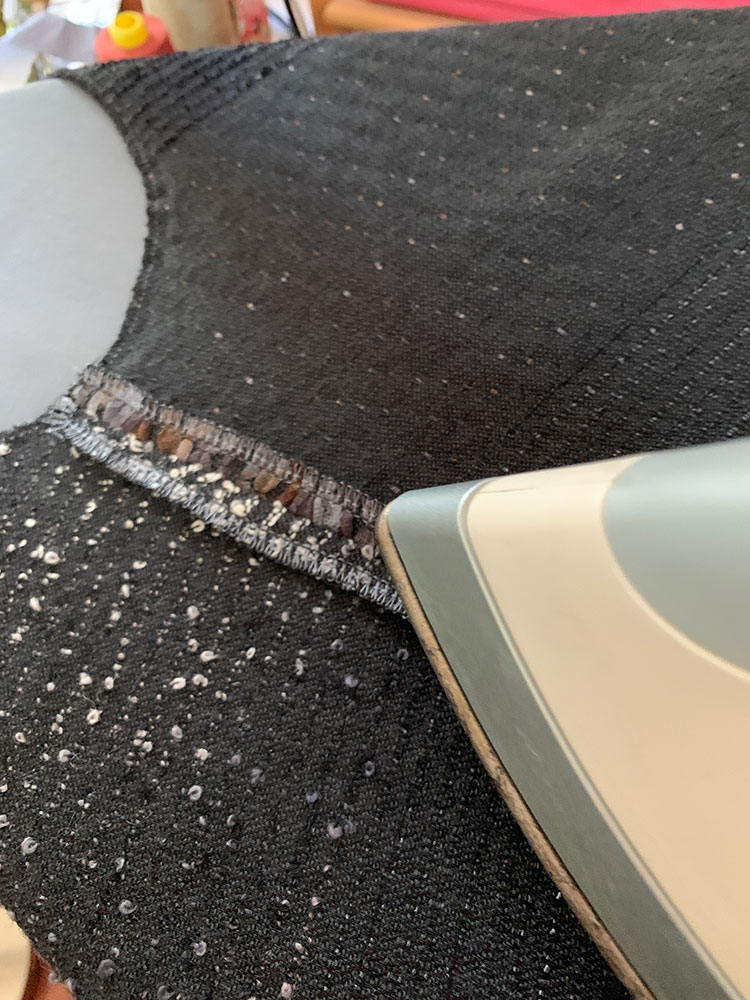
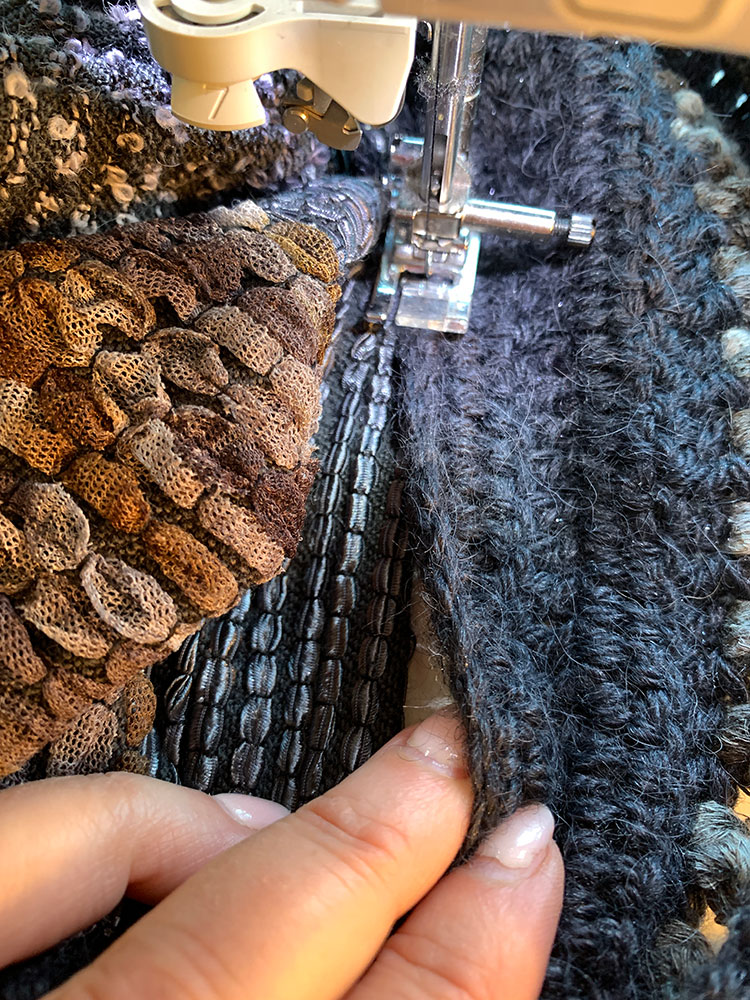
Joining the Bands to the Body
I am not a purist at times. I simply sewed the crocheted bands onto the fabric using a regular straight stitch on my sewing machine.
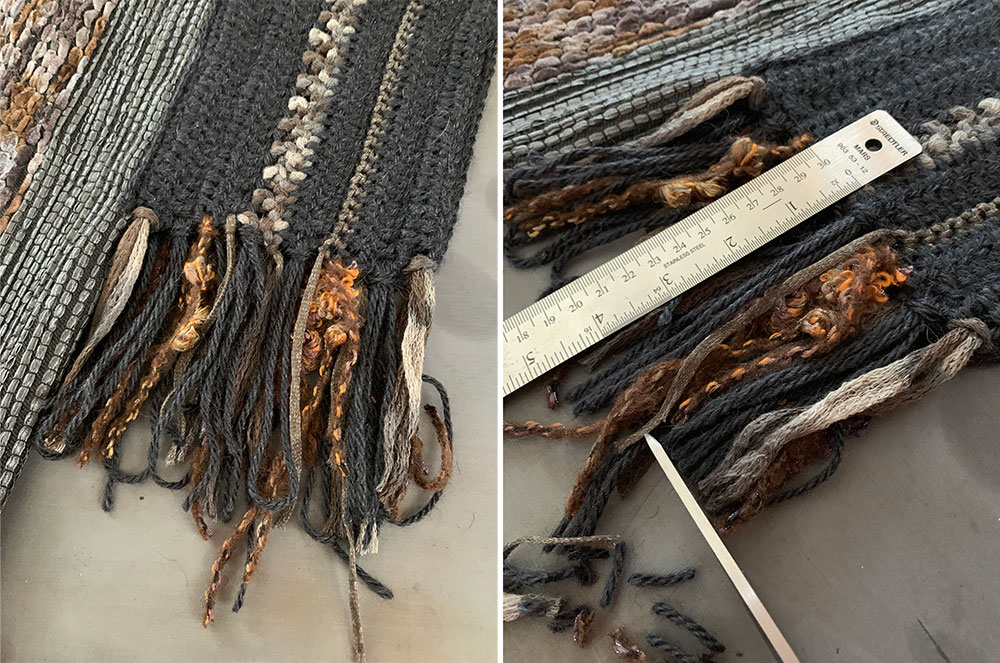
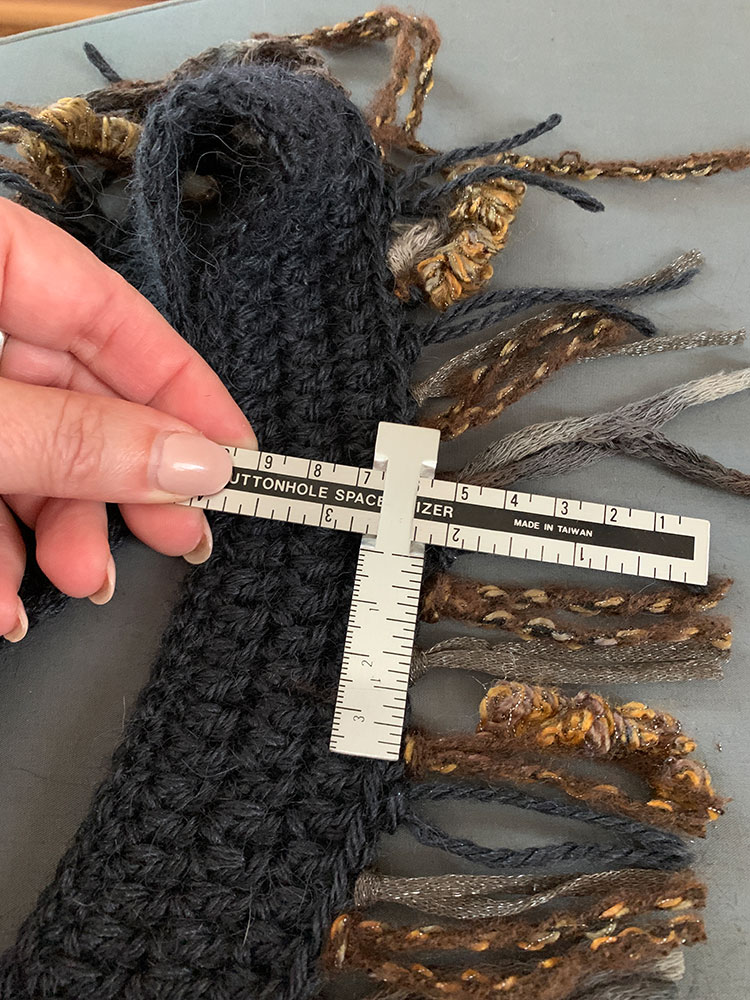
Building the Fringe
Using the same yarns as the crocheted bands (for sleeve and collar), I create a fringe and hand-knotted them onto the collar band and the lower sleeve. The last step was a haircut for the fringe, ensuring that all yarns were the same length.
Completion!
That’s it! My mixed media garment is complete! I love how design evolves. I also really love mixing media and pulling together all the craft skills that were taught to me by my mother and grandmother so many years ago.
